

Introduction
Web performance describes how fast or slow a web app is. It is crucial to application development. A highly optimized web app is quick, appeals to users' experience, and leads to improved product conversion rates and high search engine ranking.
In this article, you will understand how the Core Web Vitals (CWV) metrics are affected by the resources used in your web app; you will implement best practices for improving the performance of your Next.js application and understand how to measure the performance of your optimized web app.
Overview of User Experience
Users determine a product's success rate; their experience navigating or interacting with its web app can indirectly affect revenue. Building web pages that load faster when users request them is essential. This would improve the user's frontend experience.
Excluding the speed and user interactivity of a web app, it is also important that the contents displayed on the user interface of a web page maintain visual stability and do not always change their position, shifting from one space to the other.
Factors Affecting Web Performance
Certain resources can negatively impact web app performance if not used effectively. Let's examine each one.
Multimedia File Size
Image and video files take up much space in a web browser. When these files are of high quality, they become too large, resulting in slower load time and a shift in the position of other contents on the web page. The browser causes the shift after the files have been rendered because the browser cannot calculate the appropriate width and height of these files. This shift is known as Cumulative Layout Shift (CLS), a CWV metric that determines if the surrounding contents of an image (or other elements) move to another position after the image (or element) has loaded. In some instances, multimedia files represent the main contents of a web page. When these files load slowly, they affect the web page's Largest Contentful Paint (LCP). LCP determines how fast visually important web content is rendered.
Network Requests
Remote resources such as libraries, scripts, packages, and APIs requested from network servers are considered resource-blocking. This affects a web app's INP score. Interaction to Next Paint (INP) is also a CWV metric. It signifies the time it takes for web content to be rendered entirely after user interaction during request time.
Memory Usage
Large-scale applications require larger resources, which affects a web app's performance. To achieve optimized memory usage during build time, enable lazy loading, minimize the size of resources used, eliminate redundant code, enable caching, and analyze memory issues with tools such as Chrome DevTools.
URL Redirect
URL redirect means visiting a web page from another web page. These web pages have URL patterns that differ from one another. When these patterns do not match, an error occurs in the browser, leading users to view an unexpected web page. A URL redirect is useful when a web page has updated features or after form submission. When URL redirect is not implemented effectively, it can lead to slow load time and low search engine ranking of the web page.
Let us implement the best practices and how to optimize performance based on the abovementioned factors.
1. Display Images with the built-in Next.js Image component
Next.js has a built-in Image component with props, making controlling how we want to render an image easier. Here is an explanation on the purpose of each prop:
Required Props:
-
src(required): The source of an image. The image can be stored locally in the repository or remotely on a network server. -
alt(required): Thealtproperty provides textual information as an alternative to an image. It can be read aloud by screen-reader assistive technology, contributing to an accessible web app. Thealtcan be set to an empty value if the image does not add significant information to the user interface. -
width(required for remote images): This determines how broad an image appears. -
height(required for remote images): This determines the length of an image.
Non-required props:
Here are some non-required properties of the Next.js Image component.
-
priority: When anImagehas apriorityprop, the browser will pre-load the image before it is displayed, loading it faster. This improves the LCP score of a web app. -
fill: Thefillproperty indicates that the parent element determines an image's width and height. -
sizes: This specifies the width and height of an image at different breakpoints of a user's device. -
loader: A function that returns a URL string for an image. It acceptssrc,width, andqualityas parameters. -
placeholder: Aplaceholderfills the blank space of an image before it is rendered completely. -
loading: Accepts a value of{lazy}to specify lazy-loading. -
style: Enhances an image's visual appeal. Does not include other acceptedImageprops as its property. -
onLoad,onError: Event handlers.
Here, let us control how we want to render different Next.js images.
Rendering Local Images in Next.js
// flowerPage.jsx

import Image from 'next/image'
import roseFlower from '../public/roseImage.png'

export default function FlowerImage() {
  return(
    <main>
      <div style={{width:"600px", height:"600px"}}>
        <Image
          src={roseFlower}
          alt=""
          style={{objectFit: "contain"}}
          fill
          priority
        />
      </div>
    </main>
  )
}
View:
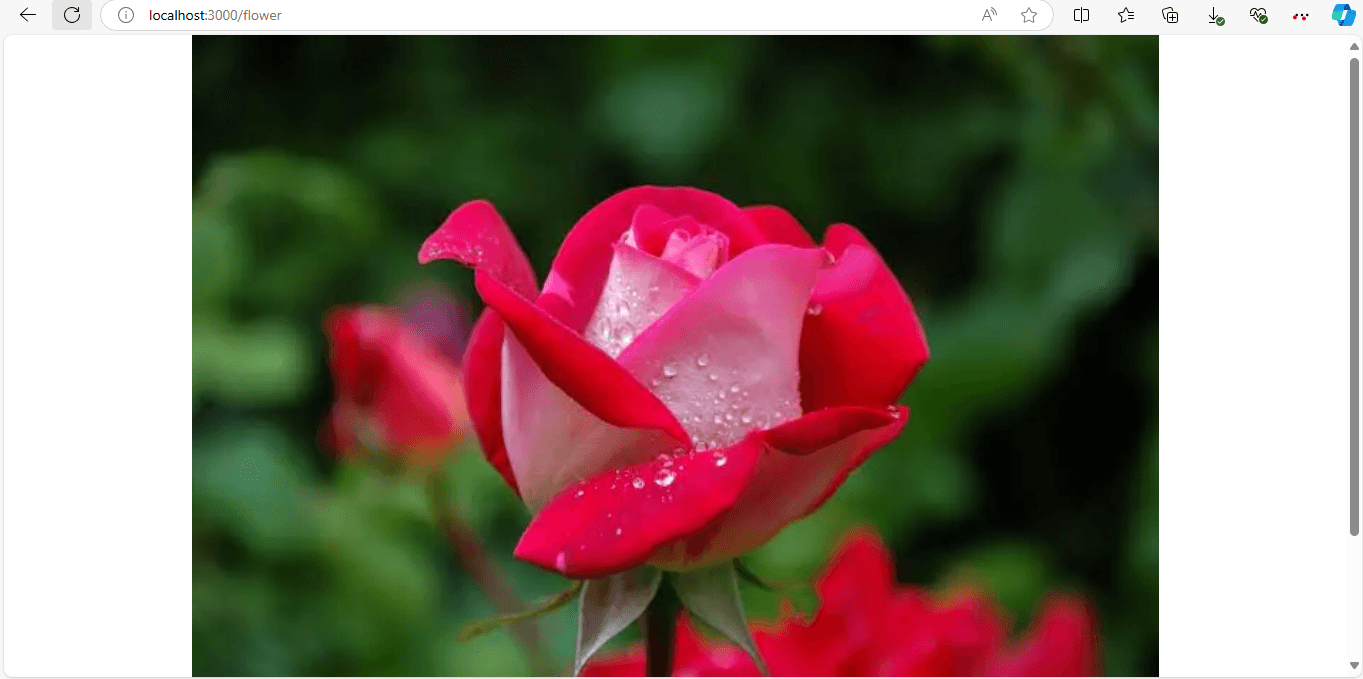
In the flowerPage.jsx file above, we did not specify the height and width inside the Image component since roseFlower is a local image. Next.js automatically calculates the width and height of a locally stored image. The roseFlower is prioritized during load time with the priority prop.
However, the width and height of the roseflower are determined by its parent element using the fill prop.
Rendering Remote Images
Specifying the width and height of an image rendered from an external source is required. This gives us more control over the image's space before it is rendered.
// monalisaPage.jsx

import Image from 'next/image'

export default function MonalisaImage() {
  return(
    <Image
      src="https://s3.amazonaws.com/my-bucket/monalisa.webp"
      alt=""
      height={600}
      width={600}
    />
  )
}
Images rendered from external sources can affect the security of a web app. To ensure that a web app renders images from specified URLs only, we have to include remotePatterns in our next.config.js file. remotePatterns accepts an object of protocol, hostname, port, and pathname
Let us configure our next.config.js file to render images from https://s3.amazonaws.com/my-bucket/** URL paths only, with different possible number of path segments or subdomains at the end:
// next.config.js

module.exports = {
  images: {
    remotePatterns: [
      {
        protocol: 'https',
        hostname: 's3.amazonaws.com',
        port: '',
        pathname: '/my-bucket/**'
      },
    ],
  },
}
To specify path segments or subdomains at the beginning of the URL, place ** at the start of the URL paths. For example, hostname: '**.amazonaws.com' means that s3 can be replaced with another subdomain or path segment.
Use * instead of ** for a single path segment or subdomain.
Rendering Images using Next.js loader Function
The loader function accepts src, width and quality as parameters while generating dynamic URLs for an image. It works in client components only. You can use loader for local images or remote images. Here is an example of how to use loader:
// artsCollectionPage.jsx

'use client'

import Image from 'next/image'

const artsImageLoader = ({src, width, quality}) => {
  return `https://example.com/${src}?w=${width}q=${quality}`
}

export default function ArtsCollectionImage() {
  return(
    <Image
      loader={artsImageLoader}
      src='../public/roseImage.png'
      alt=""
      width={600}
      height={600}
      quality={80}
    />
  )
}
Adding placeholder to Images
Placeholder solves slow network connectivity issues for image rendering.
Here in the artsGalleryPage.jsx file, the image loads with a blurry effect before it is fully rendered:
// artsGalleryPage.jsx

import Image from 'next/image'
import picasso from '../public/picasso.jpg'

export default function ArtsGallery() {
  return(
    <Image
      src={picasso}
      alt=""
      placeholder='blur'
      loading='lazy'
    />
)
}
In the code above,loading='lazy' enables delayed image rendering. Next.js Lazy loading images is useful for images, not the LCP for a web page. The image placeholder can equally be set to 'empty' or 'data:image/..'.
- Using a Separate Image as
placeholder
When the placeholder is set to data:image/..., the src image loads after the placeholder image, an image data type with a URI converted to base64. This is useful when the placeholder image has dominant colors that blend with the src image. It keeps users on the web page without waiting while the src image loads.
placeholder='data:image/<jpeg|png|...>;base64,<data-uri>'For example:
// artsGalleryPage.jsx

import Image from 'next/image'
import picasso from '../public/picassoImage.jpeg'

export default function ArtsGallery() {
  return(
    <Image
      src={picasso}
      alt=""
      placeholder='data:image/jpeg;base64,/9j/4AAQSkZJRgABAQIAJQAlAAD/2wBDAAMCAgICAgMCAgIDAwMDBAYEBAQEBAgGBgUGCQgKCgkICQkKDA8MCgsOCwkJDRENDg8QEBEQCgwSExIQEw8QEBD/2wBDAQMDAwQDBAgEBAgQCwkLEBAQEBAQEBAQEBAQEBAQEBAQEBAQEBAQEBAQEBAQEBAQEBAQEBAQEBAQEBAQEBAQEBD/wAARCAH0AfQDAREAAhEBAxEB/8QAFQABAQAAAAAAAAAAAAAAAAAAAAf/xAAUEAEAAAAAAAAAAAAAAAAAAAAA/8QAFgEBAQEAAAAAAAAAAAAAAAAAAAIF/8QAFBEBAAAAAAAAAAAAAAAAAAAAAP/aAAwDAQACEQMRAD8AobEQAAAAAAAAAAAAAAAAAAAAAAAAAAAAAAAAAAAAAAAAAAAAAAAAAAAAAAAAAAAAAAAAAAAAAAAAAAAAAAAAAAAAAAAAAAAAAAAAAAAAAAAAAAAAAAAAAAAAAAAAAAAAAAAAAAAAAAAAAAAAAAAAAAAAAAAAAAAAAAAAAAAAAAAAAAAAAAAAAAAAAAAAAAAAAAAAAAAAAAAAAAAAAAAAAAAAAAAAAAAAAAAAAAAAAAAAAAAAAAAAAAAAAAAAAAAAAAAAAAAAAAAAAAAAAAAAAAAAAAAAAAAAAAAAAAAAAAAAAAAAAAAAAAAAAAAAAAAAAAAAAAAAAAAAAAAAAAAAAAAAAAAAAAAAAAAAAAAAAAAAAAAAAAAAAAAAAAAAAAAAAAAAAAAAAAAAAAAAAAAAAAAAAAAAAAAAAAAAAAAAAAAAAAAAAAAAAAAAAAAAAAAAAAAAAAAAAAAAAAAAAAAAAAAAAAAAAAAAAAAAAAAAAAAAAAAAAAAAAAAAAAAAAAAAAAAAAAAAAAAAAAAAAAAAAAAAAAAAAAAAAAAAAAAAAAAAAAAAAAAAAAAAAAAAAAAAAAAAAAAAAAAAAAAAAAAAAAAAAAAAAAAAAAAAAAAAAAAAAAAAAAAAAAAAAAAAAAAAAAAAAAAAAAAAAAAAAAAAAAAAAAAAAAAAAAAAAAAAAAAAAAAAAAAAAAAAAAAAAAAAAAAAAAAAAAAAAAAAAAAAAAAAAAAAAAAAAAAAAAAAAAAAAAAAAAAAAAAAAAAAAAAAAAAAAAAAAAAAAAAAAAAAAAAAAAAAAAAAAAAAAAAAAAAAAAAAAAAAAAAAAAAAAAAAAAAAAAAAAAAAAAAAAAAAAAAAAAAAAAAAAAAAAAAAAAAAAAAAAAAAAAAAAAAAAAAAAAAAAAAAAAAAAAAAAAAAAAAAAAAAAAAAAAAAAAAAAAAAAAAAAAAAAAAAAAAAAAAAAAAAAAAAAAAAAAAAAAAAAAAAAAAAAAAAAAAAAAAAAAAAAAAAAAAAAAAAAAAAAAAAAAAAAAAAAAAAAAAAAAAAAAAAAAAAAAAAAAAAAAAAAAAAAAAAAAAAAAAAAAAAAAAAAAAAAAAAAAAAAAAAAAAAAAAAAAAAAAAAAAAAAAAAAAAAAAAAAAAAAAAAAAAAAAAAAAAAAAAAAAAAAAAAAAAAAAAAAAAAAAAAAAAAAAAAAAAAAAAAAAAAAAAAAAAAAAAAAAAAAAAAAAAAAAAAAAAAAAAAAAAAAAAAAAAAAAAAAAAAAAAAAAAAAAAAAAAAAAAAAAAAAAAAAAAAAAAAAAAAAAAAAAAAAAAAAAAAAAAAAAAAAAAAAAAAAAAAAAAAAAAAAAAAAAAAAAAAAAAAAAAAAAAAAAAAAAAAAAAAAAAAAAAAAAAAAAAAAAAAAAAAAAAAAAAAAAAAAAAAAAAAAAAAAAAAAAAAAAAAAAAAAAAAAAAAAAAAAAAAAAAAAAAAAAAAAAAAAAAAAAAAAAAAAAAAAAAAAAAAAAAAAAAAAAAAAAAAAAAAAAAAAAAAAAAAAAAAAAAAAAAAAAAAAAAAAAAAAAAAAAAAAAAAAAAAAAAAAAAAAAAAAAAAAAAAAAAAAAAAAAAAAAAAAAAAAAAAAAAAAAAAAAAAAAAAAAAAAAAAAAAAAAAAAAAAAAAAAAAAAAAAAAAAAAAAAAAAAAAAAAAAAAAAAAAAAAAAAAAAAAAAAAAAAAAAAAAAAAAAAAAAAAAAAAAAAAAAAAAAAAAAAAAAAAAAAAAAAAAAAAAAAAAAAAAAAAAAAAAAAAAAAAAAAAAAAAAAAAAAAAAAAAAAAAAAAAAAAAAAAAAAAAAAAAAAAAAAAAAAAAAAAAAAAAAAAAAAAAAAAAAAAAAAAAAAAAAAAAAAAAAAAAAAAAAAAAAAAAAAAAAAAAAAAAAAAAAAAAAAAAAAAAAAAAAAAAAAAAAAAAAAAAAAAAAAAAAAAAAAAAAAAAAAAAAAAAAAAAAAAAAAAAAAAAAAAAAAAAAAAAAAAAAAAAAAAAAAAAAAAAAAAAAAAAAAAAAAAAAAAAAAAAAAAAAAAAAAAAAAAAAAAAAAAAAAAAAAAAAAAAAAAAAAAAAAAAAAAAAAAAAAAAAAAAAAAAAAAAAAAAAAAAAAAAAAAAAAAAAAAAAAAAAAAAAAAAAAAAAAAAAAAAAAAAAAAAAAAAAAAAAAAAAAAAAAAAAAAAAAAAAAAAAAAAAAAAAAAAAAAAAAAAAAAAAAAAAAAAAAAAAAAAAAAAAAAAAAAAAAAAAAAAAAAAAAAAAAAAAAAAAAAAAAAAAAAAAAAAAAAAAAAAAAAAAAAAAAAAAAAAAAAAAAAAAAAAAAAAAAAAAAAAAAAAAAAAAAAAAAAAAAAAAAAAAAAAAAAAAAAAAAAAAAAAAAAAAAAAAAAAAAAAAAAAAAAAAAAAAAAAAAAAAAAAAAAAAAAAAAAAAAAAAAAAAAAAAAAAAAAAAAAAAAAAAAAAAAAAAAAAAAAAAAAAAAAAAAAAAAAAAAAAAAAAAAAAAAAAAAAAAAAAAAAAAAAAAAAAAAAAAAAAAAAAAAAAAAAAAAAAAAAAAAAAAAAAAAAAAAAAAAAAAAAAAAAAAAAAAAAAAAAAAAAAAAAAAAAAAAAAAAAAAAAAAAAAAAAAAAAAAAAAAAAAAAAAAAAAAAAAAAAAAAAAAAAAAAAAAAAAAAAAAAAAAAAAAAAAAAAAAAAAAAAAAAAAAAAAAAAAAAAAAAAAAAAAAAAAAAAAAAAAAAAAAAAAAAAAAAAAAAAAAAAAAAAAAAAAAAAAAAAAAAAAAAAAAAAAAAAAAAAAAAAAAAAAAAAAAAAAAAAAAAAAAAAAAAAAAAAAAAAAAAAAAAAAAAAAAAAAAAAAAAAAAAAAAAAAAAAAAAAAAAAAAAAAAAAAAAAAAAAAAAAAAAAAAAAAAAAAAAAAAAAAAAAAAAAAAAAAAAAAAAAAAAAAAAAAAAAAAAAAAAAAAAAAAAAAAAAAAAAAAAAAAAAAAAAAAAAAAAAAAAAAAAAAAAAAAAAAAAAAAAAAAAAAAAAAAAAAAAAAAAAAAAAAAAAAAAAAAAAAAAAAAAAAAAAAAAAAAAAAAAAAAAAAAAAAAAAAAAAAAAAAAAAAAAAAAAAAAAAAAAAAAAAAAAAAAAAAAAAAAAAAAAAAAAAAAAAAAAAAAAAAAAAAAAAAAAAAAAAAAAAAAAAAAAAAAAAAAAAAAAAAAAAAAAAAAAAAAAAAAAAAAAAAAAAAAAAAAAAAAAAAAAAAAAAAAAAAAAAAAAAAAAAAAAAAAAAAAAAAAAAAAAAAAAAAAAAAAAAAAAAAAAAAAAAAAAAAAAAAAAAAAAAAAAAAAAAAAAAAAAAAAAAAAAAAAAAAAAAAAAAAAAAAAAAAAAAAAAAAAAAAAAAAAAAAAAAAAAAAAAAAAAAAAAAAAAAAAAAAAAAAAAAAAAAAAAAAAAAAAAAAAAAAAAAAAAAAAAAAAAAAAAAAAAAAAAAAAAAAAAAAAAAAAAAAAAAAAAAAAAAAAAAAAAAAAAAAAAAAAAAAAAAAAAAAAAAAAAAAAAAAAAAAAAAAAAAAAAAAAAAAAAAAAAAAAAAAAAAAAAAAAAAAAAAAAAAAAAAAAAAAAAAAAAAAAAAAAAAAAAAAAAAAAAAAAAAAAAAAAAAAAAAAAAAAAAAAAAAAAAAAAAAAAAAAAAAAAAAAAAAAAAAAAAAAAAAAAAAAAAAAAAAAAAAAAAAAAAAAAAAAAAAAAAAAAAAAAAAAAAAAAAAAAAAAAAAAAAAAAAAAAAAAAAAAAAAAAAAAAAAAAAAAAAAAAAAAAAAAAAAAAAAAAAAAAAAAAAAAAAAAAAAAAAAAAAAAAAAAAAAAAAAAAAAAAAAAAAAAAAAAAAAAAAAAAAAAAAAAAAAAAAAAAAAAAAAAAAAAAAAAAAAAAAAAAAAAAAAAAAAAAAAAAAAAAAAAAAAAAAAAAAAAAAAAAAAAAAAAAAAAAA/9k='
      loading='lazy'
    />
)
}
- Set the Separate image
placeholderTo Have Blurry Effect To blur a placeholder with an image data type, useblurDataURLprop and theplaceholderprop.
placeholder='blur'
blurDataURL='data:image/jpeg;base64,<data-uri>'
For example:
// artsGalleryPage.jsx

import Image from 'next/image'
import picasso from '../public/picassoImage.jpeg'

export default function ArtsGallery() {
  return(
    <Image
      src={picasso}
      alt=""
      placeholder='blur'
      blurDataURL='data:image/jpeg;base64,/9j/4AAQSkZJRgABAQIAJQAlAAD/2wBDAAMCAgICAgMCAgIDAwMDBAYEBAQEBAgGBgUGCQgKCgkICQkKDA8MCgsOCwkJDRENDg8QEBEQCgwSExIQEw8QEBD/2wBDAQMDAwQDBAgEBAgQCwkLEBAQEBAQEBAQEBAQEBAQEBAQEBAQEBAQEBAQEBAQEBAQEBAQEBAQEBAQEBAQEBAQEBD/wAARCAH0AfQDAREAAhEBAxEB/8QAFQABAQAAAAAAAAAAAAAAAAAAAAf/xAAUEAEAAAAAAAAAAAAAAAAAAAAA/8QAFgEBAQEAAAAAAAAAAAAAAAAAAAIF/8QAFBEBAAAAAAAAAAAAAAAAAAAAAP/aAAwDAQACEQMRAD8AobEQAAAAAAAAAAAAAAAAAAAAAAAAAAAAAAAAAAAAAAAAAAAAAAAAAAAAAAAAAAAAAAAAAAAAAAAAAAAAAAAAAAAAAAAAAAAAAAAAAAAAAAAAAAAAAAAAAAAAAAAAAAAAAAAAAAAAAAAAAAAAAAAAAAAAAAAAAAAAAAAAAAAAAAAAAAAAAAAAAAAAAAAAAAAAAAAAAAAAAAAAAAAAAAAAAAAAAAAAAAAAAAAAAAAAAAAAAAAAAAAAAAAAAAAAAAAAAAAAAAAAAAAAAAAAAAAAAAAAAAAAAAAAAAAAAAAAAAAAAAAAAAAAAAAAAAAAAAAAAAAAAAAAAAAAAAAAAAAAAAAAAAAAAAAAAAAAAAAAAAAAAAAAAAAAAAAAAAAAAAAAAAAAAAAAAAAAAAAAAAAAAAAAAAAAAAAAAAAAAAAAAAAAAAAAAAAAAAAAAAAAAAAAAAAAAAAAAAAAAAAAAAAAAAAAAAAAAAAAAAAAAAAAAAAAAAAAAAAAAAAAAAAAAAAAAAAAAAAAAAAAAAAAAAAAAAAAAAAAAAAAAAAAAAAAAAAAAAAAAAAAAAAAAAAAAAAAAAAAAAAAAAAAAAAAAAAAAAAAAAAAAAAAAAAAAAAAAAAAAAAAAAAAAAAAAAAAAAAAAAAAAAAAAAAAAAAAAAAAAAAAAAAAAAAAAAAAAAAAAAAAAAAAAAAAAAAAAAAAAAAAAAAAAAAAAAAAAAAAAAAAAAAAAAAAAAAAAAAAAAAAAAAAAAAAAAAAAAAAAAAAAAAAAAAAAAAAAAAAAAAAAAAAAAAAAAAAAAAAAAAAAAAAAAAAAAAAAAAAAAAAAAAAAAAAAAAAAAAAAAAAAAAAAAAAAAAAAAAAAAAAAAAAAAAAAAAAAAAAAAAAAAAAAAAAAAAAAAAAAAAAAAAAAAAAAAAAAAAAAAAAAAAAAAAAAAAAAAAAAAAAAAAAAAAAAAAAAAAAAAAAAAAAAAAAAAAAAAAAAAAAAAAAAAAAAAAAAAAAAAAAAAAAAAAAAAAAAAAAAAAAAAAAAAAAAAAAAAAAAAAAAAAAAAAAAAAAAAAAAAAAAAAAAAAAAAAAAAAAAAAAAAAAAAAAAAAAAAAAAAAAAAAAAAAAAAAAAAAAAAAAAAAAAAAAAAAAAAAAAAAAAAAAAAAAAAAAAAAAAAAAAAAAAAAAAAAAAAAAAAAAAAAAAAAAAAAAAAAAAAAAAAAAAAAAAAAAAAAAAAAAAAAAAAAAAAAAAAAAAAAAAAAAAAAAAAAAAAAAAAAAAAAAAAAAAAAAAAAAAAAAAAAAAAAAAAAAAAAAAAAAAAAAAAAAAAAAAAAAAAAAAAAAAAAAAAAAAAAAAAAAAAAAAAAAAAAAAAAAAAAAAAAAAAAAAAAAAAAAAAAAAAAAAAAAAAAAAAAAAAAAAAAAAAAAAAAAAAAAAAAAAAAAAAAAAAAAAAAAAAAAAAAAAAAAAAAAAAAAAAAAAAAAAAAAAAAAAAAAAAAAAAAAAAAAAAAAAAAAAAAAAAAAAAAAAAAAAAAAAAAAAAAAAAAAAAAAAAAAAAAAAAAAAAAAAAAAAAAAAAAAAAAAAAAAAAAAAAAAAAAAAAAAAAAAAAAAAAAAAAAAAAAAAAAAAAAAAAAAAAAAAAAAAAAAAAAAAAAAAAAAAAAAAAAAAAAAAAAAAAAAAAAAAAAAAAAAAAAAAAAAAAAAAAAAAAAAAAAAAAAAAAAAAAAAAAAAAAAAAAAAAAAAAAAAAAAAAAAAAAAAAAAAAAAAAAAAAAAAAAAAAAAAAAAAAAAAAAAAAAAAAAAAAAAAAAAAAAAAAAAAAAAAAAAAAAAAAAAAAAAAAAAAAAAAAAAAAAAAAAAAAAAAAAAAAAAAAAAAAAAAAAAAAAAAAAAAAAAAAAAAAAAAAAAAAAAAAAAAAAAAAAAAAAAAAAAAAAAAAAAAAAAAAAAAAAAAAAAAAAAAAAAAAAAAAAAAAAAAAAAAAAAAAAAAAAAAAAAAAAAAAAAAAAAAAAAAAAAAAAAAAAAAAAAAAAAAAAAAAAAAAAAAAAAAAAAAAAAAAAAAAAAAAAAAAAAAAAAAAAAAAAAAAAAAAAAAAAAAAAAAAAAAAAAAAAAAAAAAAAAAAAAAAAAAAAAAAAAAAAAAAAAAAAAAAAAAAAAAAAAAAAAAAAAAAAAAAAAAAAAAAAAAAAAAAAAAAAAAAAAAAAAAAAAAAAAAAAAAAAAAAAAAAAAAAAAAAAAAAAAAAAAAAAAAAAAAAAAAAAAAAAAAAAAAAAAAAAAAAAAAAAAAAAAAAAAAAAAAAAAAAAAAAAAAAAAAAAAAAAAAAAAAAAAAAAAAAAAAAAAAAAAAAAAAAAAAAAAAAAAAAAAAAAAAAAAAAAAAAAAAAAAAAAAAAAAAAAAAAAAAAAAAAAAAAAAAAAAAAAAAAAAAAAAAAAAAAAAAAAAAAAAAAAAAAAAAAAAAAAAAAAAAAAAAAAAAAAAAAAAAAAAAAAAAAAAAAAAAAAAAAAAAAAAAAAAAAAAAAAAAAAAAAAAAAAAAAAAAAAAAAAAAAAAAAAAAAAAAAAAAAAAAAAAAAAAAAAAAAAAAAAAAAAAAAAAAAAAAAAAAAAAAAAAAAAAAAAAAAAAAAAAAAAAAAAAAAAAAAAAAAAAAAAAAAAAAAAAAAAAAAAAAAAAAAAAAAAAAAAAAAAAAAAAAAAAAAAAAAAAAAAAAAAAAAAAAAAAAAAAAAAAAAAAAAAAAAAAAAAAAAAAAAAAAAAAAAAAAAAAAAAAAAAAAAAAAAAAAAAAAAAAAAAAAAAAAAAAAAAAAAAAAAAAAAAAAAAAAAAAAAAAAAAAAAAAAAAAAAAAAAAAAAAAAAAAAAAAAAAAAAAAAAAAAAAAAAAAAAAAAAAAAAAAAAAAAAAAAAAAAAAAAAAAAAAAAAAAAAAAAAAAAAAAAAAAAAAAAAAAAAAAAAAAAAAAAAAAAAAAAAAAAAAAAAAAAAAAAAAAAAAAAAAAAAAAAAAAAAAAAAAAAAAAAAAAAAAAAAAAAAAAAAAAAAAAAAAAAAAAAAAAAAAAAAAAAAAAAAAAAAAAAAAAAAAAAAAAAAAAAAAAAAAAAAAAAAAAAAAAAAAAAAAAAAAAAAAAAAAAAAAAAAAAAAAAAAAAAAAAAAAAAAAAAAAAAAAAAAAAAAAAAAAAAAAAAAAAAAAAAAAAAAAAAAAAAAAAAAAAAAAAAAAAAAAAAAAAAAAAAAAAAAAAAAAAAAAAAAAAAAAAAAAAAAAAAAAAAAAAAAAAAAAAAAAAAAAAAAAAAAAAAAAAAAAAAAAAAAAAAAAAAAAAAAAAAAAAAAAAAAAAAAAAAAAAAAAAAAAAAAAAAAAAAAAAAAAAAAAAAAAAAAAAAAAAAAAAAAAAAAAAAAAAAAAAAAAAAAAAAAAAAAAAAAAAAAAAAAAAAAAAAAAAAAAAAAAAAAAAAAAAAAAAAAAAAAAAAAAAAAAAAAAAAAAAAAAAAAAAAAAAAAAAAAAAAAAAAAAAAAAAAAAAAAAAAAAAAAAAAAAAAAAAAAAAAAAAAAAAAAAAAAAAAAAAAAAAAAAAAAAAAAAAAAAAAAAAAAAAAAAAAAAAAAAAAAAAAAAAAAAAAAAAAAAAAAAAAAAAAAAAAAAAAAAAAAAAAAAAAAAAAAAAAAAAAAAAAAAAAAAAAAAAAAAAAAAAAAAAAAAAAAAAAAAAAAAAAAAAAAAAAAAAAAAAAAAAAAAAAAAAAAAAAAAAAAAAAAAAAAAAAAAAAAAAAAAAAAAAAAAAAAAAAAAAAAAAAAAAAAAAAAAAAAAAAAAAAAAAAAAAAAAAAAAAAAAAAAAAAAAAAAAAAAAAAAAAAAAAAAAAAAAAAAAAAAAAAAAAAAAAAAAAAAAAAAAAAAAAAAAAAAAAAAAAAAAAAAAAAAAAAAAAAAAAAAAAAAAAAAAAAAAAAAAAAAAAAAAAAAAAAAAAAAAAAAAAAAAAAAAAAAAAAAAAAAAAAAAAAAAAAAAAA/9k='
      loading='lazy'
    />
)
}
NOTE: Alternatively, you can automatically generate placeholders using plaiceholder,**
Display an Image Across Different Viewports Using sizes Property.
In the example below, using media queries, the lilacImage renders at different sizes based on the user's screen size.
// lilacPage.jsx

export default function lilacImage() {
  return(
    <Image
      src='../public/lilacImage.webp'
      alt=""
      sizes= "(max-width: 768px) 100vw, (max-width: 1200px) 50vw, 33vw"
    />
  )
}
2. Enhance Video Players with <video> and <iframe/>
You can render video players in two ways: using the <video> HTML tag for locally stored videos or using the<iframe/> HTML tag for remote videos requested from network servers.
Rendering local videos with <video>
<video> accepts the width and height properties to specify the space the video player occupies. To indicate the source of the video file, use the src attribute inside the <source /> tag.
The control attribute inside the <video> tag enables keyboard navigation and screen reader accessibility features.
The <track /> tag helps to provide alternative information such as captions, subtitles, descriptions, chapters, or metadata for a video player, these are specified with the kind attribute. To specify the source of the track file, use the src attribute.
The textual information within the <video>...</video> tag is a fallback content. It keeps the users engaged in the web page.
// flowerMakingVideo.jsx

export default function FlowerMakingVideo() {
  return(
    <video width="600" height="500" controls preload="none">
      <source src="../flowerMakingVideo.mp4" type="video/mp4" />
      <track
        src="../flowerMakingCaptions.vtt"
        kind="subtitles"
        srcLang="en"
        label="English"
      />
      This video is not supported by your browser
    </video>
  )
}
Rendering remote videos with <iframe/> and React Suspense
In Next.js, remote videos are first generated on the server. To render remote video players, use the <iframe /> HTML tag.
The video player is rendered without a border in the artsMakingVideo.jsx file below. The title attribute enables the screen reader to associate the video player with the information it provides.
// artsMakingVideo.jsx

export default function ArtsMakingVideo() {
  return(
    <iframe
      width="600"
      height="600"
      src="https://www.youtube.com/..."
      frameborder="0"
      loading="lazy"
      title="art making video"
      allowfullscreen
    />
  )
}
When a video loads, it is not interactive until the JavaScript for the file is equally loaded or fetched. This process is known as Hydration. It leads to slow response time when users need to interact with the video, causing the web app to have a poor INP score. React Suspense solves the hydration problem by providing fallback content for videos, leading to improved user experience.
Let us better understand how to useSuspense.
Suspense is a React component. It enables you to load an alternative layout that the video replaces with the fallback prop before the video is rendered completely.
Let us create a fallback component:
// artsVideoFallback.jsx

export default function ArtsVideoFallback() {
  return(
    <div>
      <p>Loading Arts Video</p>
      <p>Rather, just view me</p>
    </div>
  )
}
Wrap the <iframe/> tag inside the React <Suspense>...</Suspense> component
// artsMakingVideo.jsx

import { Suspense } from "react";
import ArtsVideoFallback from "artsVideoFallback.jsx";

export default function ArtsMakingVideo() {
  return (
    <Suspense fallback={ArtsVideoFallback}>
      <iframe
      // ...
      />
    </Suspense>
  );
}
3. Eliminate External Fonts download
Fonts loaded from network servers take a long time to render. Next.js self-hosts Google fonts and local fonts without rendering fonts from external sources.
Next.js fonts are functions called with an object of different properties:
-
src(required in local fonts): The path where the local font file is stored. -
declarations(local fonts only): Describes generated font face. -
subsets(google fonts only): An array of strings. It is useful for preloaded font subsets. -
axes(google fonts only): Specifies the axes of variable fonts. -
weight: Representsfont-weight. -
style: Representsfont-style. Can be set toitalic,obliqueornormal. -
display: Possible string value ofauto,block,swap,fallbackoroptional. -
preload: Specifies whether a font will preload. Sets totrueorfalse. -
fallback: An array of strings. Replace the imported fonts when a loading error occurs. To style afallback, use a CSS class selector for the element it is applied to. -
adjustFontFallback: Reduces the effect of font fallback on Cumulative Layout Shift (CLS). Sets totrueorfalse. -
variable: A string value of the declared CSS variable name.
Using local Fonts
Local fonts are downloaded fonts. In the project's root directory, you can save local font files in a ./styles/fonts/ folder.
To use local fonts, import localFont from next/font/local:
// app/layout.js

import localFont from 'next/font/local'

const myFont = localFont({
  src: './fonts/my-font.woff2',
  style: 'italic',
  display: 'swap',
  fallback: ['arial'],
})

export default function RootLayout({ children }) {
  return(
    <html lang="en" className={myFont.className} >
      <body>{children}</body>
    </html>
  )
}
Using Google Fonts
Google fonts are classified into different types. When using a non-variable font, it is important to specify its weight.
To use Google fonts, import the font type from next/font/google:
// app/layout.js

import { Roboto } from next/font/google

const roboto = Roboto({
  weight: '400',
  subsets: ['latin'],
  style: ['normal', 'italic'],
  display: 'swap',
})

export default function RootLayout({ children }) {
  return (
    <html lang="en" className={roboto.className}>
      <body>{children}</body>
    </html>
  )
}
Rendering and Reusing Multiple Fonts
To use multiple fonts in a reusable manner, call the fonts in a single fonts file as an export const:
// app/fonts.js

import localFont from 'next/font/local'
import { Roboto_Mono } from 'next/font/google'

export const myLocalFont = localFont({
  src: "my-local-font.tff",
  subset: ['latin'],
})

export const roboto_mono = Roboto_Mono({
  subsets: ['latin'],
  display: 'swap',
})
Next, render the font in the file you want to apply.
In the example below, the font is only rendered in the artsCollectionPage.jsx file:
// artsCollectionPage.jsx

import { myLocalFont } from '../fonts.js'

export default function ArtsCollection() {
  return(
    <div className={myLocalFont.className}>
      Available Arts
    </div>
  )
}
Using CSS variables to render fonts
In the example below, to apply font to a specific text using a CSS variable, set the className of the text's parent element to the font's variable:
// aboutArtsPage.jsx

import styles from './aboutArts.module.css'

import { Inter } from 'next/font/google'

const inter = Inter({
  variable: '--font-inter',
})

export default function AboutArts() {
  return(
    <div className=`${inter.className}`>
        <h1 className=`${styles.text}`>Arts help to improve the memory</h1>
    </div>
  )
}
Next, style the text in the aboutArts.module.css file:
// aboutArts.module.css

.text {
  font-family: var(--font-inter)
}
Using TailwindCSS to render Fonts
Here, the inter and roboto_mono fonts are called with the variable --font-inter and --font-roboto-mono in the aboutArtistPage.jsx file.
// aboutArtistPage.jsx

import { Inter, Roboto_mono } from 'next/font/google'

const inter = Inter({
  variable: '--font-inter'
})

const roboto_mono = Roboto_mono({
  variable: '--font-roboto-mono'
})

export default function AboutArtist() {
  return (
      <section className=`${inter.variable} ${roboto_mono.variable}`>
        <h1>About Artist</h1>
    </section>
  )
}
To apply the CSS variable fonts using Tailwind CSS, add the css variable to your tailwind.config.js file:
// tailwind.config.js

/** @type {import('tailwindcss').Config} */

module.exports = {
  content: [
    'pages/**/*.{js,ts,
    jsx,tsx}',
    'components/**/*.{js,ts,jsx,tsx}',
    'app/**/*.{js,ts,jsx,tsx}/'
  ],
  theme: {
    extend: {
      font-family: {
        sans: ['var(--font-inter)'],
        mono: ['var(--font-roboto-mono)'],
      },
    },
  },
  plugins: [],
}
Aplying fonts with style
You can equally apply fonts to elements using style:
<h1 style={inter.className}>Well done</h1>4. Amplify Search Engine ranking with metadata
Metadata provides additional information about the data in a web app. These data include documents, files, images, audio, videos, and web pages. When a web app has enriched metadata information, it takes high precedence and relevance over other web apps on search engines.
In Next.js, metadata is classified as either static or dynamic. Dynamic metadata provides information bound to change, such as the current route parameter, external data, or metadata in parent segments.
You can add metadata either through configuration or special files:
Adding metadata through configuration
You can export static metadata using Next.js built-in metadata object, while you can export dynamically generated metadata with changing values using the built-in generateMetadata() function. The metadata object and generateMetadata() function are exported in either layout.js or page.js files and can only be used for server components.
- Adding Static Metadata with
metadataobject
// page.jsx

export const metadata = {
  title: "....",
  description: "....",
}

export default function Page(){}- Adding Dynamic Metadata with
generateMetadata()Function
The generateMetadata() function accepts the props object and parent as parameters. The props object includes params and searchParams. The params contains the dynamic route parameters from the root segment to the segment where generateMetadata() is called. The searchParams: Contains the search params of the current URL. And the parent parameter is the resolved metadata's promise from the parent route segments.
Below is an example:
// artist/[id]/page.jsx

export async function generateMetadata({params, searchParams}, parent) {
  const id = params.id

  const artist = await fetch(`https://../${id}`).then((res)=>res.json())

  const price = await parent

  return {
    title: artist.title,
    description: artist.description,
  },
}

export default function ArtsPage({params, searchParams}){}
5. Loading Scripts with Script Component
Next.js has a built-in Script component lets us control how to render scripts for a specific folder or the app root layout. To optimize performance, render the scripts in the specific folders' layouts where they are needed.
Scripts can equally be loaded in Page files.
Specifying the id prop in Script is useful for optimization.
Loading inline Scripts
Inline scripts are written directly in the Script component. The id prop is required in inline scripts. Inline scripts can be written in two ways:
- With curly braces:
// app/artsCollection/layout.jsx

import Script from 'next/script'

export default function Layout({children}) {
  return (
    <div>
      <h1>Available Arts</h1>
      <section>{children}</section>
      <Script id="show-arts-collection">
        {
          document.getElementbyId=('arts-collection').classList.remove('hidden')
        }
      </Script>
    </div>
  )
}- With
dangerouslyStyleInnerHTMLprop:
// app/artsCollection/layout.jsx

import Script from 'next/script'

// ...
    <Script
      id="show-arts-collection"
      dangerouslySetInnerHTML={{
      __html: "document.getElementById('arts-collection').classList.remove('hidden')",
      }}
    />

// ...
Loading External Scripts
External scripts are loaded with a required src prop to specify the URL.
// ...
    <Script src="https://example.com"
    />
// ...
Specifying How Scripts Should Load Using the strategy Prop
Although the Script is loaded only once in the web app, you can control how it loads with the following loading strategies:
-
beforeInteractive: The script will load before the Next.js code loads and before page hydration happens. -
afterInteractive: The script will load immediately after page hydration happens. -
lazyOnLoad: The script wll load in a delayed manner after every other code have been loaded in the browser.
*worker: The script will load in a web worker.
Here, render the script before page hdration occurs:
     <Script
        src="https://example.com/script.js"
        strategy="beforeInteractive"
     />
Adding Event Handlers to Scripts
To control how a web page responds to certain events, you can use the following event handlers which can only be used in client components:
-
onLoad: Responds inmediately the script has finished loading. -
onReady: This function responds after the script has finished loading and the component is fully displayed. -
onError: Responds when an error occurs with script loading.
Using Event Handlers
'use client'

import Script from 'next/script'

// ...

    <Script
      src="..."
      onReady=()=> {console.log('users can interact with the component now')}
    />

// ...
6. Implement URL Redirects
Implement URL redirect with Next.js built-in functions and hooks based on different use cases.
Redirecting Users After Mutations or Events
Mutation involves updating data to a network server. Use redirect or permanentRedirect to enable URL redirect in server components, actions, or route handlers.
Using redirect function
redirect is called outside the try/catch block.
redirect accepts two parameters:
-
path: The URL path users are redirected to. The path can be relative or absolute. -
type: The URL redirect we want to enable is either to replace a URL pattern withreplaceor to push to an existing URL pattern withpush. Next.js automatically uses thepushredirect type only for server actions. Redirects that called in other files arereplaceby default.
// bidArtsAction.js

'user server'

import { redirect } from 'next/navigation'
import { revalidatePath} from 'next/cache'

export default async function bidArts(id) {

  try{
    // ...
  } catch(error){
    // ...
  }

  revalidatePath('/bidArts')
  redirect(`/bidArts/${id}`)

}
As shown in the example above, revalidatePath will update the cached bidArts page. Once the user bidArts' server action is called, the URL pattern will change from ../bidArtsto../bidArts/[id]`.
If you want to replace the URL path, use:
redirect(`/bidArts/${id}`, replace)using permanentRedirect function
To redirect users to a permanently changed URL, use permanentRedirect:
// updateArtistPaintingAction.js

'use server'

import { permanentRedirect} from 'next/navigate'
import revalidateTag from 'next/cache'

export async function updateArtistPainting(artsWork, formData){

  try{
    // ...
  } catch(error) {
    // ...
  }

revalidateTag('artsWork')
permanentRedirect(`artist/${artsWork}`)
}
revalidateTag will update all paths related to artsWork.
Redirecting Users Within Client components With useRouter hooks
useRouter hook works in client components only.
// modernArts.jsx

'use client'

import useRouter from 'next/navigation'

export default function Page(){
const router = useRouter()

  return(
    <button onClick=(()=>{router.push(/fernado)})>
      Fernado
    </button>
)
}
Here, once a user clicks on the button, the user is redirected to a new URL with the path /fernado
Redirecting Users With redirects in next.config.js
To enable URL redirect to different URL paths based on different incoming URL requests, include redirects to the next.config.js file. It allows you manage different number of URL paths at once.
// next.config.js

module.exports = {
  async redirects() {
    return [
      {
        source: '/about',
        destination: '/',
        permanent: true,
      },
      {
        source: '/artists/:slug',
        destination: '/artsCollection/:slug',
        permanent: true,
      },
    ],
  },
}
Conditionally Redirect Users Using Next.js Middleware
Enabling URL redirects in a Next.js middleware allows the web browser to redirect URLs before a user's request is completed, for example, before a browser completes an authentication process.
Here, we want to redirect a user to the login page if the user is not authenticated. The redirect is processed before the login page is rendered. This will avoid errors when the page loads since we redirect the user after a condition has been met.
// middleware.js

import { NextResponse} from 'next/server'
import 'authenticate' from  'next/auth-provider'

export function middleware(request) {
  const isAuthenticated = authenticate(request)

  if(!isAuthenticated) {
    NextResponse.redirect(new URL('/login', request.url))
}

export const config = {
  matcher: '/artscollection/:path*'
}
7. Bundling and Analyzing packages with @next/bundle-analyzer
To minimize memory usage, you can bundle the packages used in your web app with a bundler. A bundler automatically merges all the code written in the web app into a single file, helping to solve dependency and latency issues. Certain resources depend on other resources, such as remote libraries, components, and frameworks, and are complex to manage. Latency is a measure of the time distance between a user's device and the network server that is being requested.
Next.js has a built-in plugin @next/bundle-analyzer which identifies and reports dependencies issues.
Installing @next/bundle-analyzer plugin
To install the the plugin, use:
npm i @next/bundle-analyzer

# or

yarn add @next/bundle-analyzer

# or

pnpm add @next/bundle-analyzer
@next/bundle-analyzer usage
Here is how to use the @next/bundle-analyzer:
// next.config.js

/** @type {import('next')}.NextConfig */
import("next").NextConfig;
const nextConfig = {
  experimental: {
    optimizePackageImports: ["icon-library"],
  },

  serverExternalPackages: ["package-name"],
};

const withBundleAnalyzer = require("@next/bundle-analyzer")({
  enabled: process.env.ANALYZE === "true",
});

module.exports = withBundleAnalyzer(nextConfig);
From the code above, we have the following:
-
optimizePackageImportsenables manual optimization of the packages imported. This allows the packages to be imported once and used in different components as often as possible. -
withBundleAnalyzerincludes the bundle analyzer's settings to thenext.config.jsfile after it has been installed. -
serverExternalPackagesexcludespackage-namefrom being bundled in the application.
The next.config.js' file optionally uses optimizePackageImports, withBundleAnalyzer, and serverExternalPackages`.
Identifying and Reporting Bundles
To analyze and generate reports on your bundles, use:
ANALYZE=true npm run build

# or

ANALYZE=true yarn build

# or

ANALYZE=true pnpm build
9. Implement Next.js Lazy Loading Strategies
Lazy loading is a performance strategy that reduces page load time by rendering web pages lightweight until users actively navigate to certain components. It is useful for enjoyable scrolling engagements. So far, in this article, you have implemented Next.js lazy loading for images and videos.
Server components have features that enable automatic render delay. To enable manual lazy loading in server components, implement Streaming.
Client components cannot be delayed automatically. You must use dynamic imports or Suspense to achieve Next.js lazy loading in client components.
In this section, you will lazy load client components only:
Using Next.js Dynamic Imports
dynamic is a callback function that returns the components we want to lazy load as imports. To disable pre-rendering in client components, set the ssr option to false. To enable custom loading in dynamic imports, set the loading option to a preferred UI:
// artsExhibitionPage.jsx

'use client'

import dynamic from 'next/dynamic'

// client components:
const Leonardo = dynamic(()=> import('../ui/leonardo'))
const Picasso = dynamic(()=>import('../ui/picasso'))
const Michelangelo = dynamic(()=>import('../ui/michelangelo'), {ssr: false})
const Magritte = dynamic(()=>import('../ui/magritte'), {
  loading: () => <div>While waiting for Magritte's arts work, just view me instead</div>
})


export default function ArtsExhibition() {

  return (
    <div>
      <Leonardo />

      <Picasso />

      <Magritte />

      <Michelangelo />
    </div>
  )
}
Loading Named Exports with dynamic
// vermeer.js

export function Vermeer() {
  return(
    <div>...</div>
  )
}
To lazy load the named export Vermeer using dynamic, return it as a Promise after it has been imported:
// artsExhibitionPage.jsx

'use client'

const Vermeer = dynamic(import('../components/vermeer').then((res)=>res.Vermeer))
Using Suspense
With Suspense, you can lazy load client components while providing a fallback component:
// upcomingArtsExhibitionPage.jsx

'use client'

import { Suspense} from 'react'
import Leonardo from '../components/leonardo.jsx'
import Picasso from '../components/picasso.jsx'

export default function UpcomingArtsExhibition() {
  return(
    <Suspense fallback={<div>Waiting for all components to load at once</div>}>
      <Leonardo />
      <Picasso />
    </Suspense>
  )
}
Lazy loading Packages or Libraries in Next.js
To load packages or libraries only when needed, use the await import:
// myPage.jsx

'use client'

import { useState } from 'react'

export default function MyPage() {

  const [results, setResults] = useState(false)

  return(
    <div>

      <button onClick={async()=>{
        const MyLibrary = (await import('my-library.js')).default
        const myLibrary = new MyLibrary()
        setResults(myLibrary)
      }>
      Show Result
      </button>

      <div>Results: {JSON.stringify(results)}</div>

    </div>
  )
}
const myLibrary = (await import('my-library.js')).default
In the example above, my-library.js will load only when the <button> is clicked.
Solving Lazy Loading Problem with Caching in Next.js
When lazy loading complex components, different problems may arise. An example is multiple requests from network servers at the same time. To prevent this problem, cache the components. Read about Caching in Next.js.
Measuring Web Performance in Next.js
In Next.js, you can always keep track of performance issues in production using:
-
reportWebVitalshook: monitors Core Web Vitals (CWV) metrics and sends observed reports manually. -
Vercel's built-in observability tool: integrated with other observability tools such as OpenTelementry, Datadog, through a process known as instrumentation.
-
Google Lighthouse: Lighthouse measures and provides reports on the score of different CWV metrics based on the URL of each web page, with suggested ways to fix the performance issues.
Conclusion
In this article, you have understood how different resources affect the user experience of a web app. You have also implemented techniques to optimize images, videos, fonts, metadata, URL redirects, scripts, and packages. You have also implemented Next.js lazy loading strategies for client components and other resources.
Optimization enables your Next.js web app to be highly performant, lightweight, and enjoyable. You have also learned about different performance metrics and possible ways to measure your web app's performance.