What is Astro?
Astro is a modern, lightweight frontend framework for building fast, content-driven websites.
It is particularly popular among developers who want to build static websites, and it uses HTML as its primary rendering method while allowing for the integration of multiple JavaScript frameworks such as React, Vue, and Svelte.
Astro gives you the flexibility to create dynamic components while maintaining the simplicity and speed of a static site.
What to Expect from this Tutorial
In this tutorial, we’ll be building a blog application powered by Astro 4 and Strapi 5.
Strapi will serve as our content management system (CMS), allowing us to easily manage blog content and it is easily configurable, while Astro will power our frontend.
Here's what our final blog application will look like:
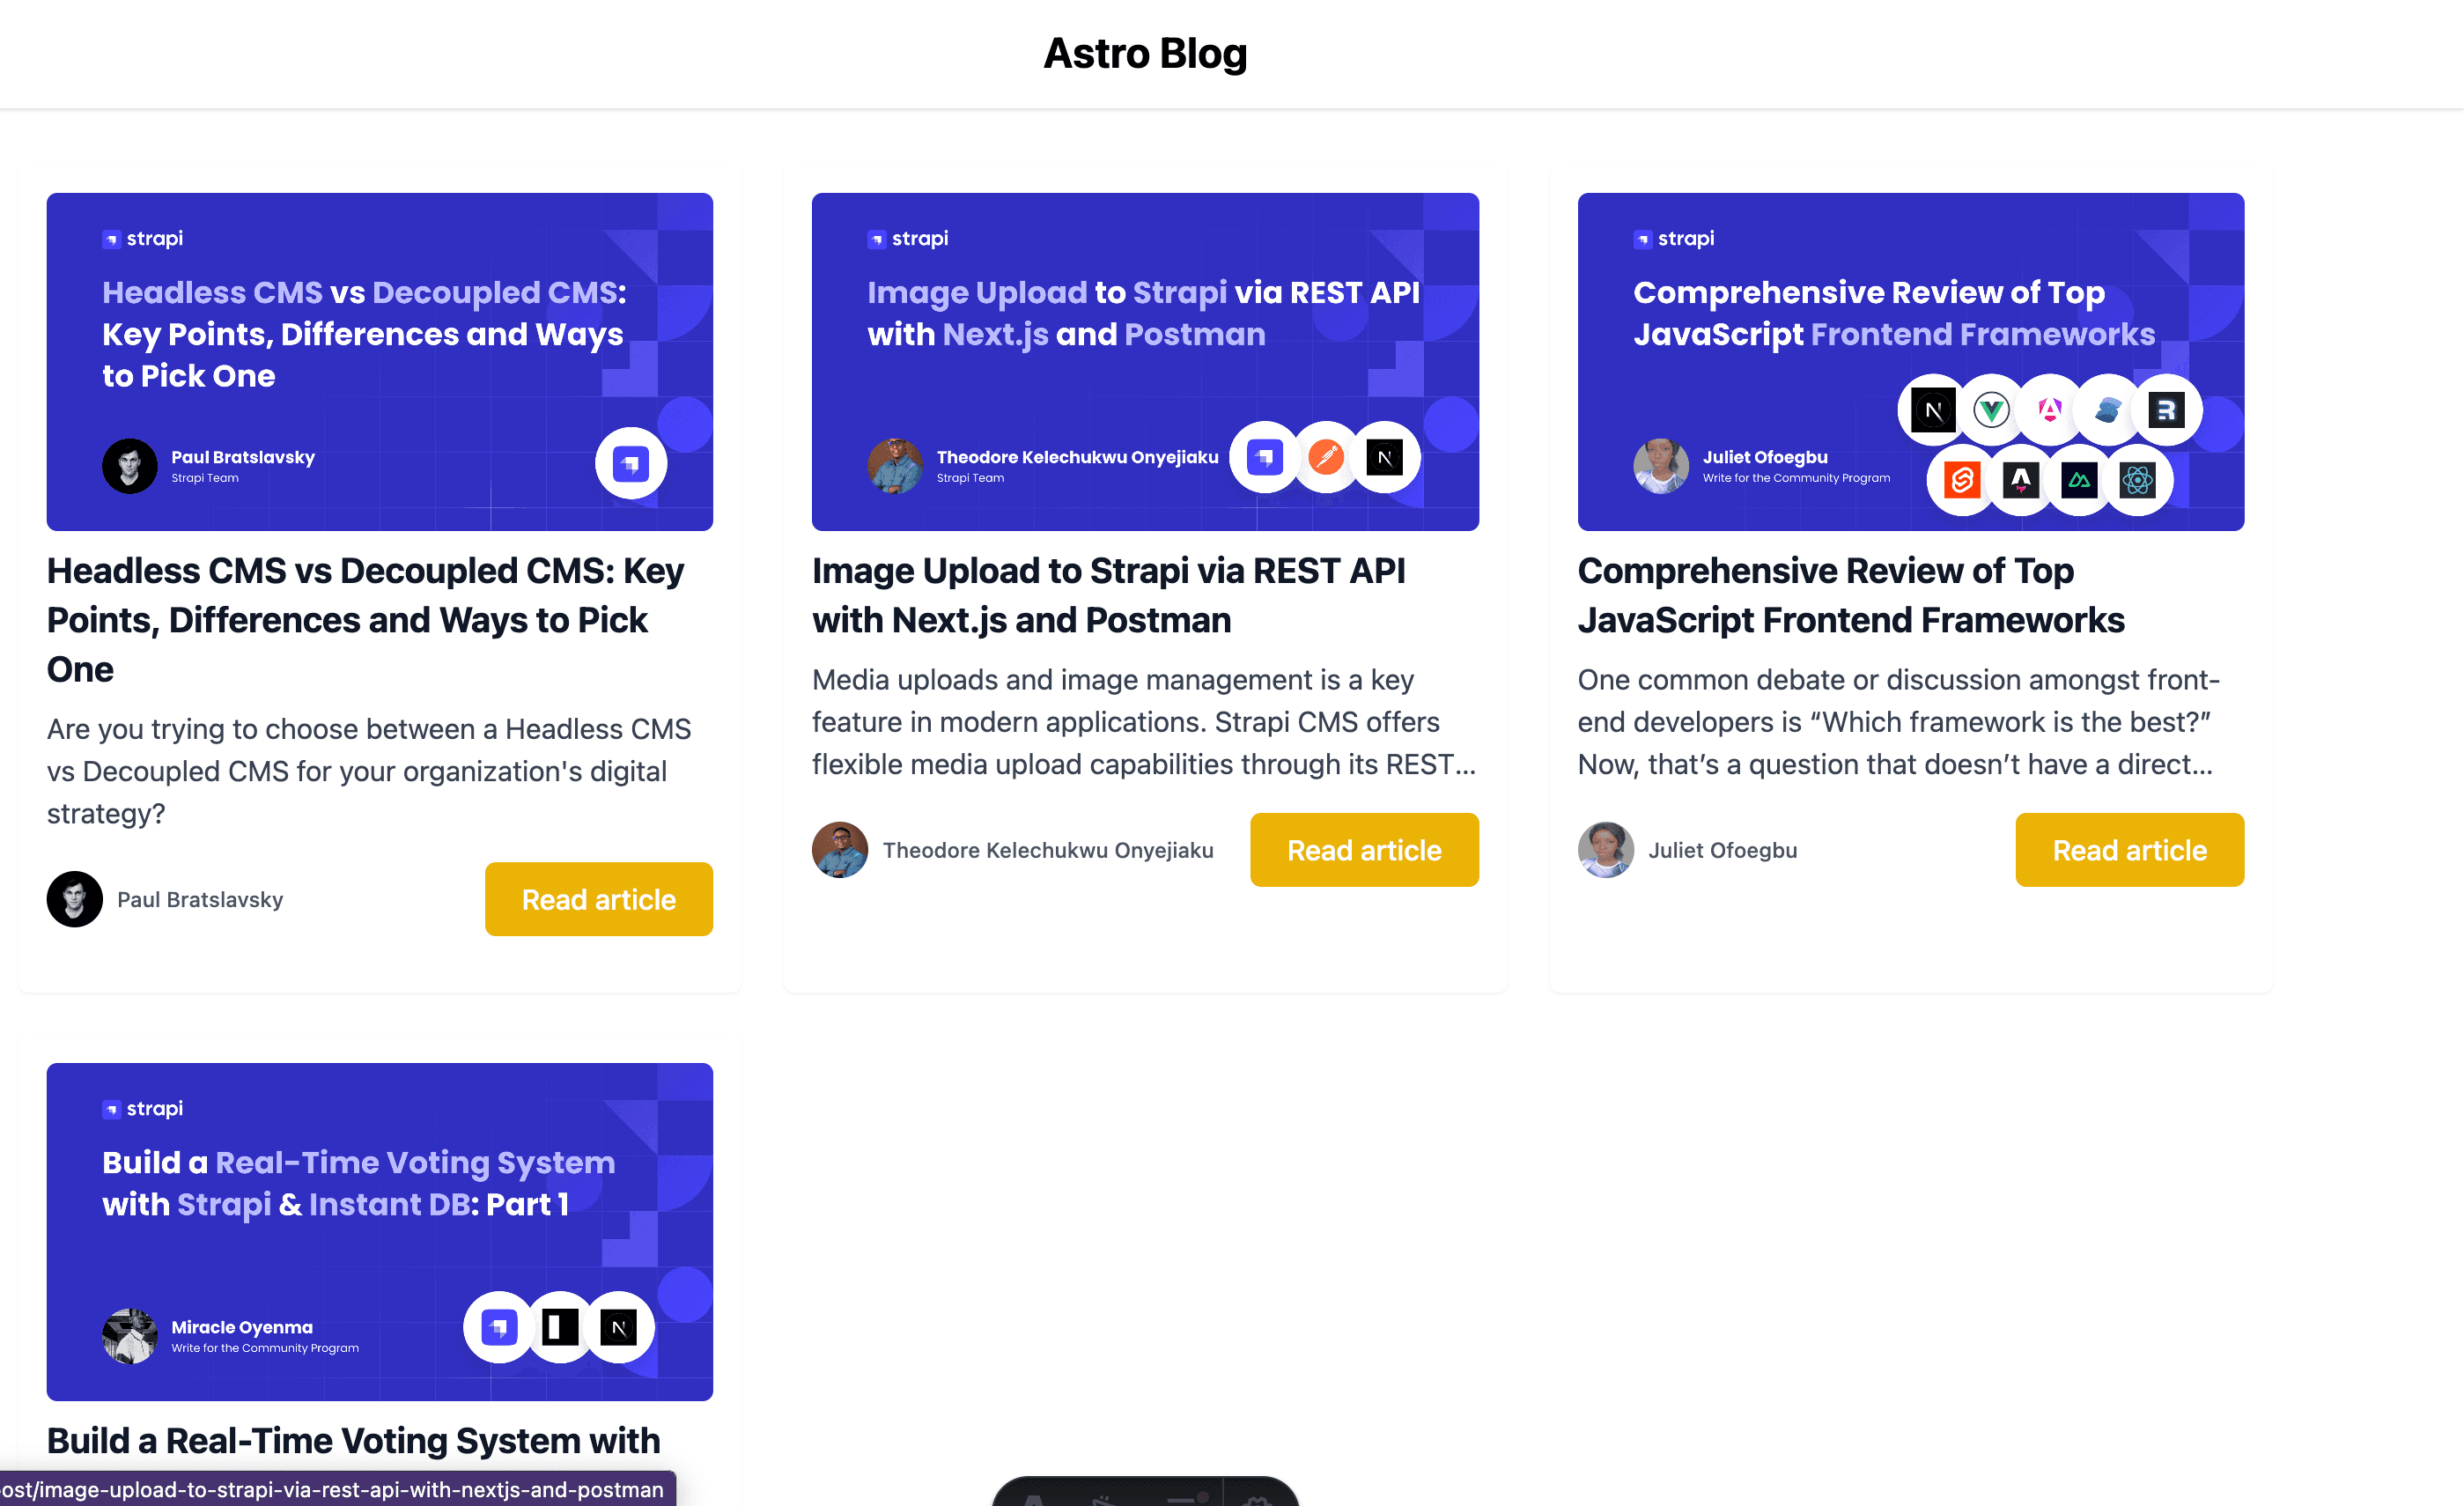
So why are we building a blog application? Building a functional blog application is a great way to learn how modern tools like Astro and Strapi can simplify web development, while exploring concepts like web APIs, database, and frontend design.
Prerequisites:
Here are some things you'll need to have or do so you can follow along with this tutorial:
- Basic understanding of HTML and CSS.
- Basic understanding of Strapi.
- Familiarity with Tailwind CSS classes.
- Astro's syntax
- Have Node.js installed - v18.0.0, or higher.
By the end of this tutorial, we'll have a fully functional blog application and a solid understanding of how Strapi and Astro work together. Here are a few things you'll learn along the way:
- How to set up backend with Strapi 5.
- How to build static pages and frontend interface with Astro.
- How to connect the Strapi backend with the Astro project to render the blog posts.
Setting up the Strapi Backend
In this section, we'll set up Strapi as the backend CMS that will allow us to set up RESTful API to fetch the blog data.
Creating Strapi Project Directory
First, we'll create a directory for our project. This directory will contain the project's Strapi backend folder and the Astro frontend folder.
mkdir blog-app && cd blog-appCreating a Strapi 5 Project
Create a new Strapi 5 project using one of the following commands:
npx create-strapi@latest backend --quickstart
OR
yarn create strapi-app@latest backend --quickstart
We'll proceed with the installation and login to our Strapi account when prompted (you'll have to signup instead if this is your first time using Strapi).
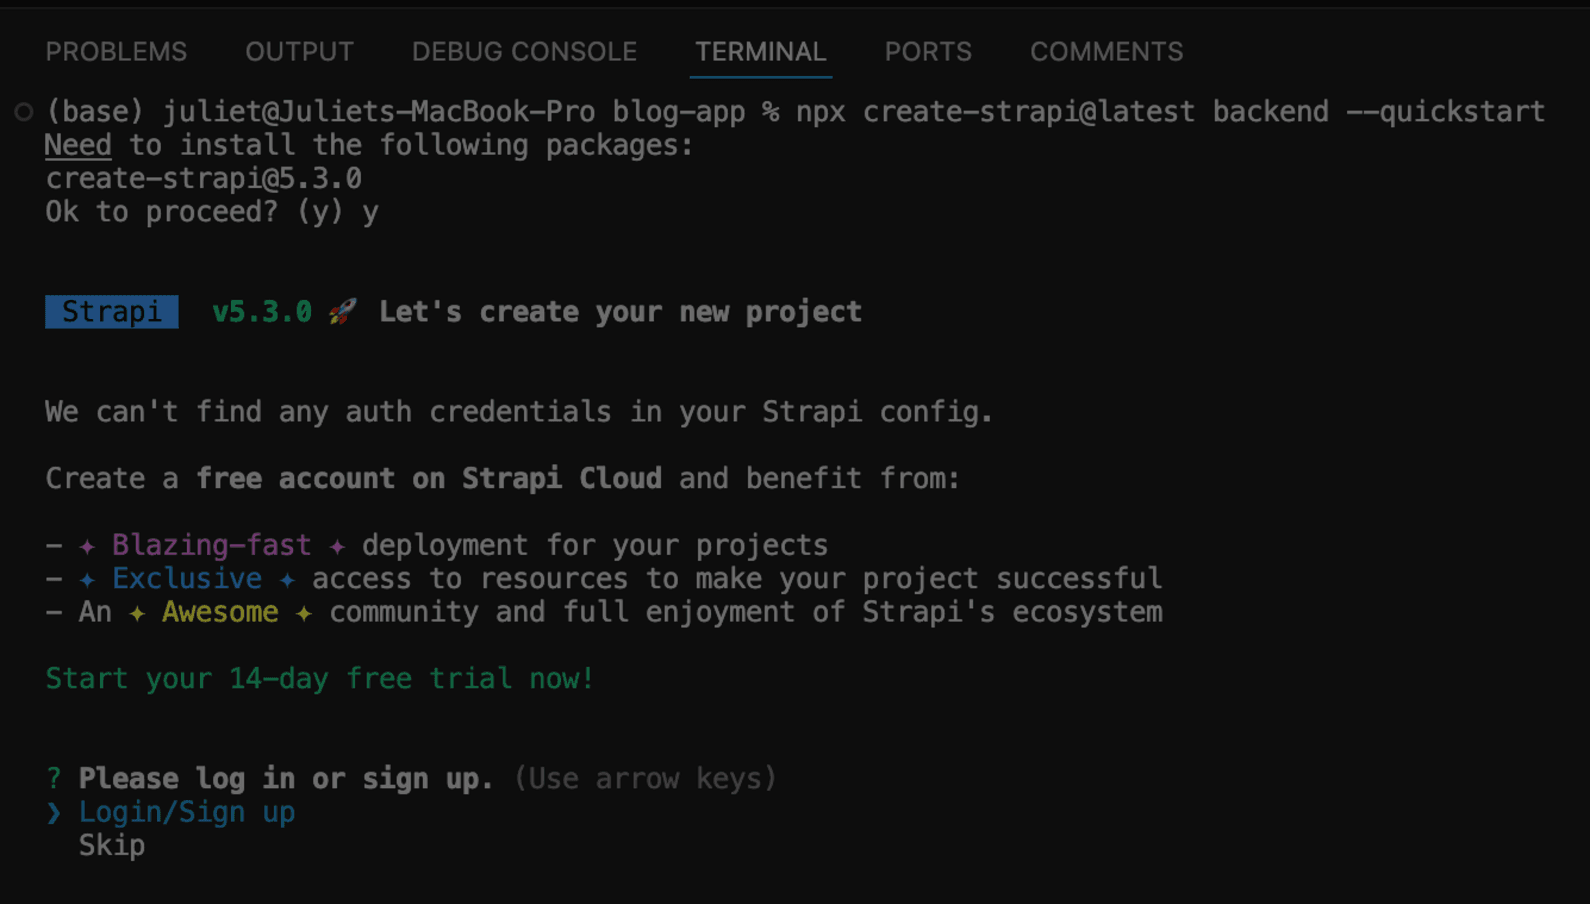
This will create a new Strapi 5 project in the 'blog-app' directory and install necessary dependencies.
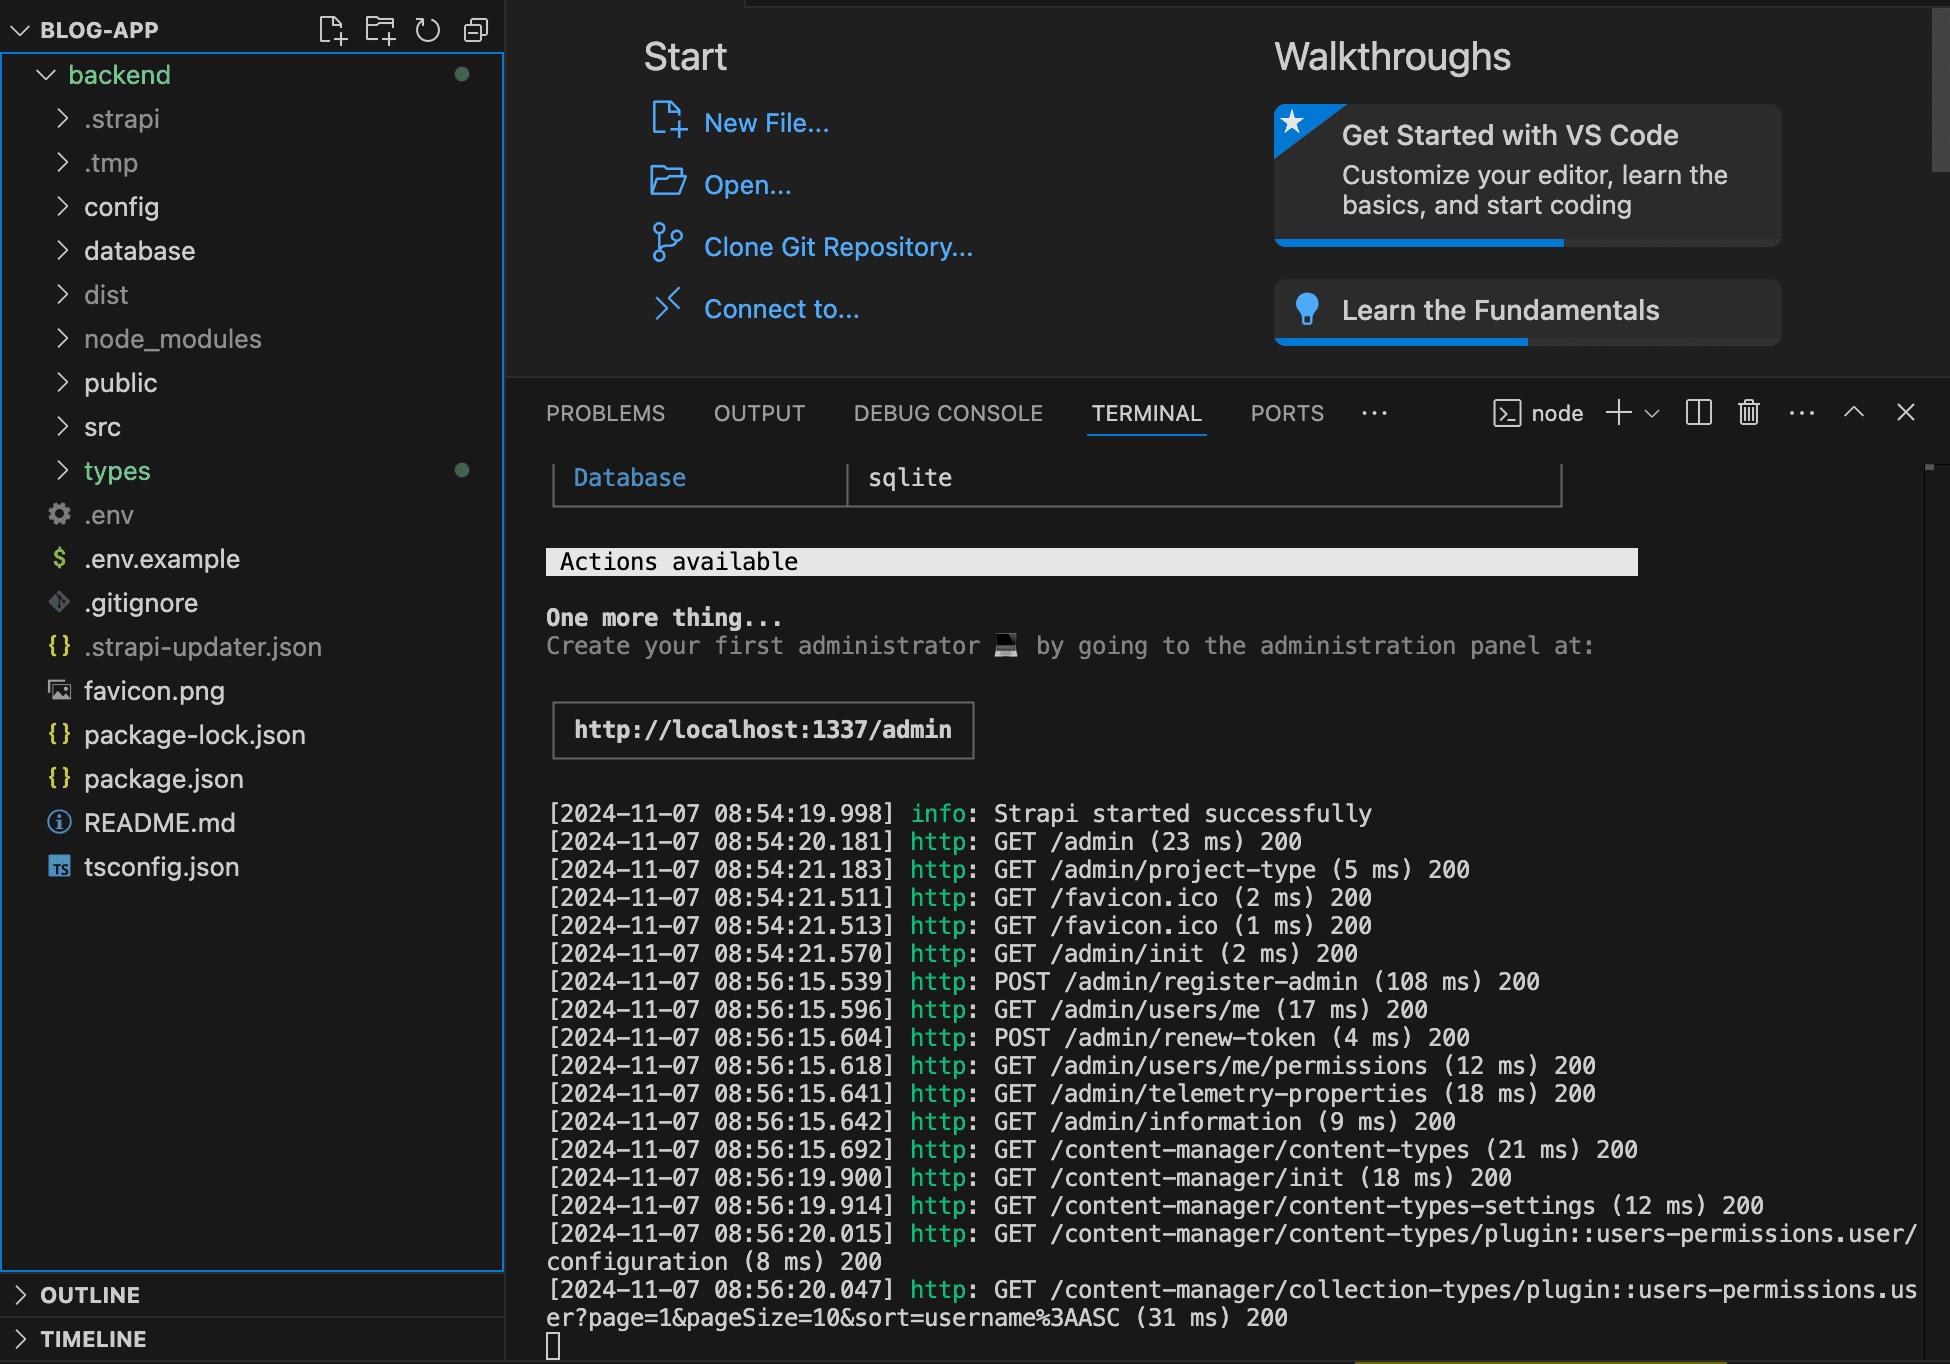
After creating the Strapi project, we'll navigate to the project folder:
cd backendStart up the Strapi server (if you're not automatically directed to the Strapi panel on your browser) using:
npm run develop
OR
yarn develop
This will open up the Strapi admin dashboard of our newly created project at this url "http://localhost:1337/admin", which will be provided in our terminal. We'll then input our details, including name, email, and password to assess our admin panel.
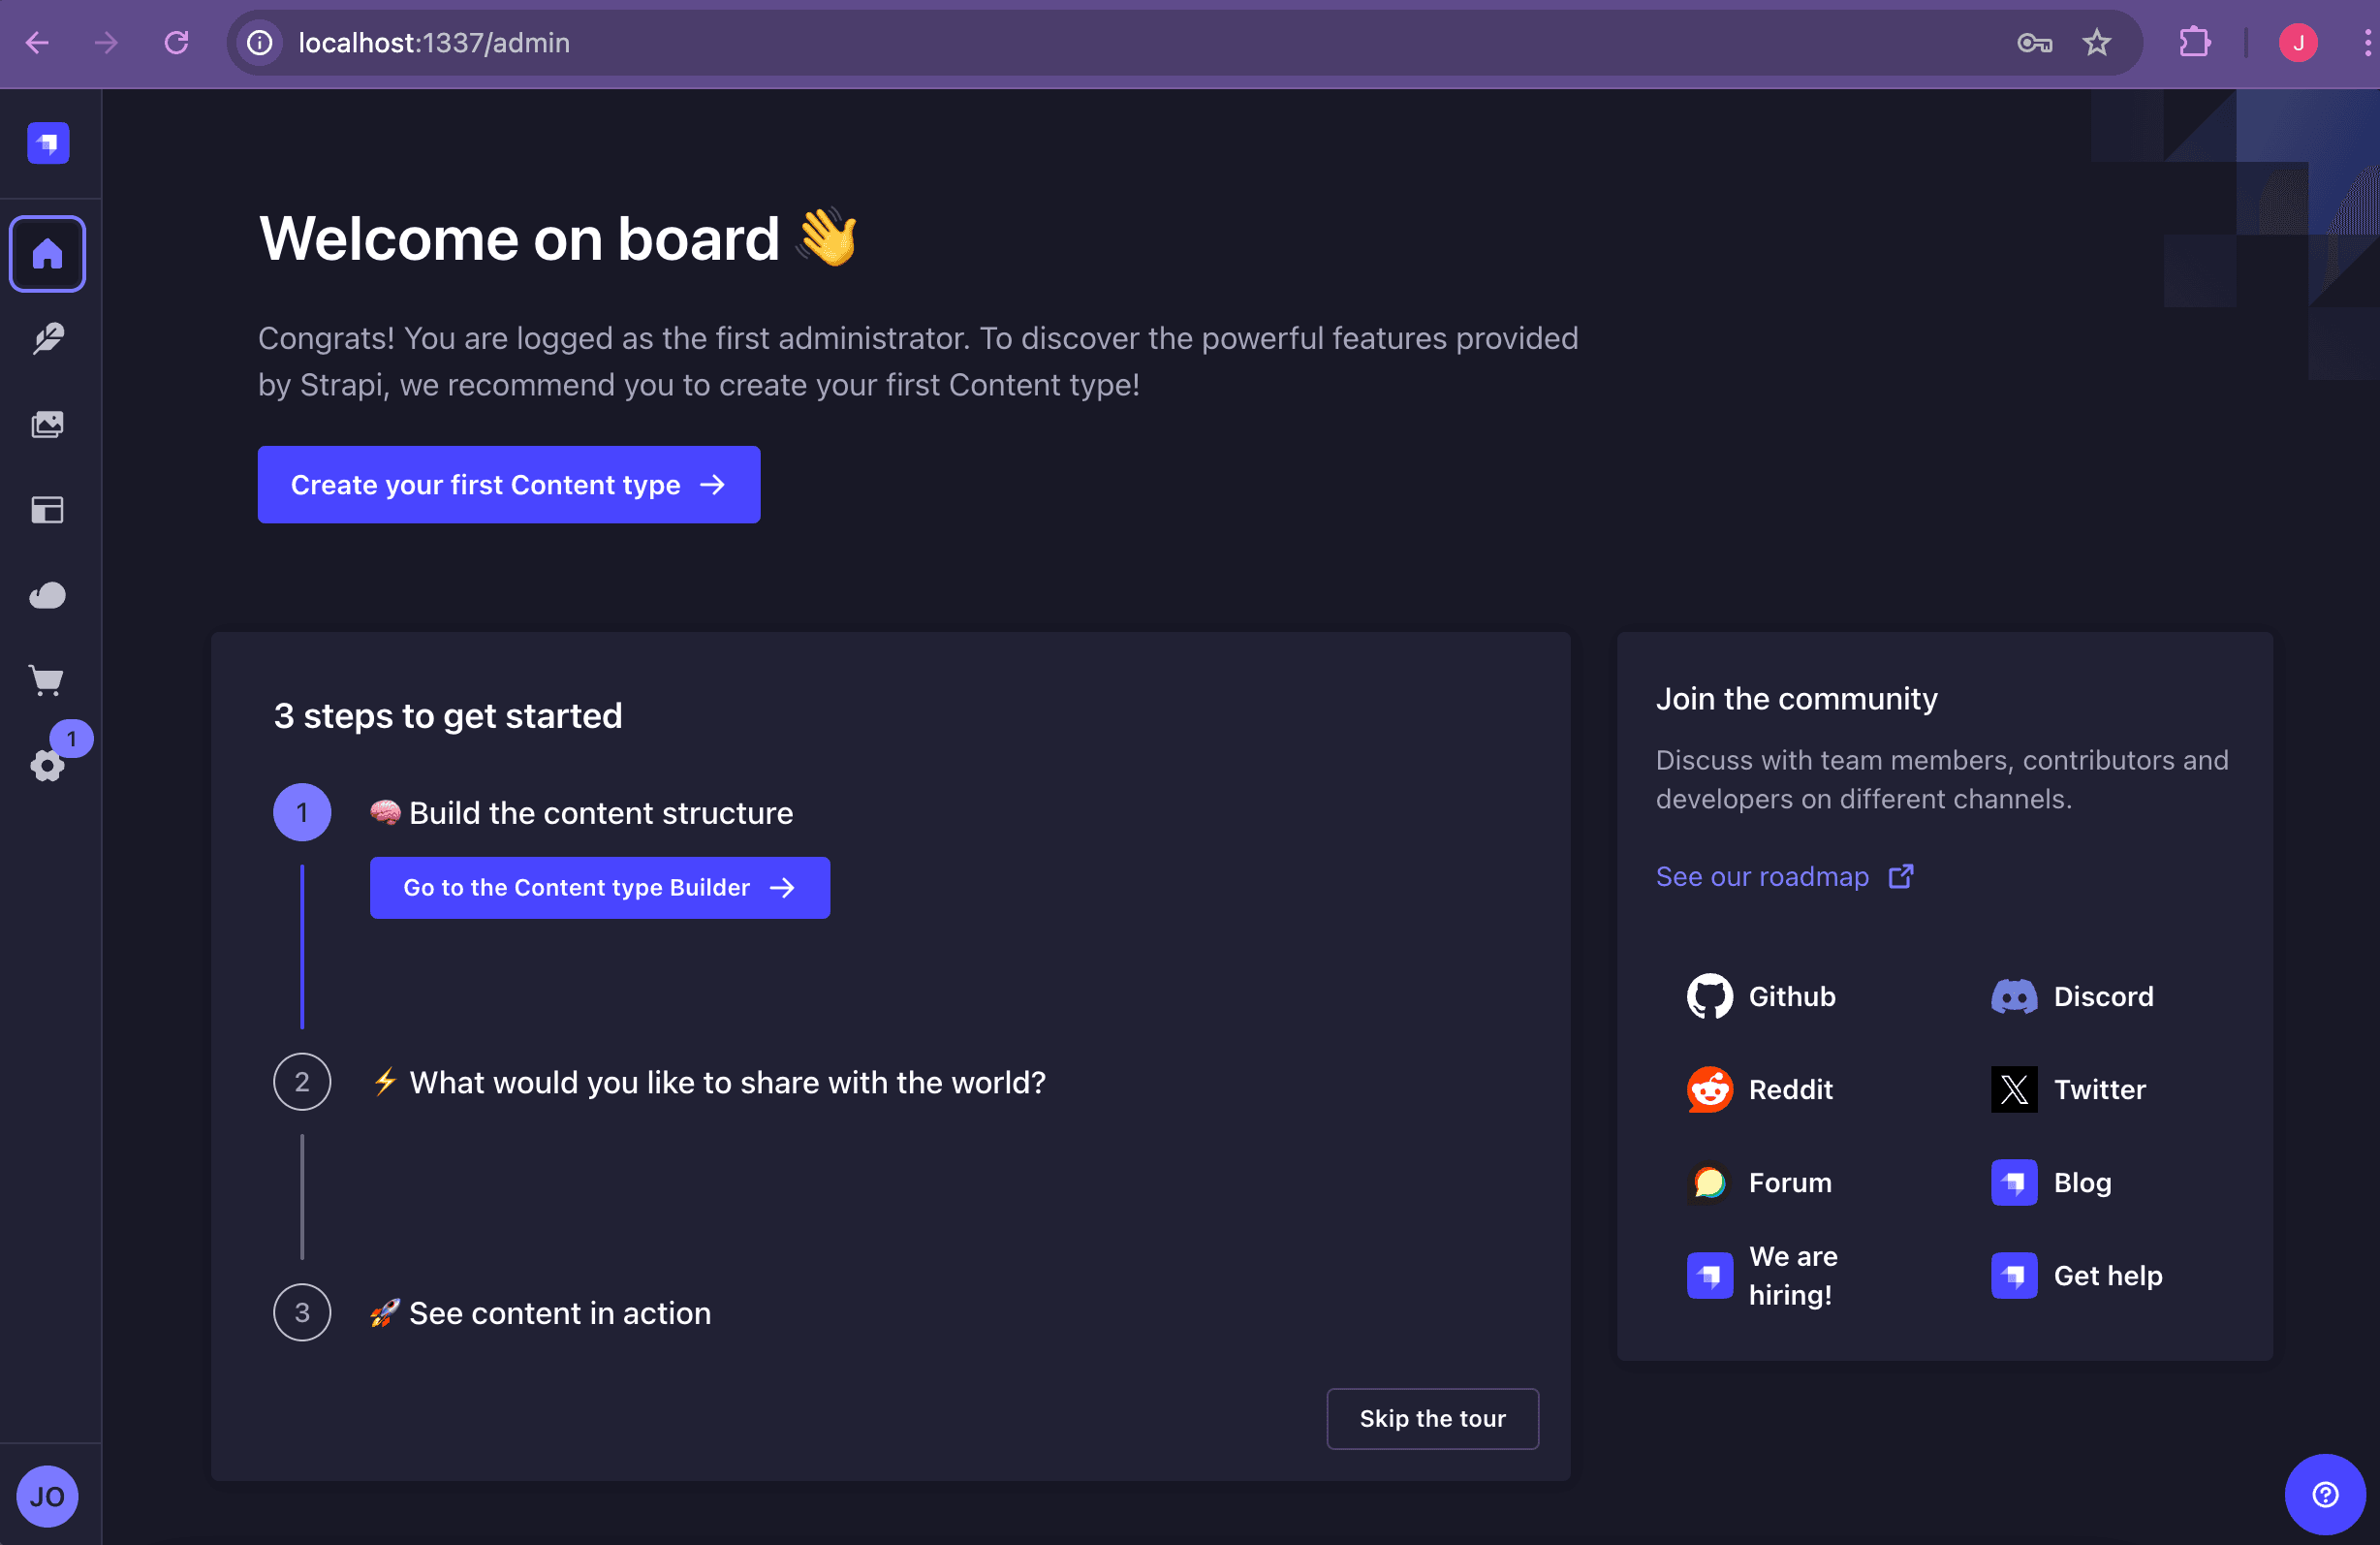
This is where we’ll create collections, manage content types, and configure API settings for our blog application.
Creating Strapi Collection Types
Here's a breakdown of the collection types we'll create, along with their respective fields:
- Category
Nameslug
- Author
namebiobioImage
- Post
titlecontentfeaturedImageexcerptreadingTime- (this we will automatically update based on the content)slugcategoryauthor
Create Category Collection Type
To get started, we'll first create content type for the collection by navigating to the Content-Type Builder page. We'll click the "Go to the Content type builder" button on our dashboard or click the fourth icon on the sidebar navigation labelled "Content-Type Builder".
We'll then create our first collection by clicking the "Create new collection type" option. A modal opens up where we'll be prompted to input our first collection name - Category, then hit "Continue".
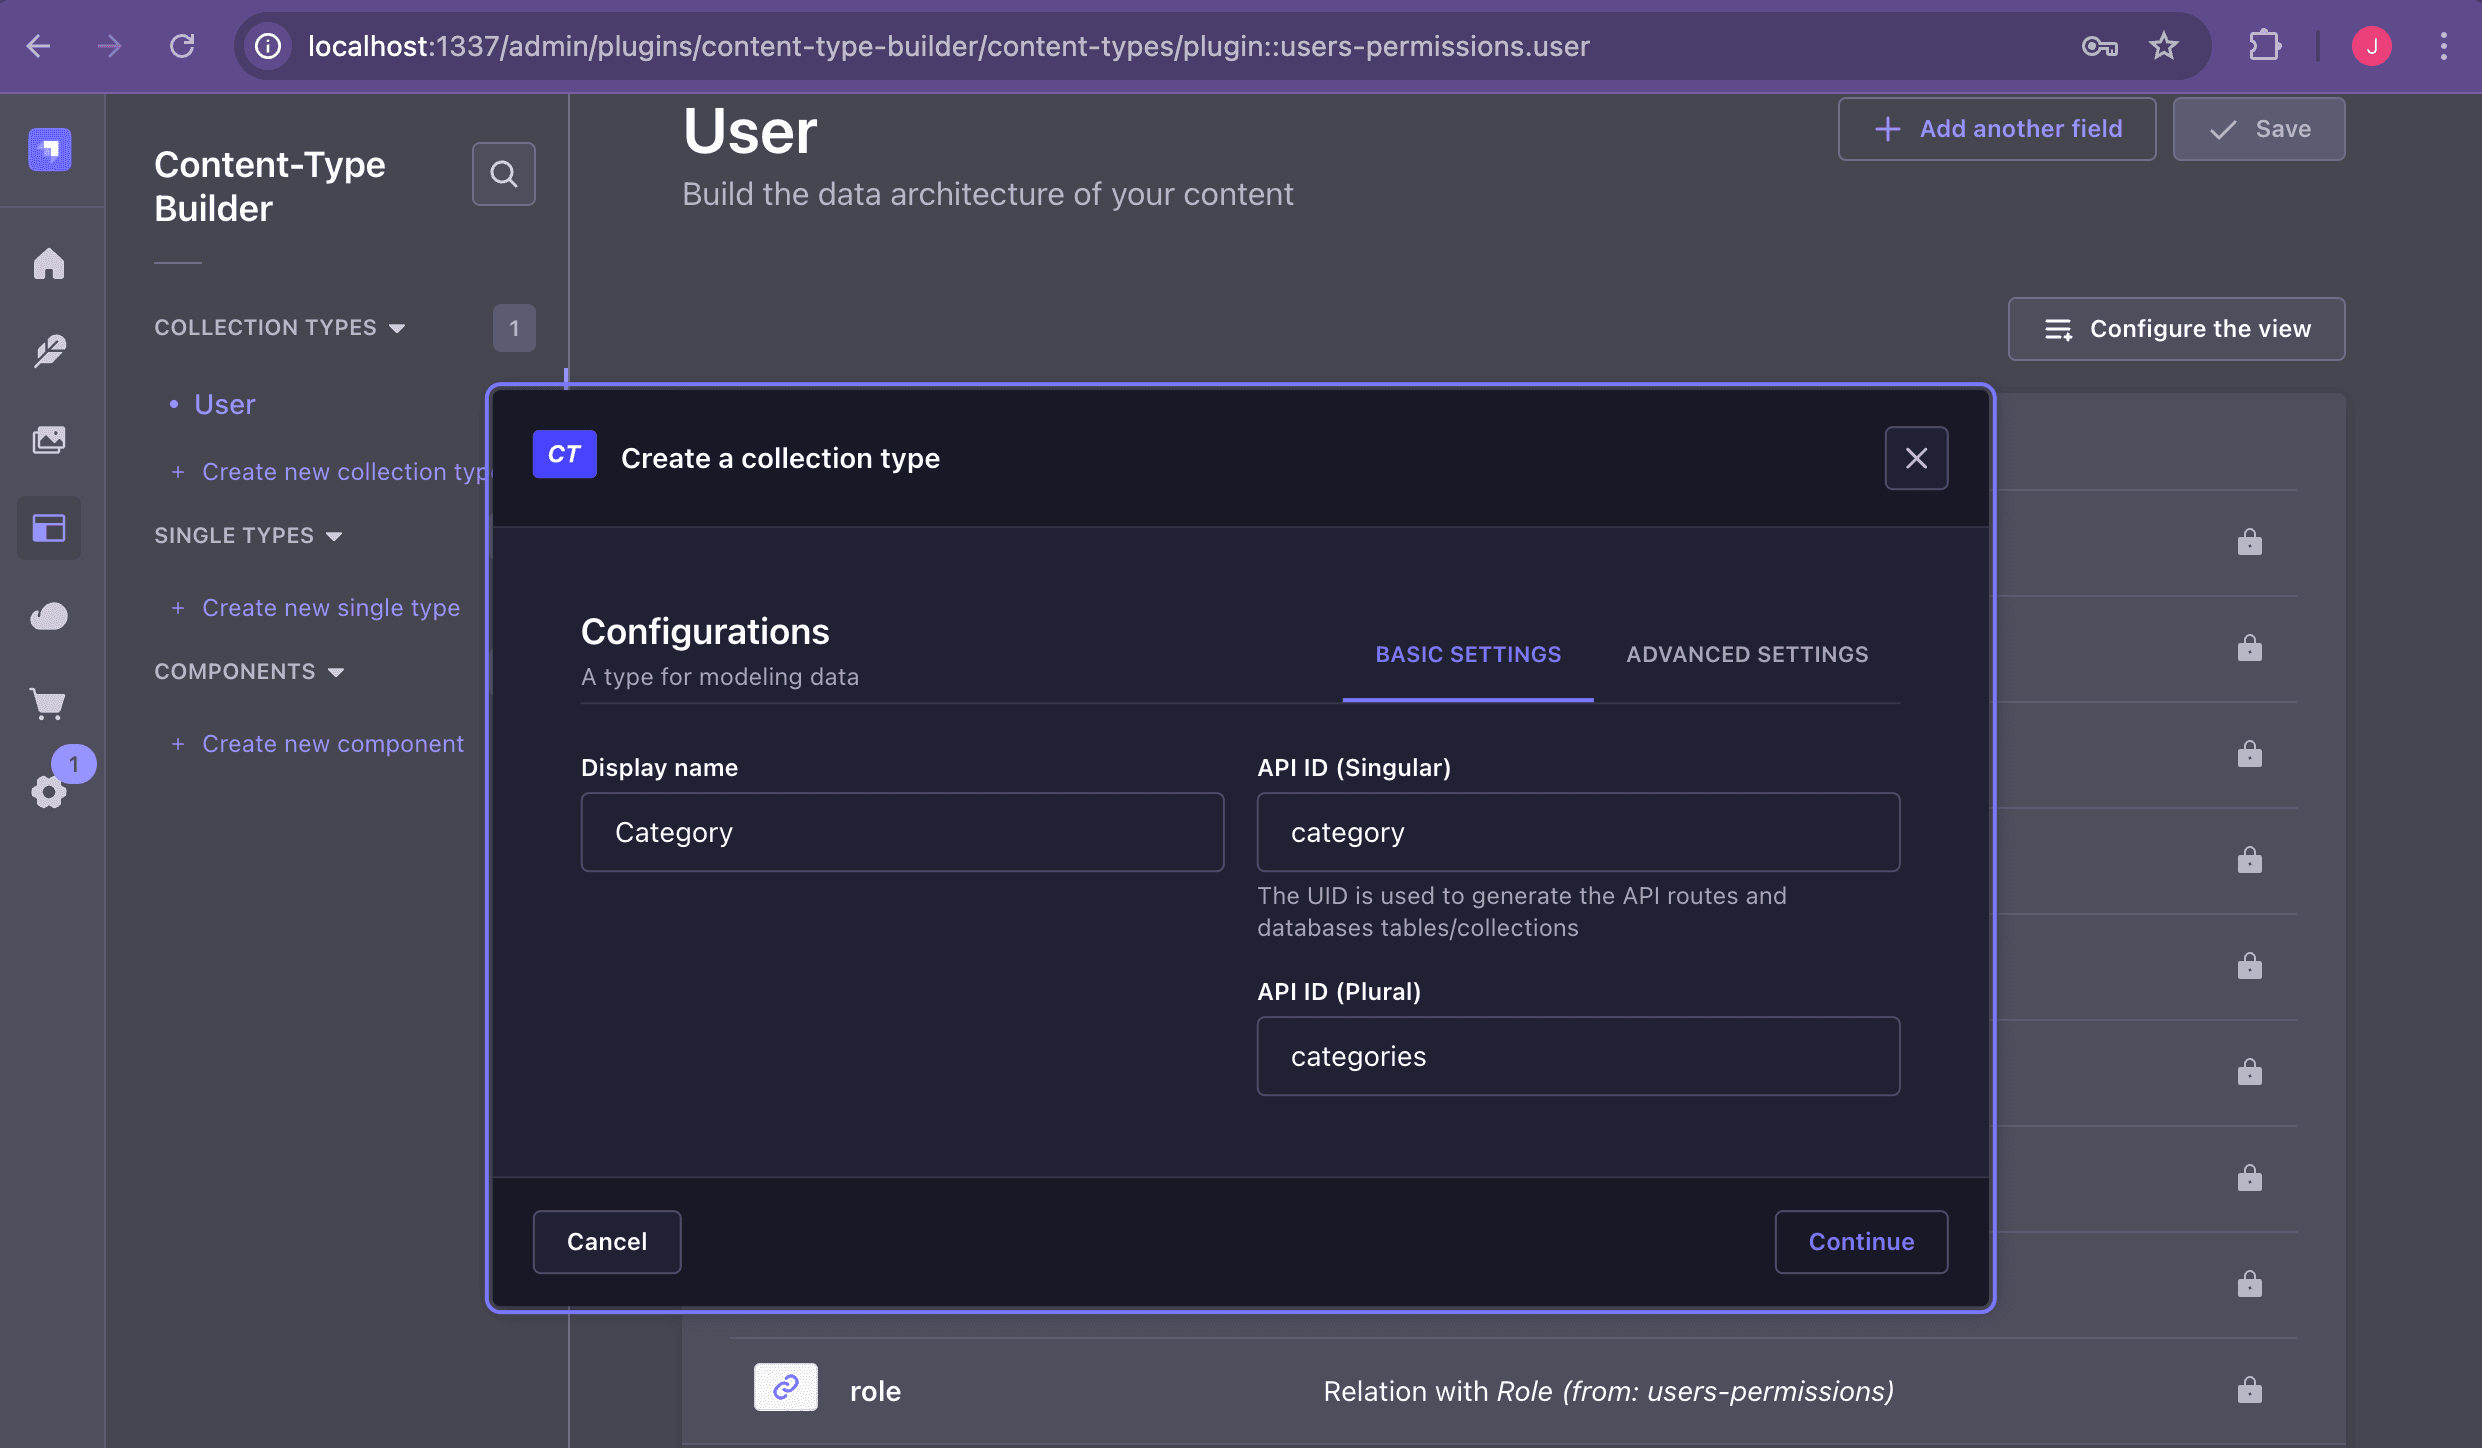
NB: Name your collection in the singular, as Strapi automatically pluralizes the word.
Next, we'll be asked to select our collection field type. Choose the field types according to the fields we discussed above, i.e, Category collection will have two fields- Name and slug.
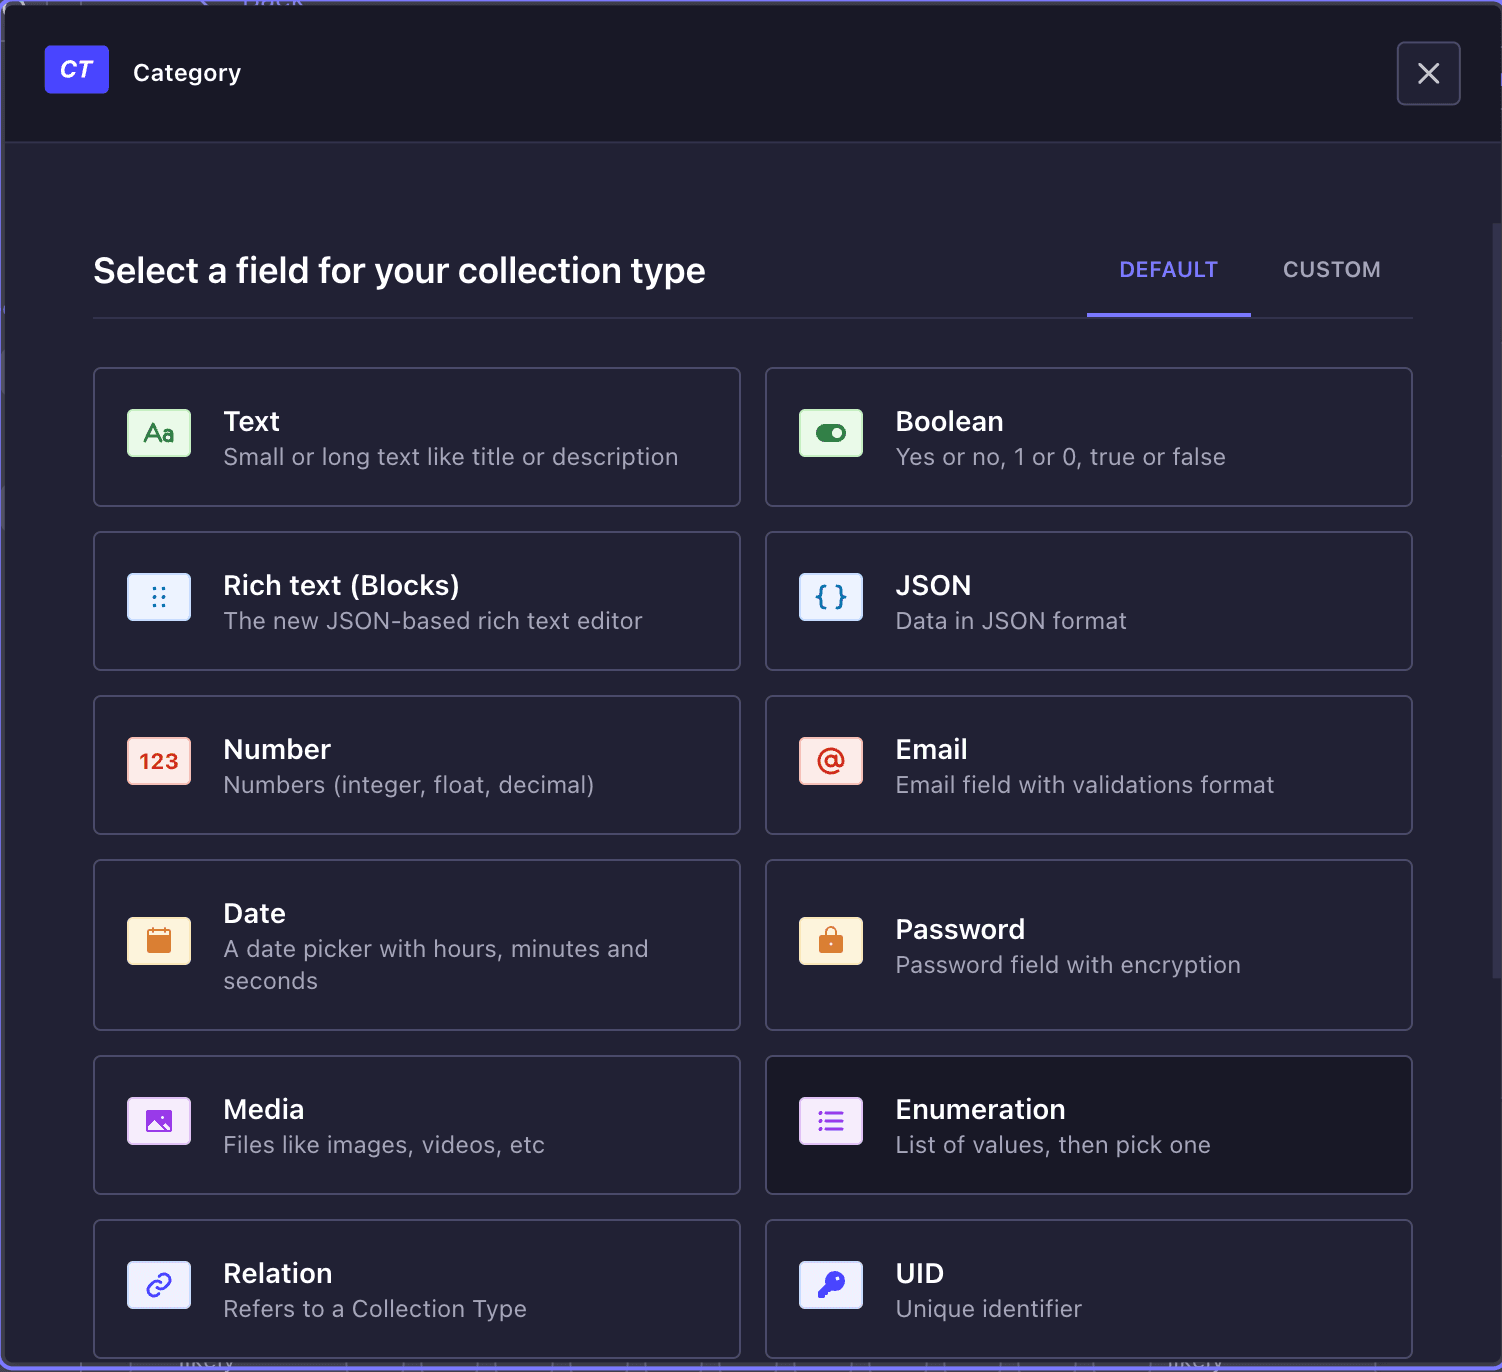
The Name field will be a text (short text) type, so select the 'Text' option and tick the 'Short text' radio button. The slug field will be a 'UID' type, so select the 'UID' option.
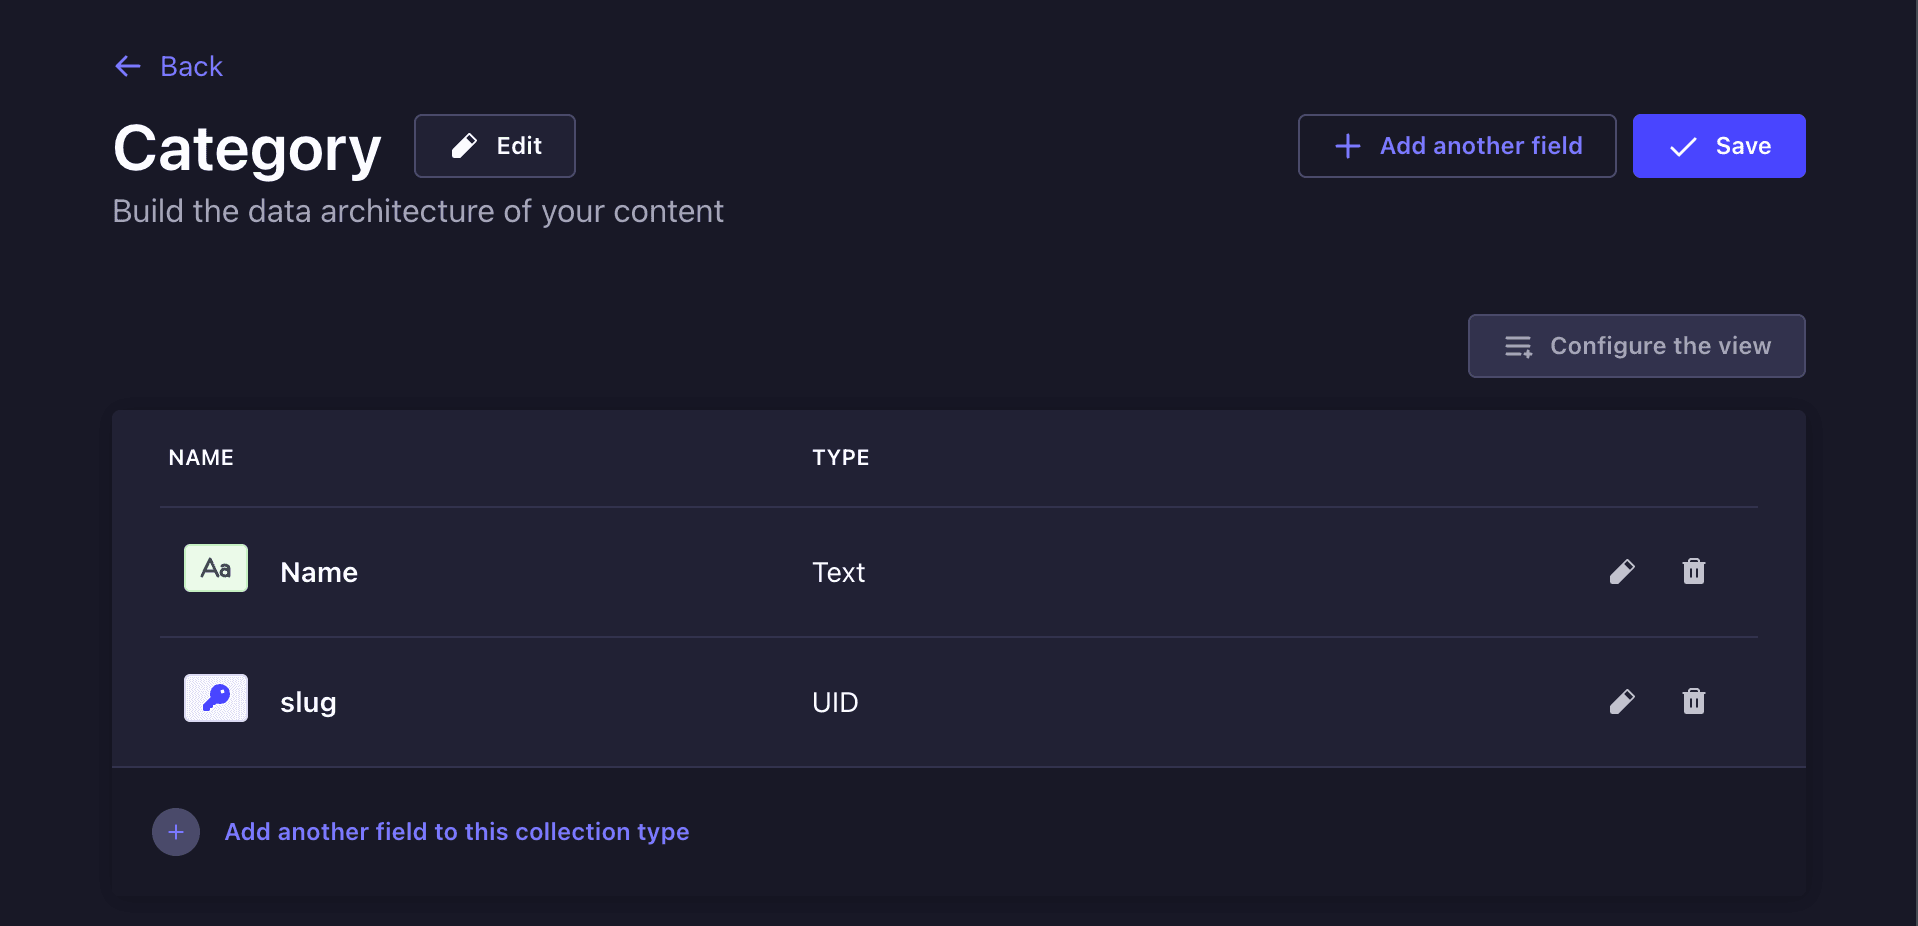
We'll then click the "Save" button located at the top-right hand corner of our page to save the fields created.
Follow the same steps to create the other two collections (Author and Post) and their respective fields.
Creating Author Collection
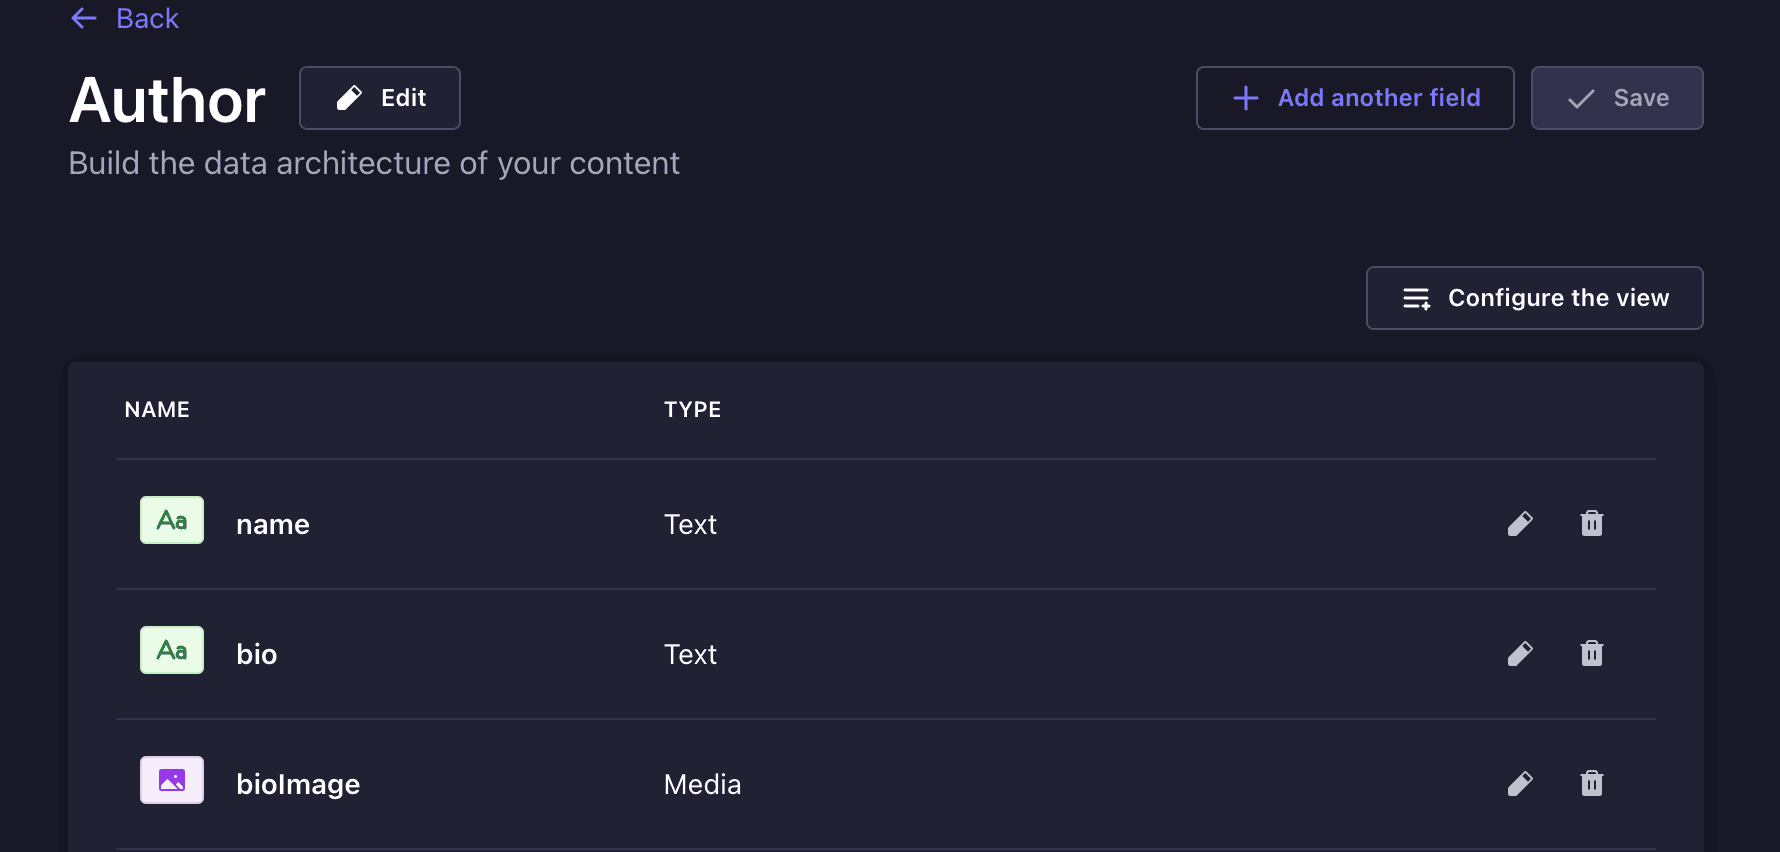
Authors will manage details about blog post authors. We'll go to Content-Types Builder again, create a new collection type called "Author" and add fields for name (Text), bio (Text), and bioImage (Single Media).
Create Post Collection
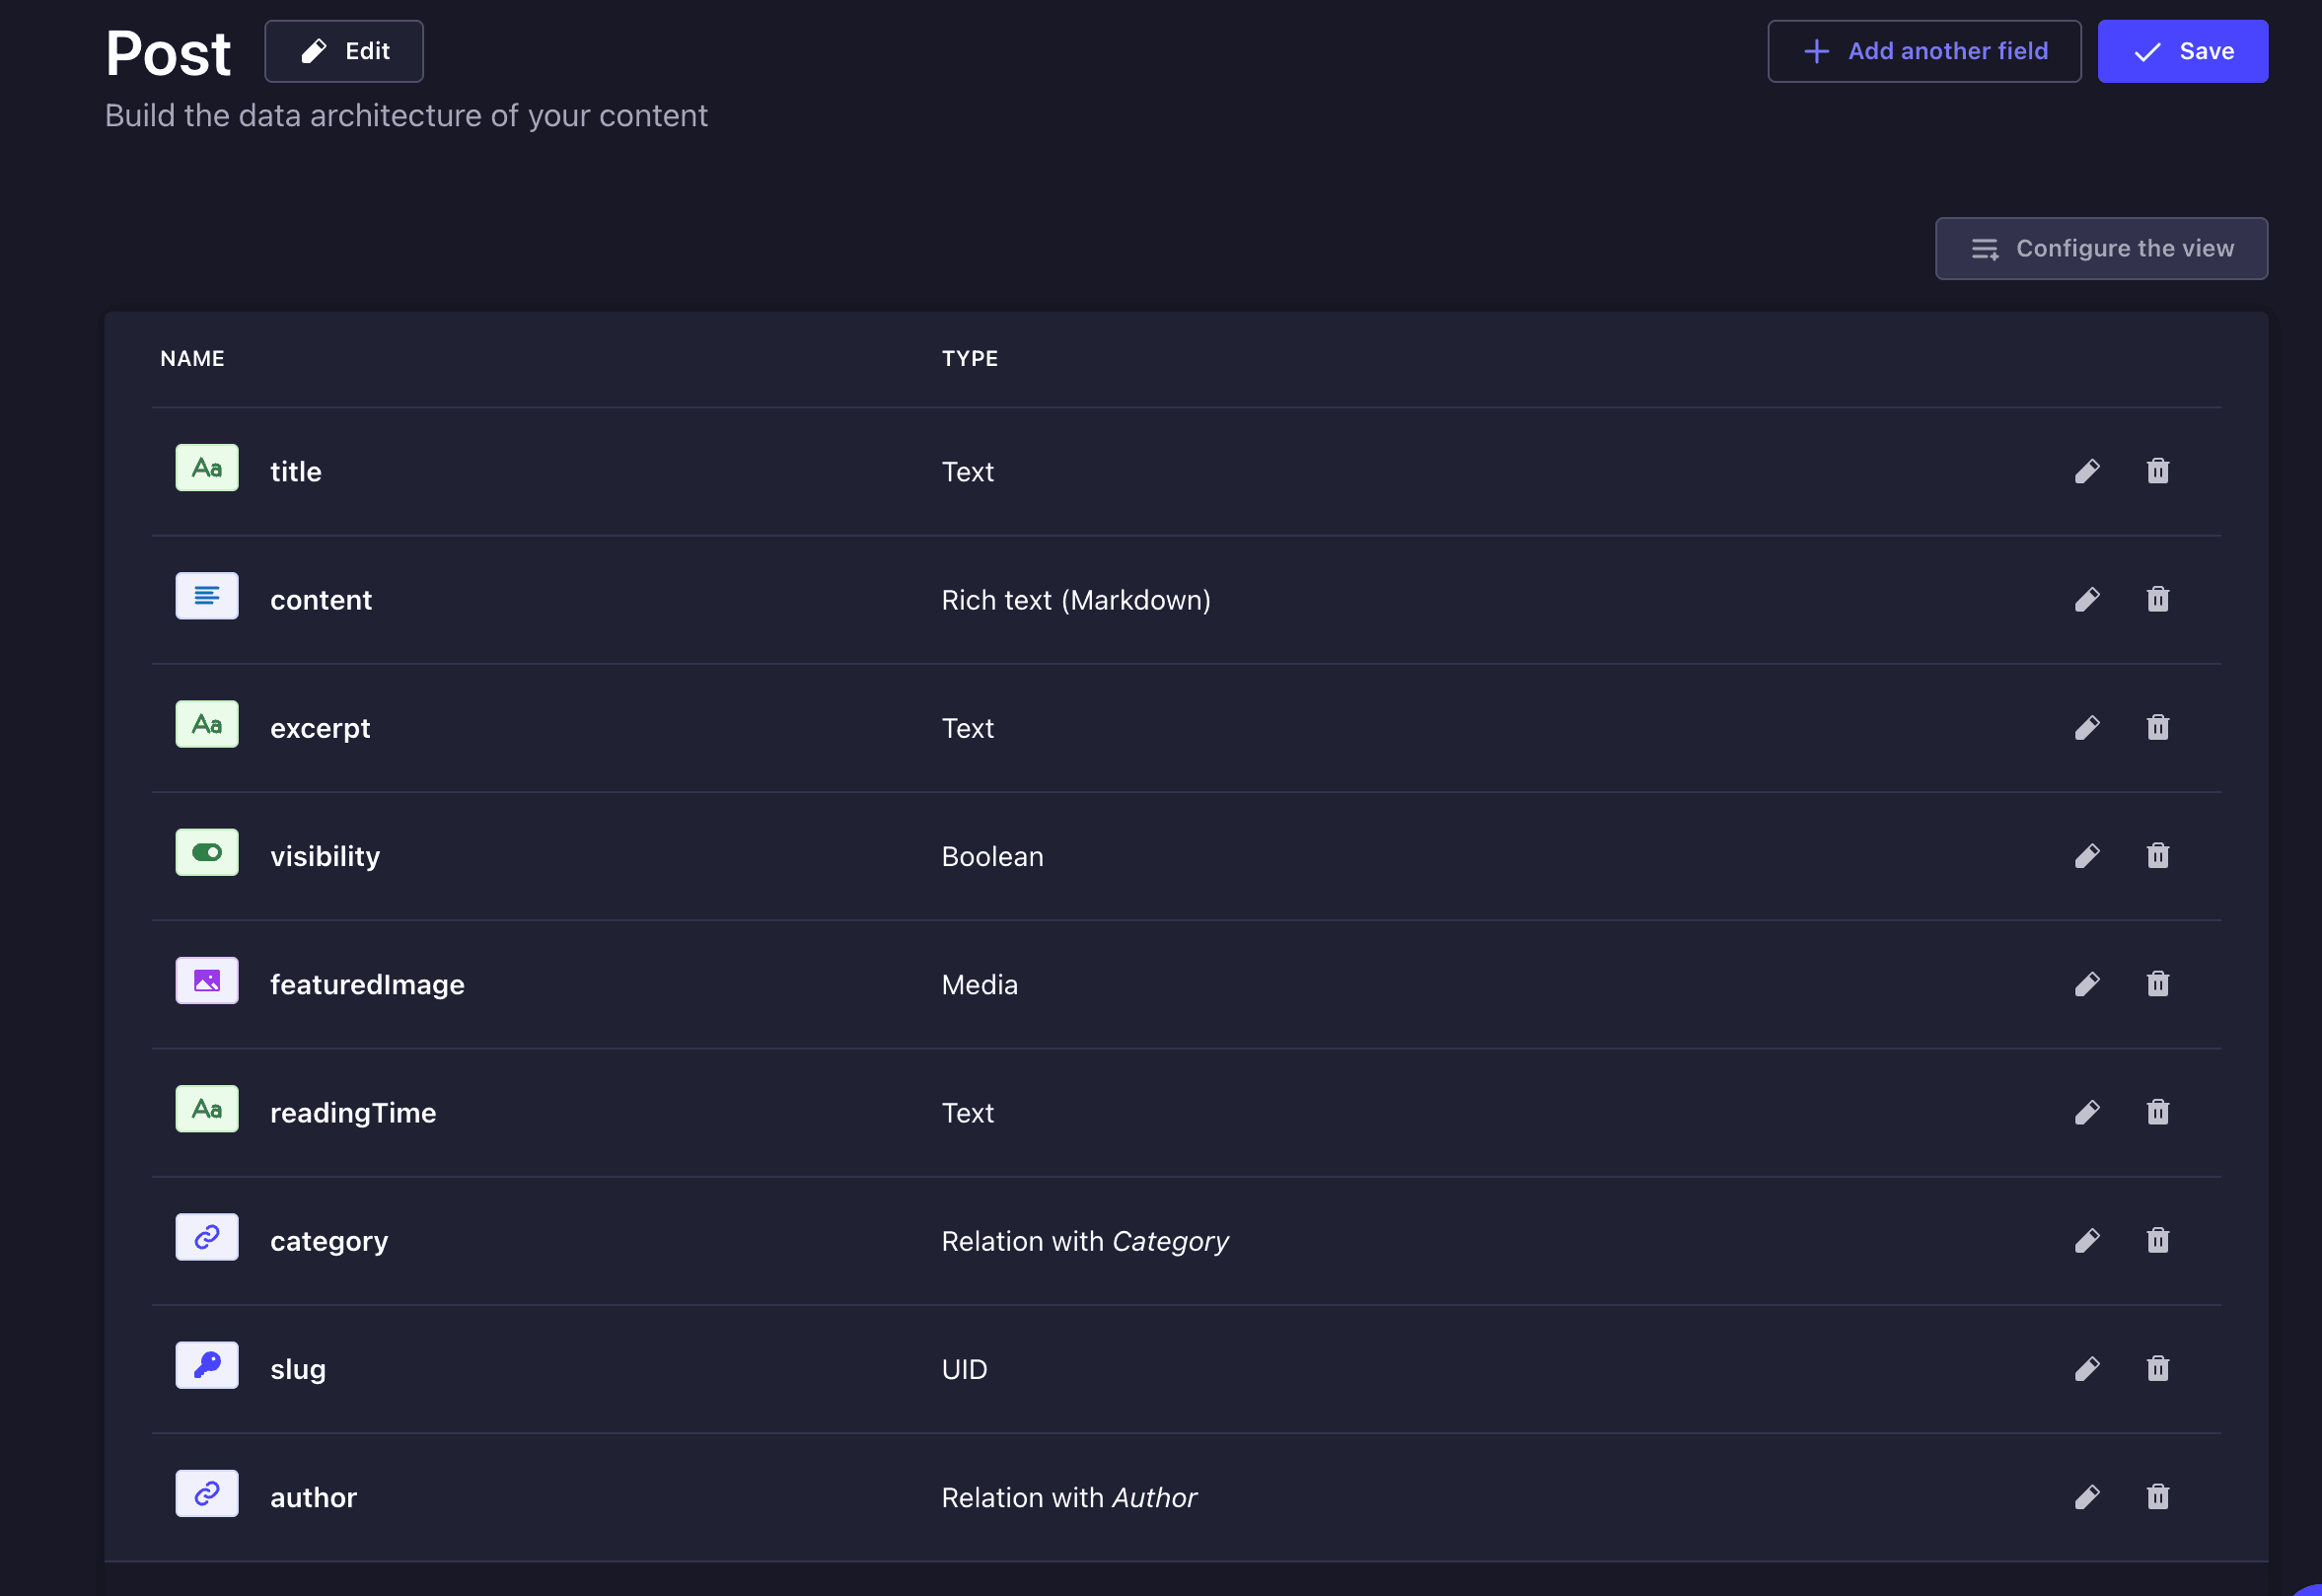
The Post collection holds the main content of our blog. We'll create a collection type called "Post" with fields for title (Text), content (Rich Text-Markddown), excerpt (Text), visibility (Boolean), readingTime (Text), published_at (Date), and any other relevant fields like featuredImage (Media) as shown in the image below.
Author and Post Strapi Relation
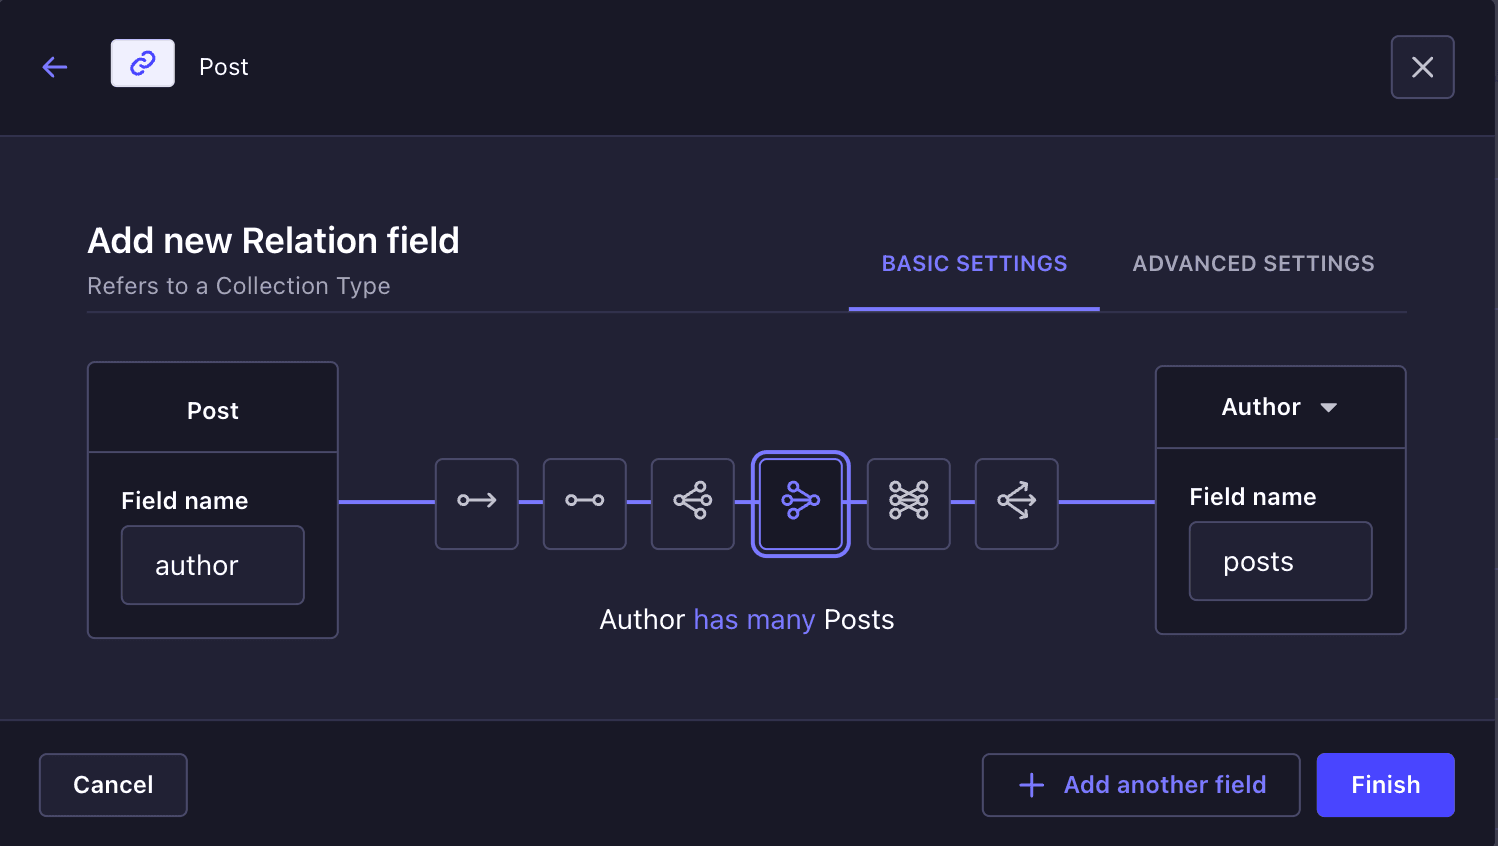
To link authors with their blog posts, we need to create a relationship. In the Post collection, we'll add a field of type Relation. Then we'll set it to relate one Author to many Posts. This way, each post can only have one author, but an author can have multiple posts.
Category and Post Relation
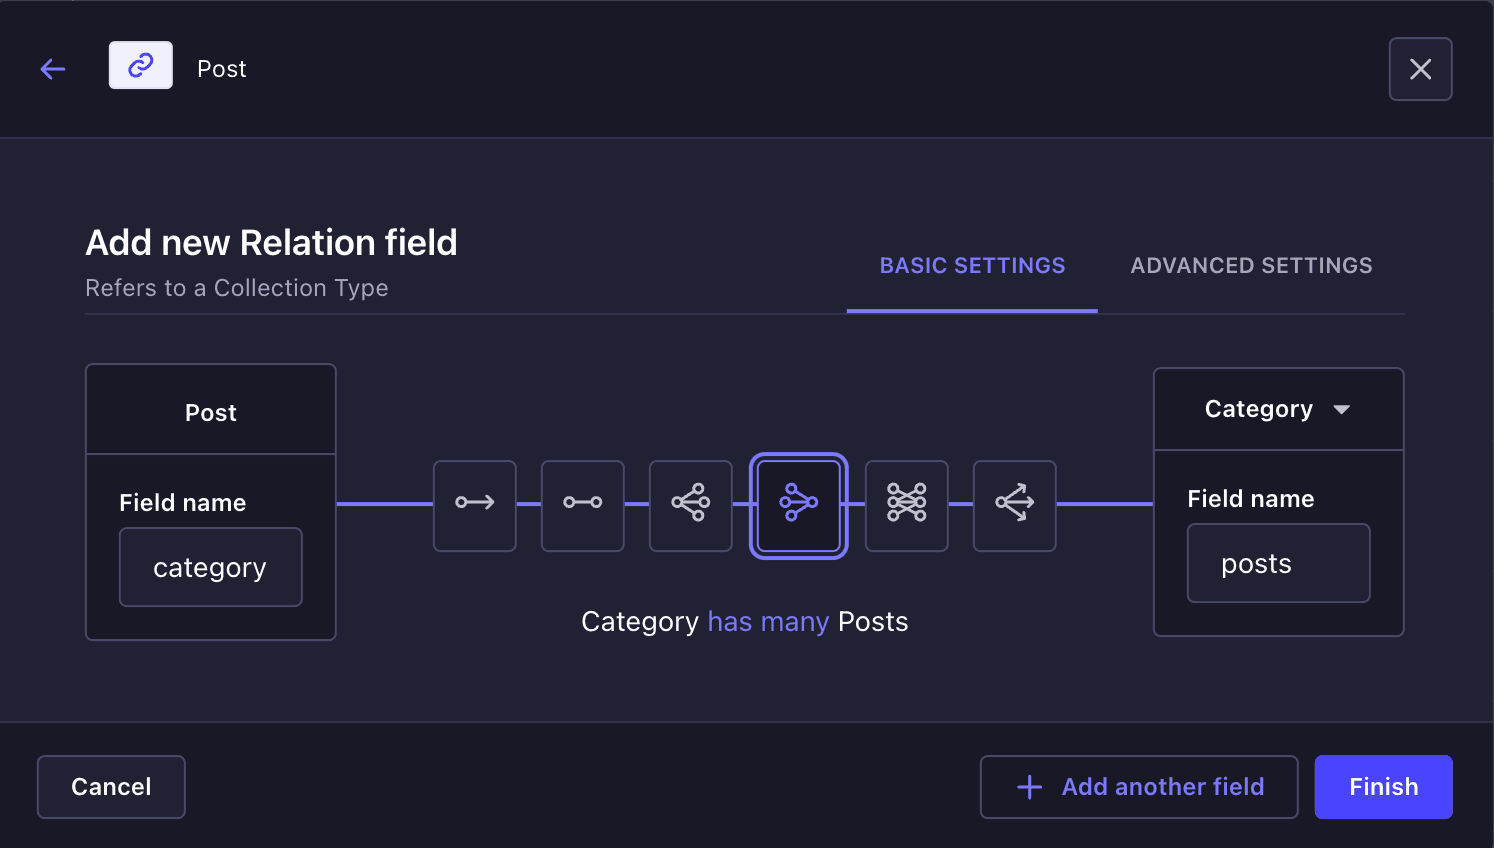
Similarly, we'll link categories to posts by adding a Relation field in the Post collection. We'll set this to category to many posts, so each post can belong to one category, and each category can relate to many posts.
We'll save oour fields and collections after creating them.
Setting up Roles and Permission in Strapi
One important thing in setting up a Strapi project is to configure roles and permissions to control who can access our blog data and grant public access to view and perform CRUD operations.
To set up roles and permission to have public access for our front end to fetch the posts, we'll navigate to Settings → Users & Permissions Plugin → Roles → Public.
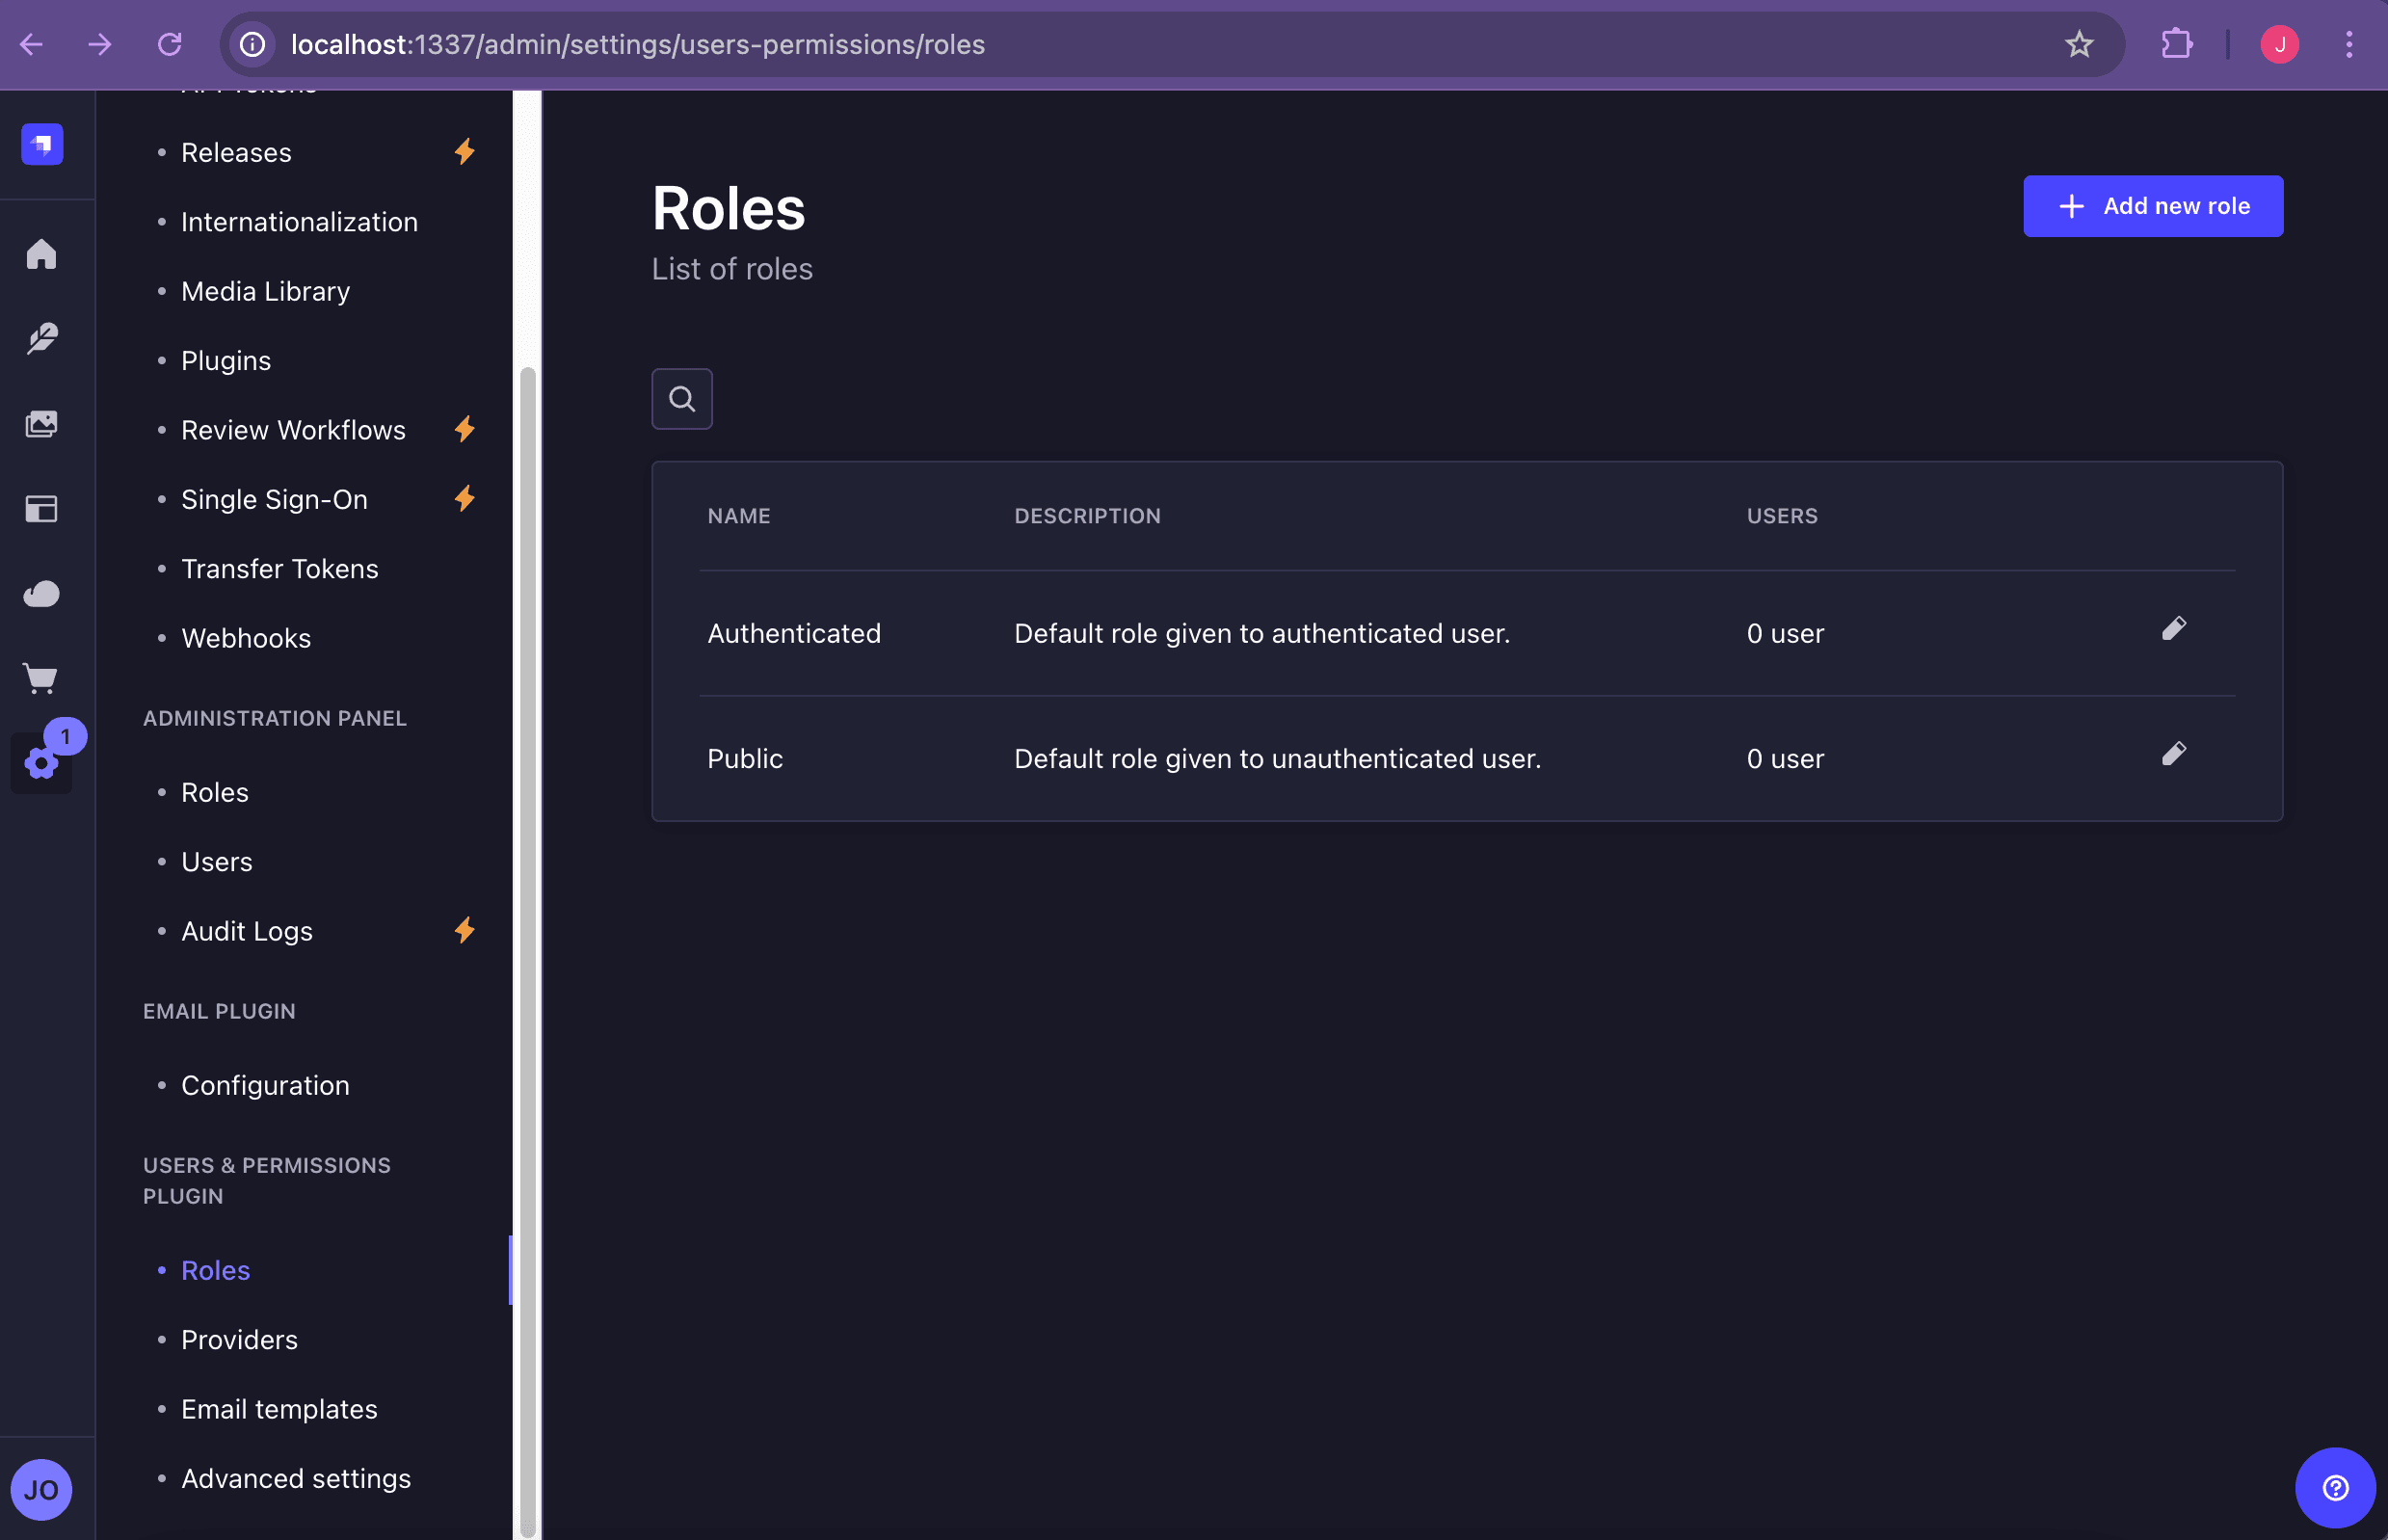
Click the 'edit' icon in Public.
Toggle the Author, Category, and Post collections under "Permission" and tick the find and findOne checkboxes for each of the collection.
These are the only two permissions we'll need for our blog application.
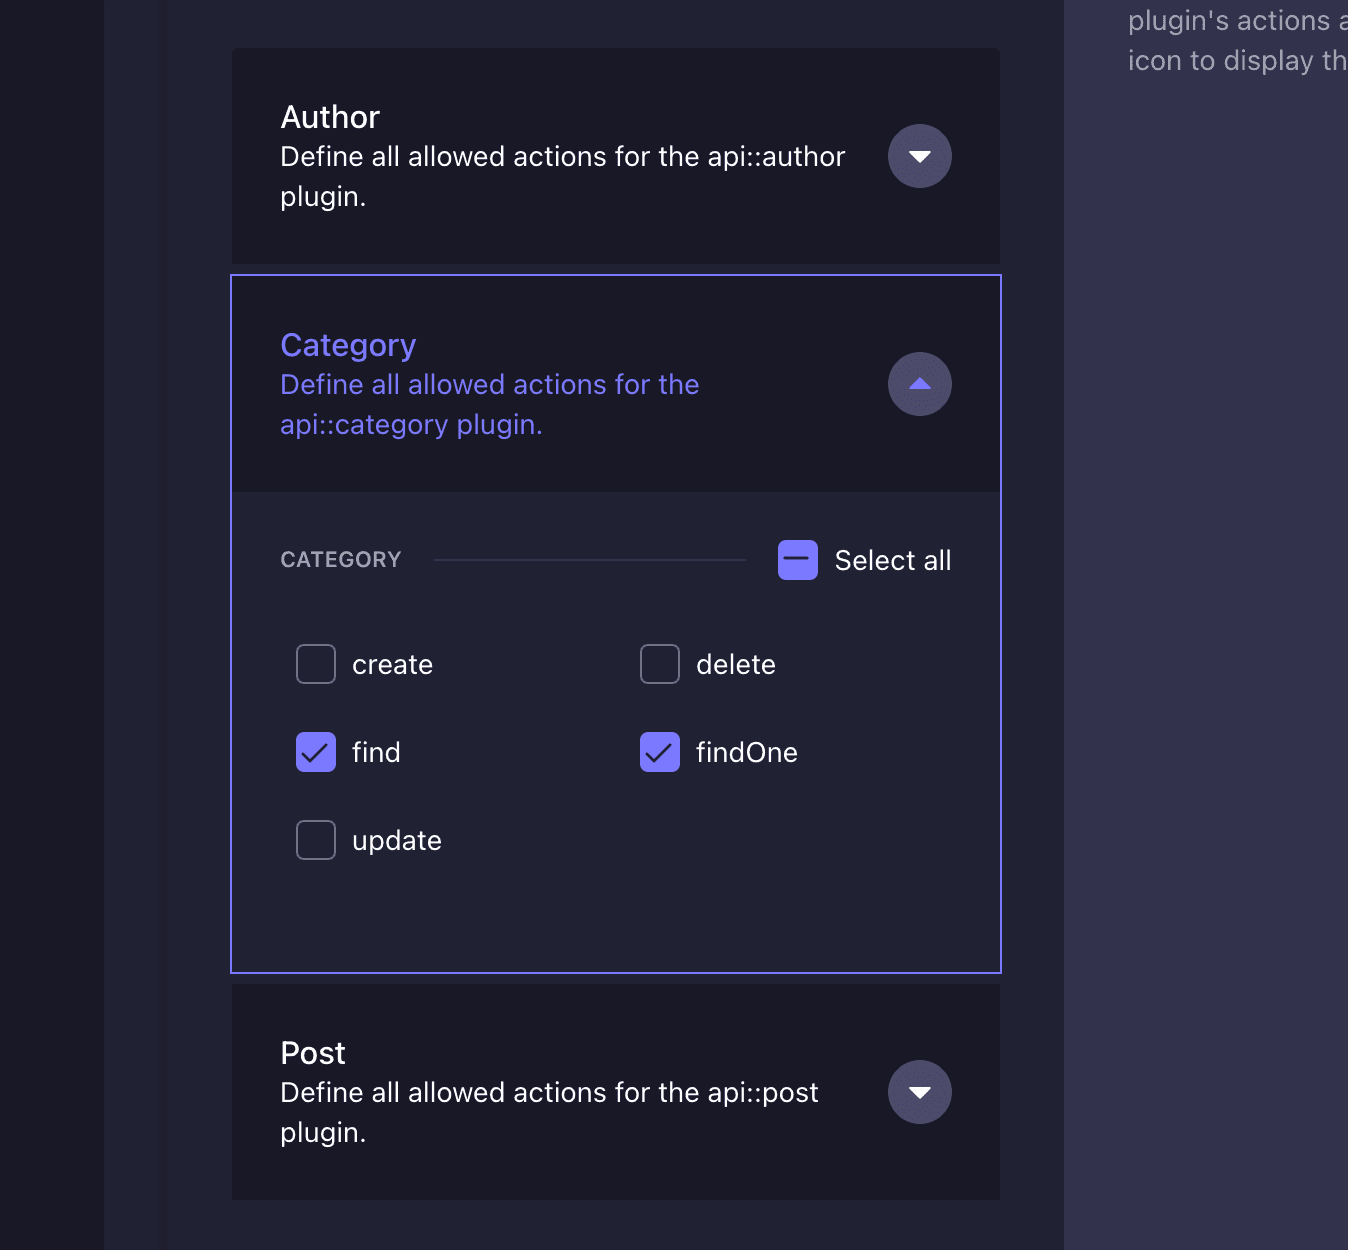
We'll save our settings by clicking the Save button at the top right-hand corner of the page.
Accessing the Post Strapi Endpoints
Strapi automatically generates REST API endpoints for each content type. To access any API endpoint in Strapi, add the pluralized name of the collection type to the base URL.
In our case, for us to access all posts, we can use the endpoint: http://localhost:1337/api/posts. This URL retrieves all posts in JSON format.
We can access this endpoint because we made the /posts endpoints public.
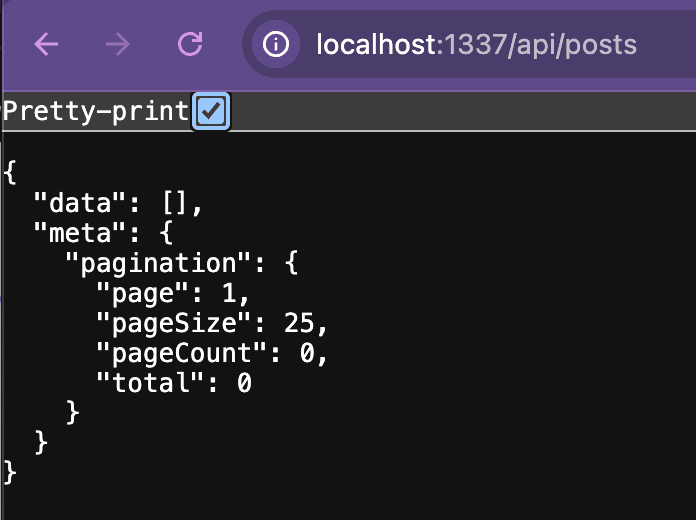
The reason we are getting an empty array JSON response for our endpoint is because we haven't added any post entry in our Strapi admin panel.
Before we finalize the Strapi backend for this blog app, let's modify the Post functionality to automatically include the reading time when a post is created or edited. We can achieve this by modifying the Post Collection Model.
Adding Reading Time to Post Collection
Strapi, by default, is extensible, meaning it allows us to modify the functionality as we like. For more on Strapi's customization, visit the Strapi customization documentation.
To add this reading time functionality to the post collection, we'll open our Strapi project in our code editor. Restart using yarn develop or npm run develop if the server has stopped. If it hasn't, go on.
Models represent the database's structure. We will be updating the post.js file which contains lifecycle hooks or functions that are called when Strapi queries are executed or database interactions are performed. In this case, we want to update the reading time whenever we create or update/edit a post.
We'll navigate to src/api/post/content-types/post and create a new file called lifecycles.js and paste the following code inside it:
const readingTime = require("reading-time");

module.exports = {
  async beforeCreate(event) {
    console.log("########## BEFORE CREATE ##########");
    if (event.params.data.content) {
      event.params.data.readingTime =
      readingTime(event.params.data.content)?.text || null;
    }
  },

  async beforeUpdate(event) {
    console.log(, "########## BEFORE UPDATE ##########");
    if (event.params.data.content) {
      event.params.data.readingTime =
      readingTime(event.params.data.content)?.text || null;
    }
  },
};
Save the file.
NB: The
lifecycles.jsfile defines lifecycle hooks for the post content type in our Strapi project. These hooks enable us to perform specific actions automatically before certain events occur in a database, such as creating or updating a post.
Quick breakdown of what we did in the lifecycles component:
-
The reading-time library is used to calculate how long it would take to read a given text which is useful for enhancing blog posts with a "Reading Time" indicator.
-
The
beforeCreatelifecycle hook is triggered before a new post is created in the Strapi database. The hook checks if thecontentfield exists in the data being created. Ifcontentexists, the reading-time package is used to calculate the text's reading time, which is then assigned toevent.params.data.readingTime. If thecontentis empty,readingTimeis set to null. -
The
beforeUpdatelifecycle hook is triggered before an existing post is updated in our Strapi database. It performs the same actions as thebeforeCreatehook. It checks to see if the updated data containscontentbefore recalculating and updating the post'sreadingTime.
If we create a new post with content that takes ~3 minutes to read, the readingTime field in the Strapi is automatically adjusted to "3 min read".
If we later update the content to make it shorter or longer, the readingTime field will reflect the changes before they are saved.
NB: For a detailed guide on how to work with Strapi hooks, check out our Understanding the different types/categories of Strapi Hooks article.
After this, we'll install the reading-time package by navigating to the backend folder of our project and running any one of these commands:
yarn add reading-time
#OR
npm i reading-time
We'll then stop and restart our Strapi server using the npm run develop or yarn develop command so the changes can take effect.
Finalizing the Backend
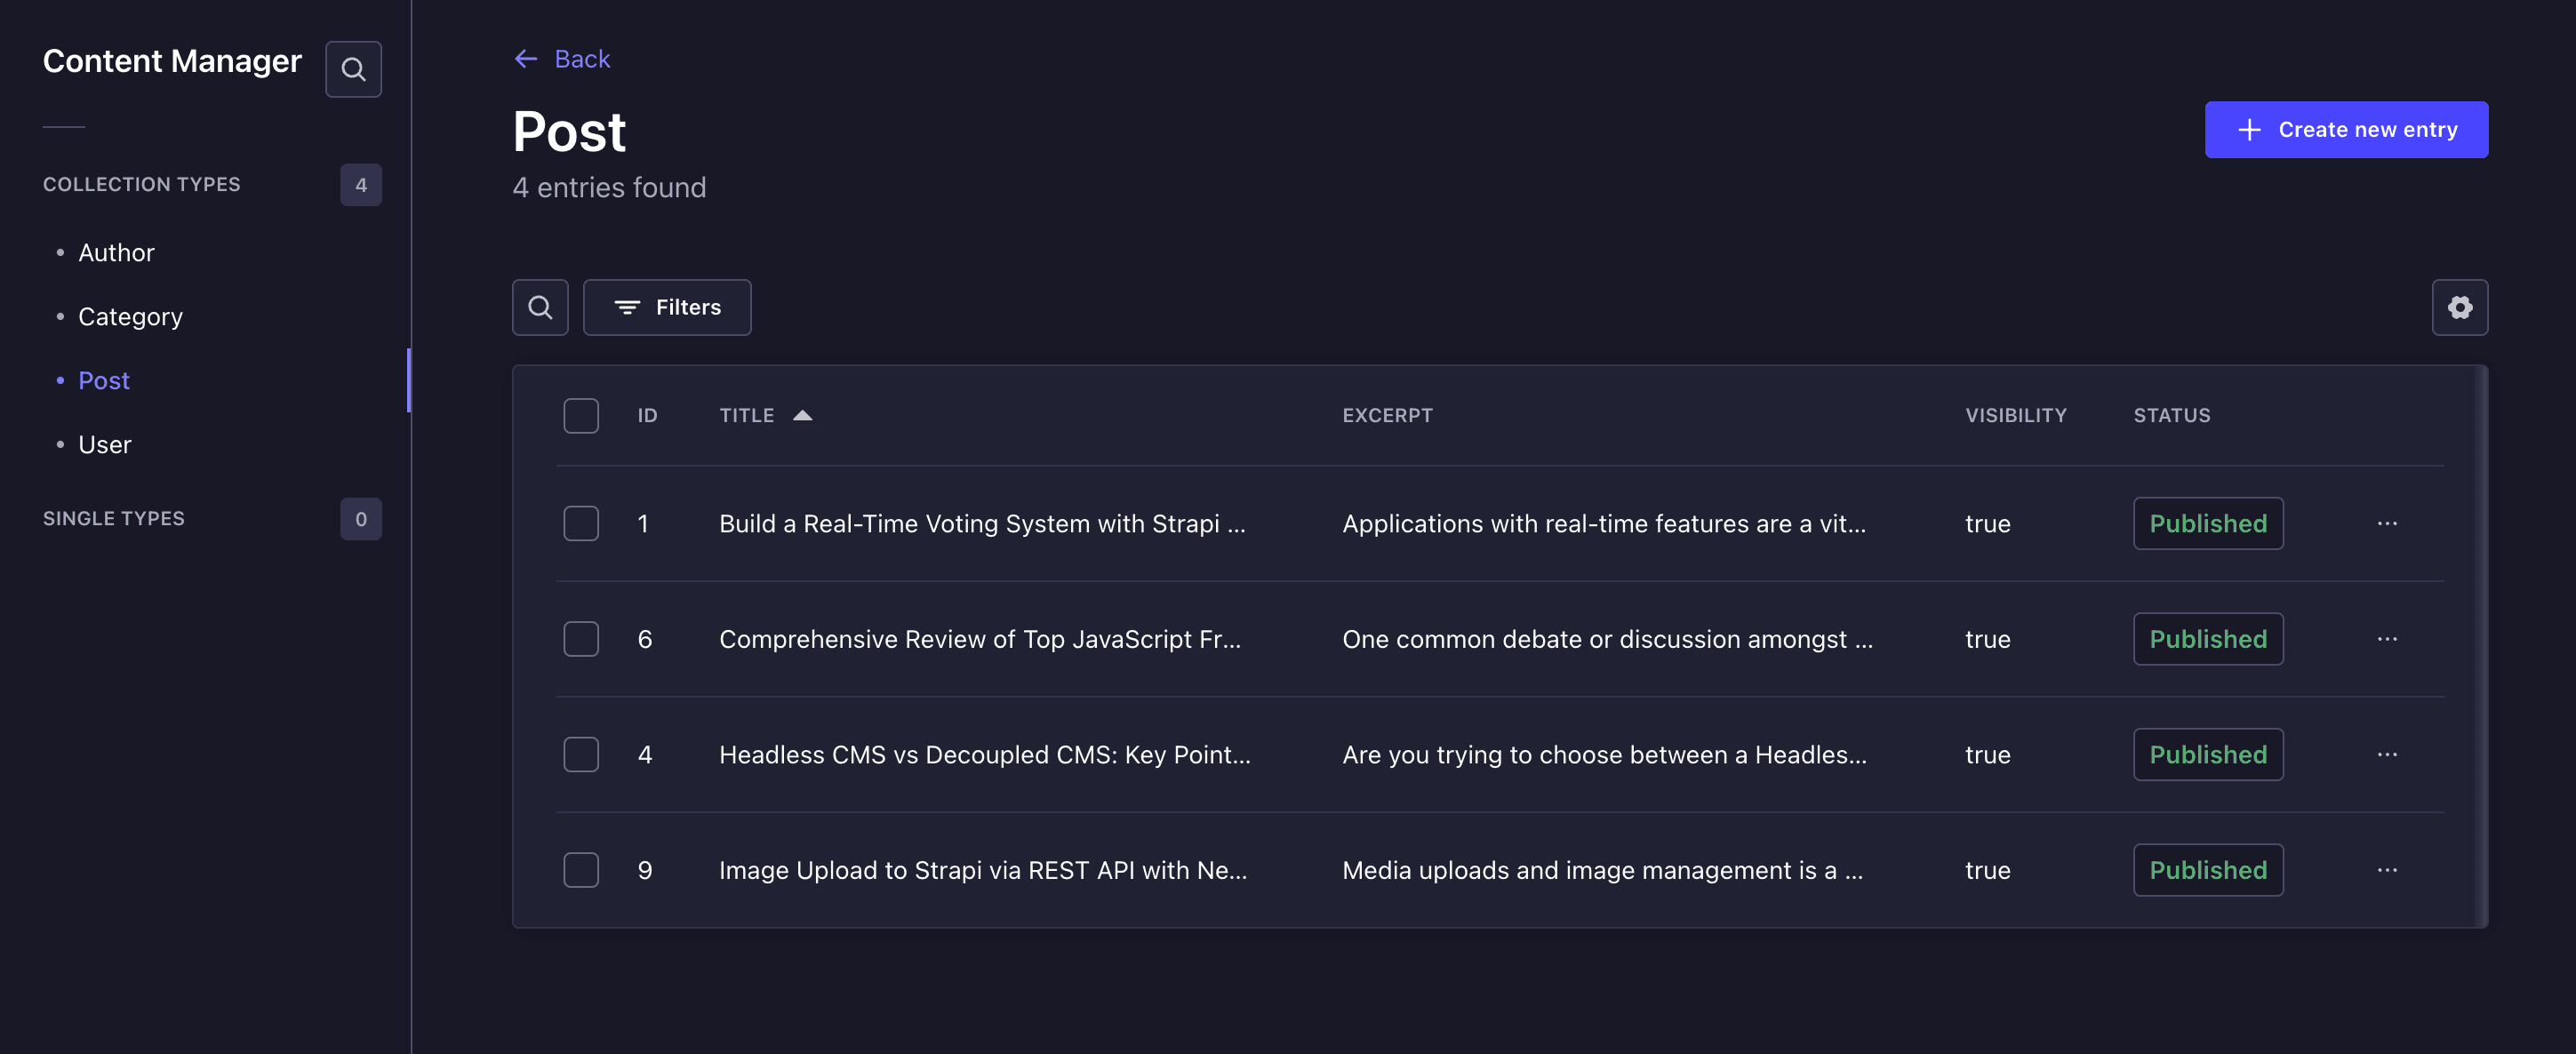
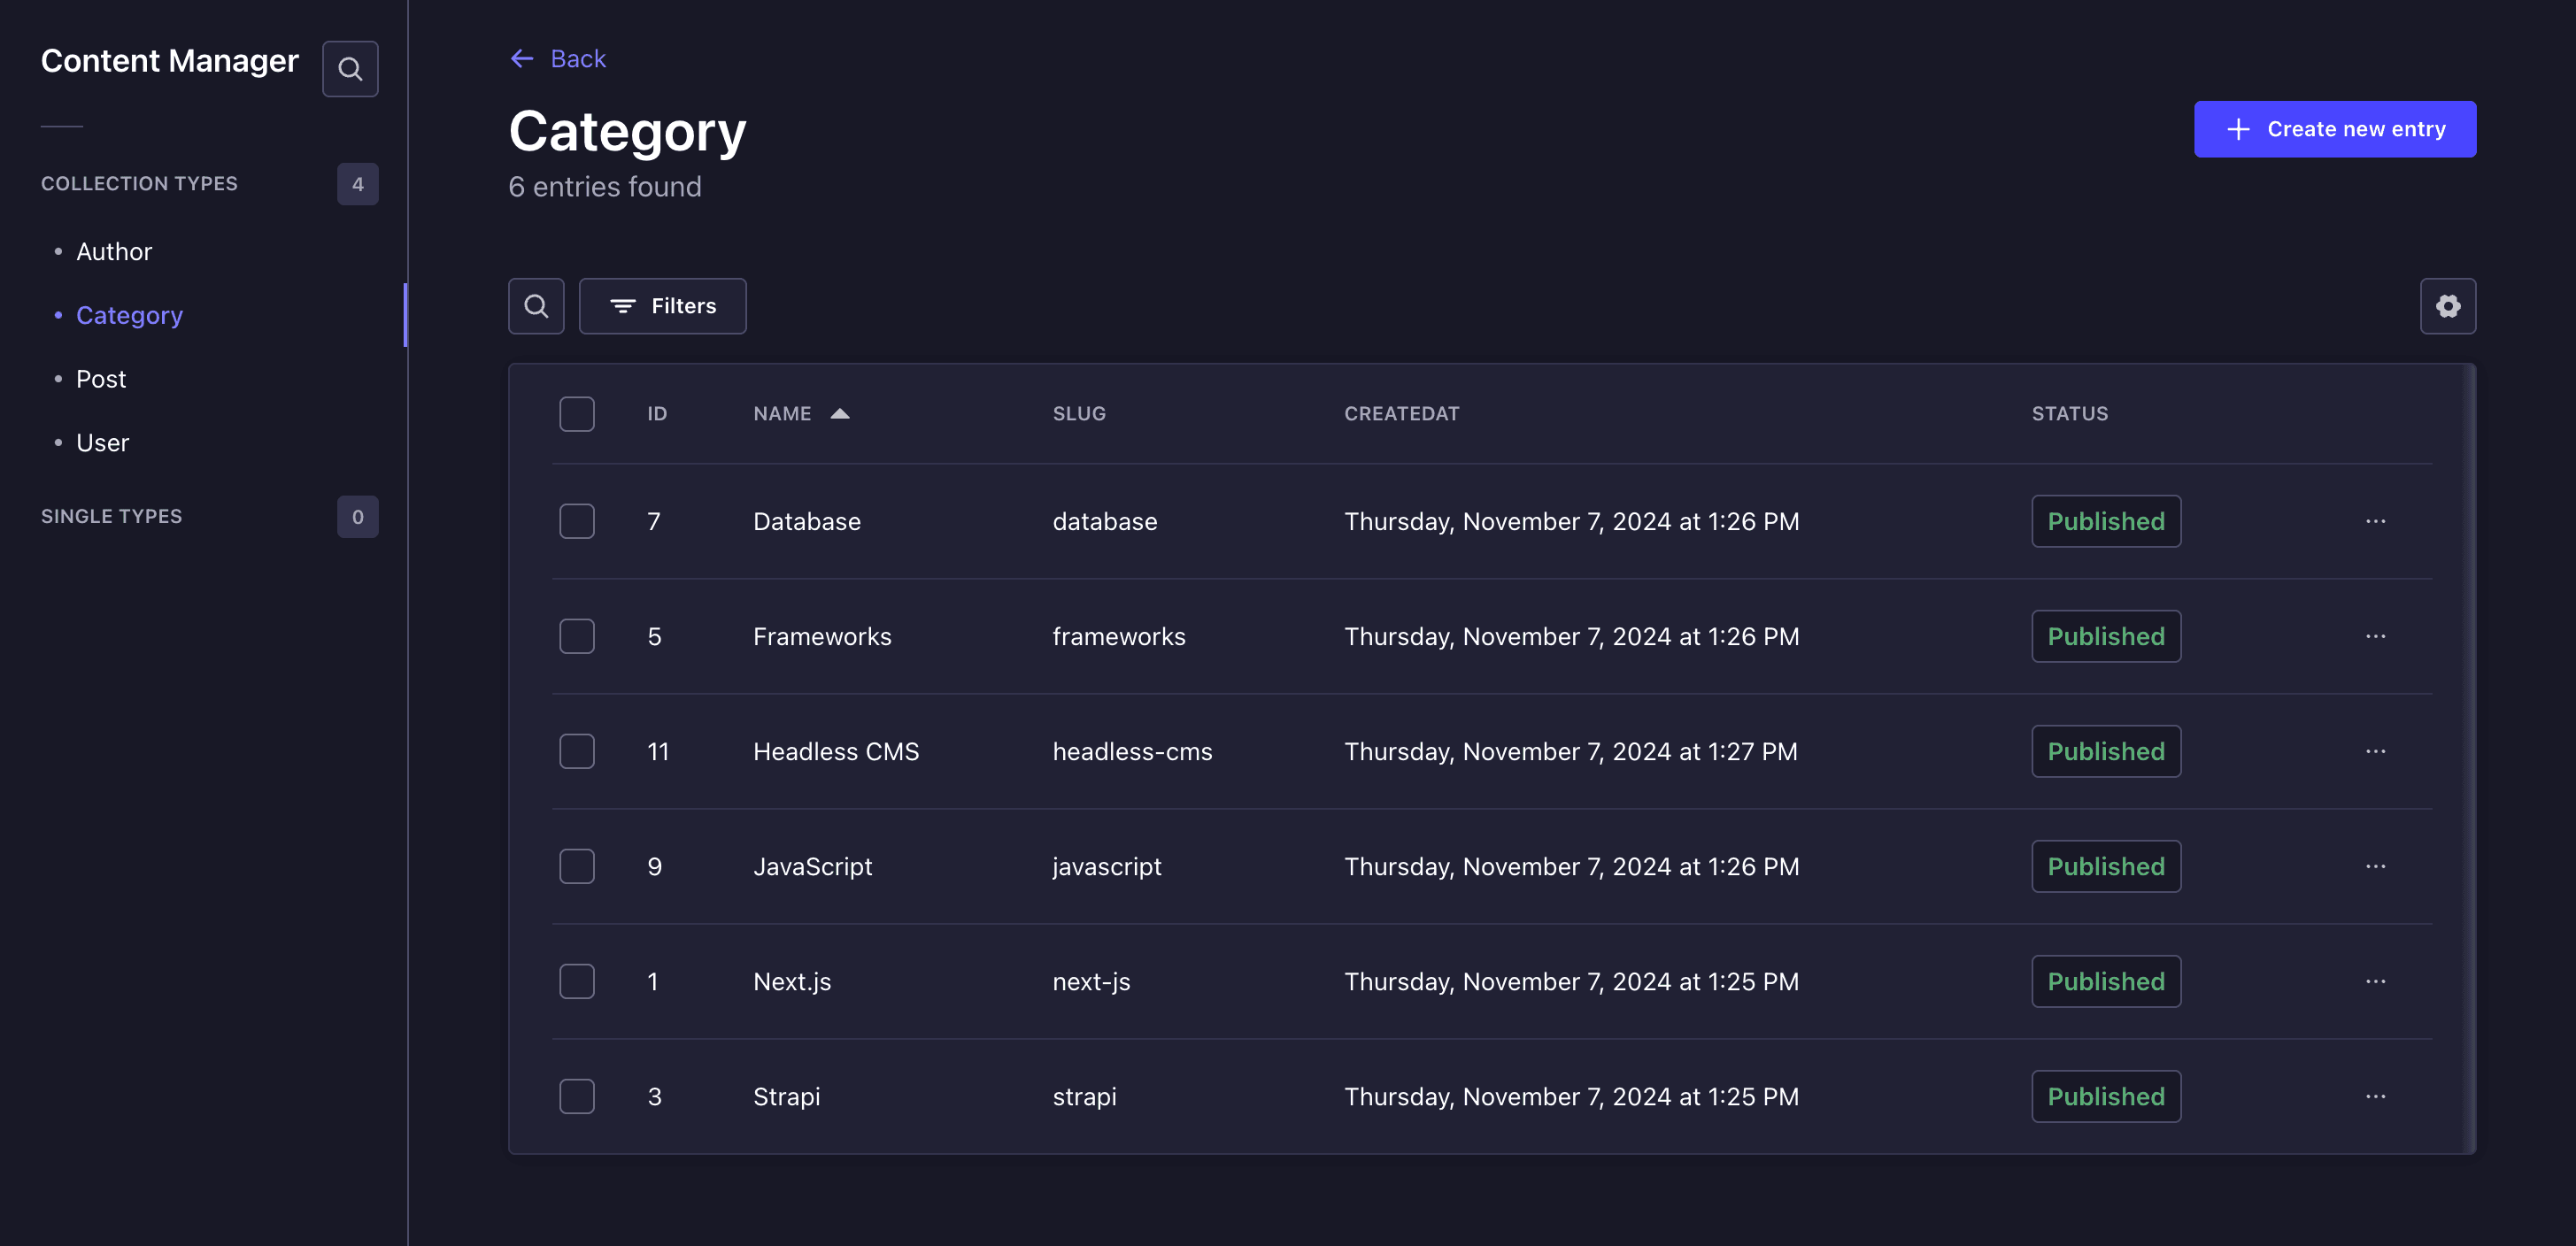
Now we've set up our Strapi backend and configured some settings. Let's add some entries in each of the collection we created in our admin panel.
To do this, we'll navigate to the Content Manager page and click the Create new entry button.
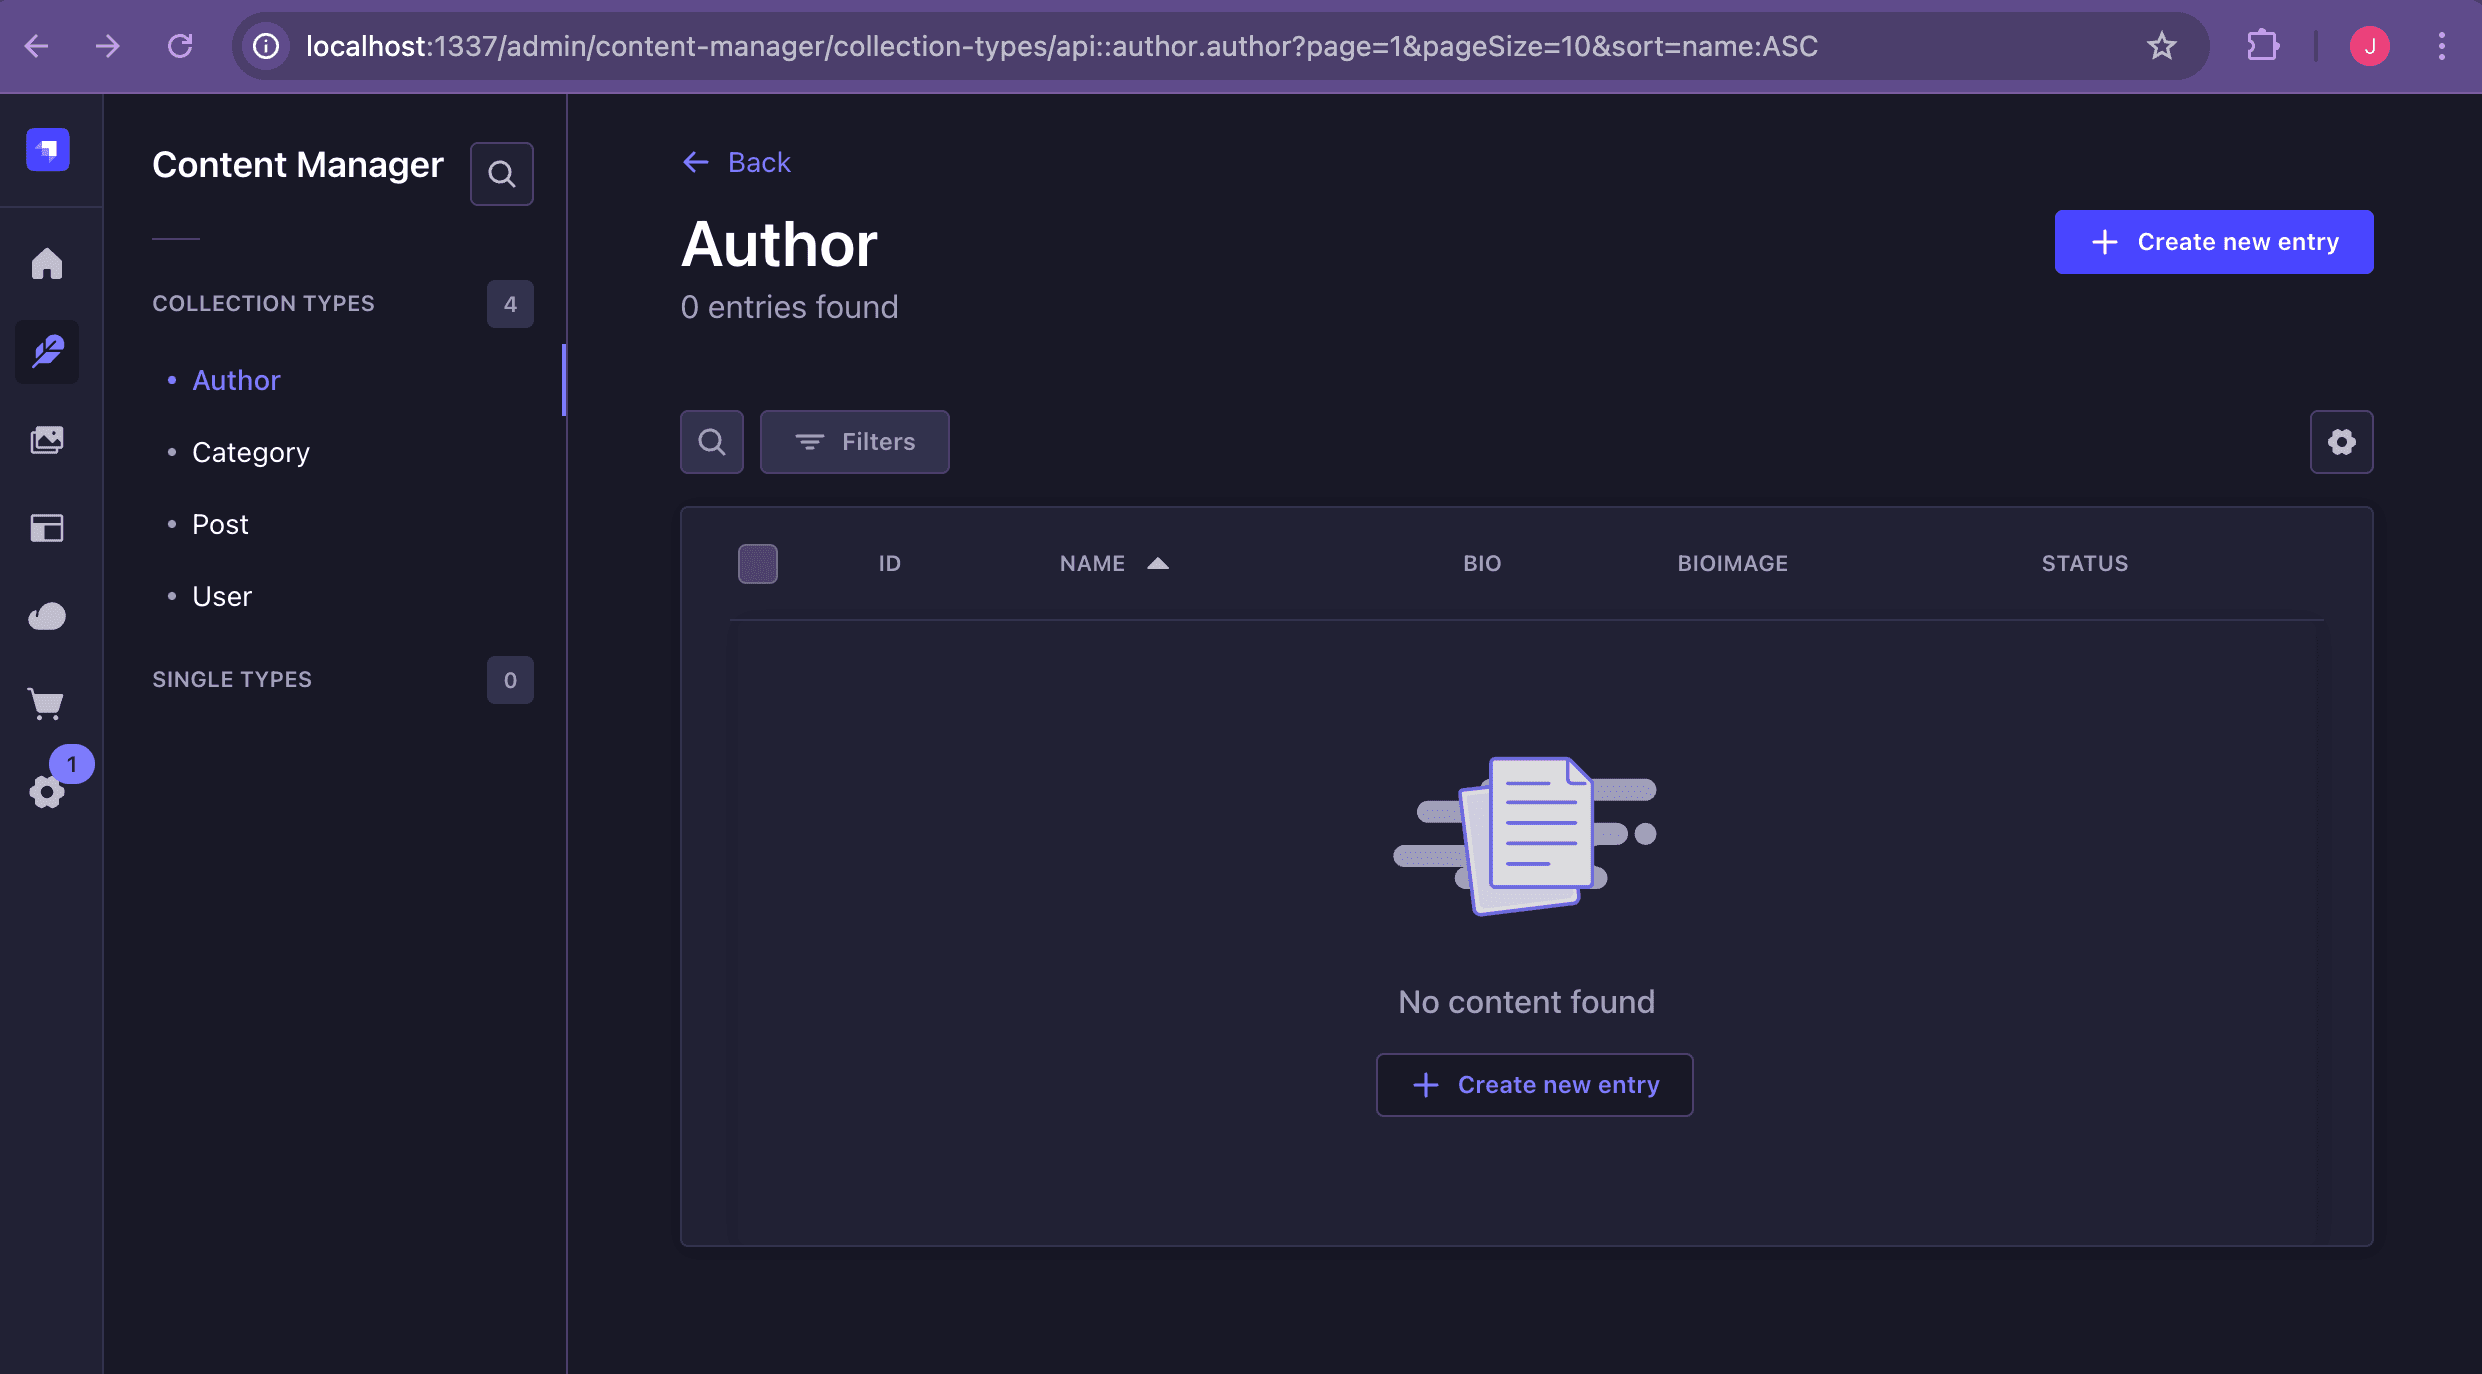
Create a few entries for the Post, Author, and Category collections.
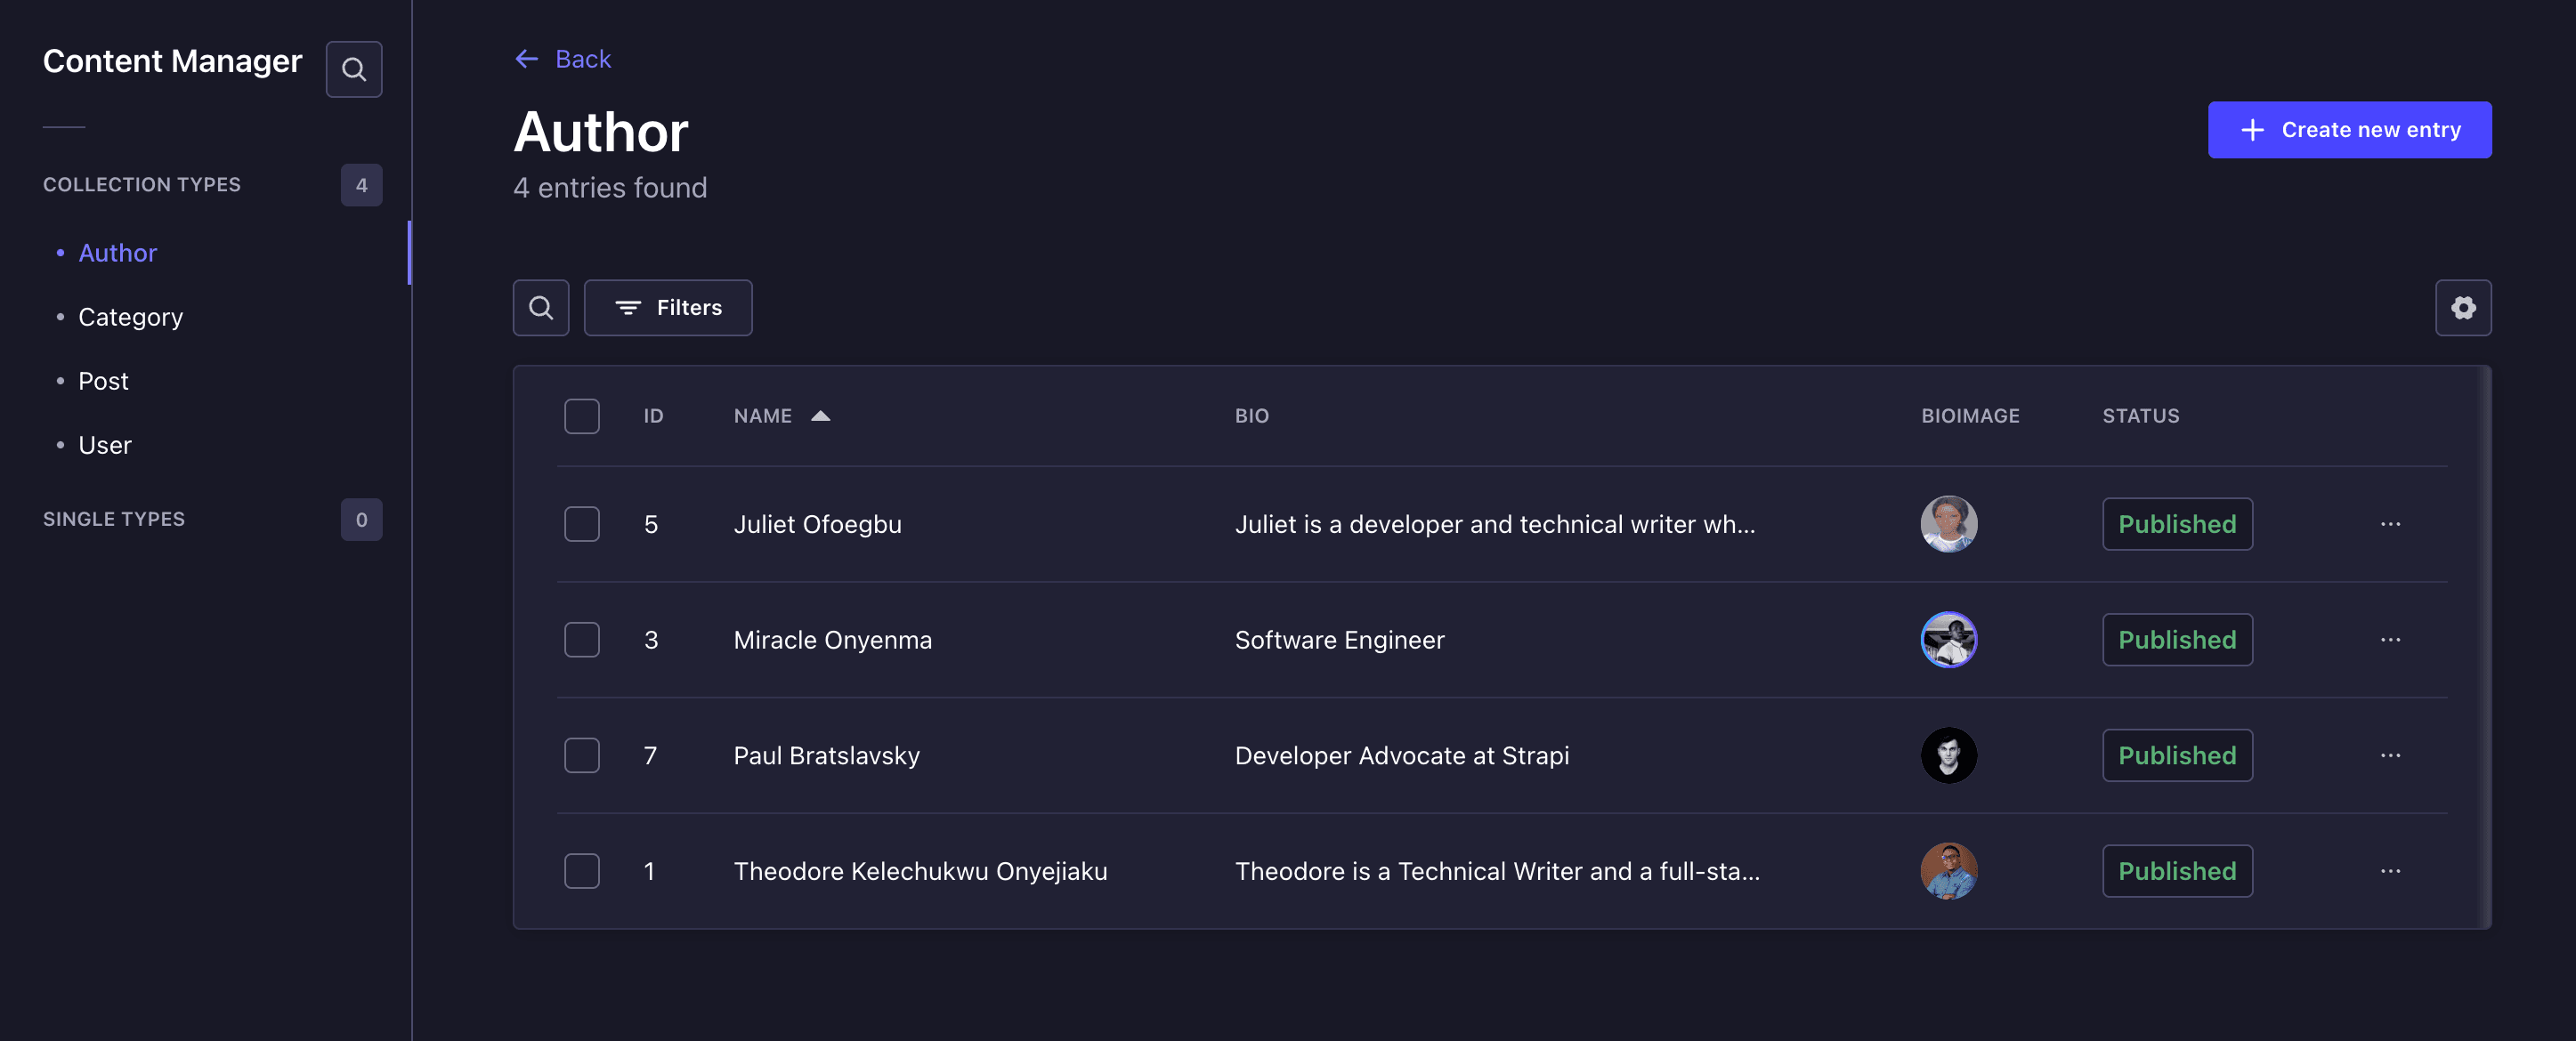
Our JSON Response
If we check out the api endpoints (http://localhost:1337/api/categories, http://localhost:1337/api/authors, and http://localhost:1337/api/posts), we'll see the entries we made in the admin panel in JSON format, like this:
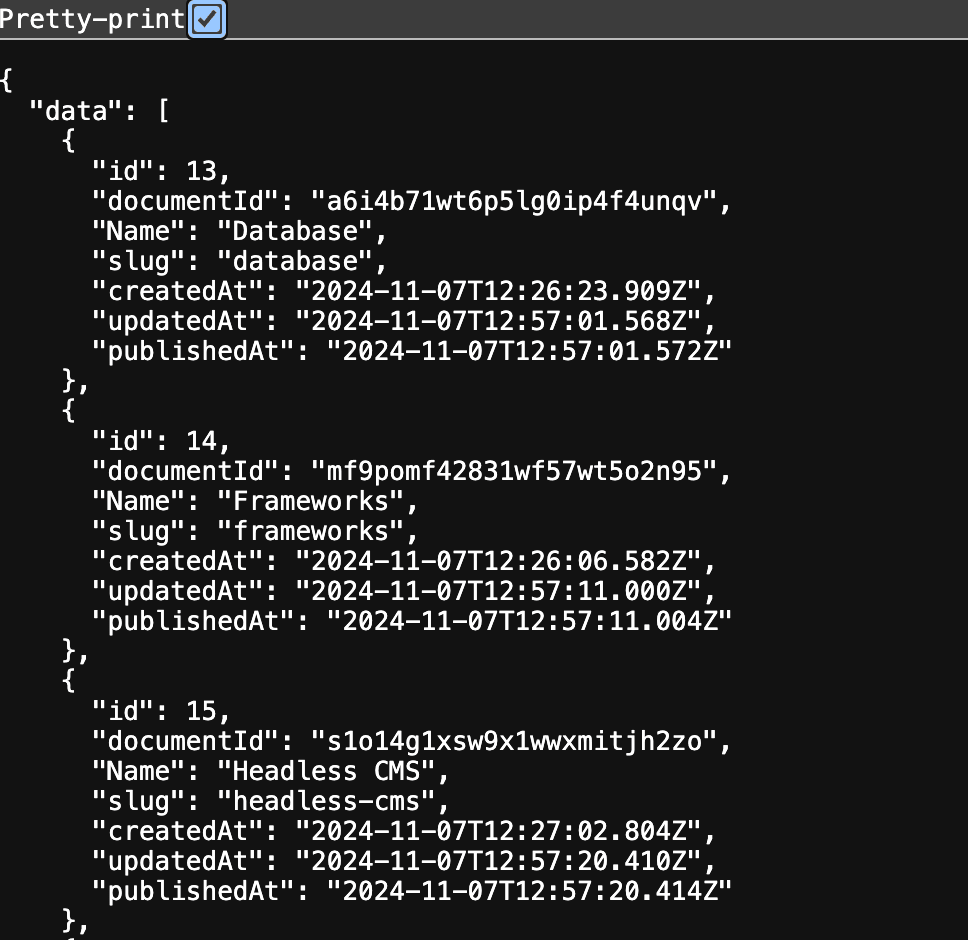
That is all for the Strapi backend configuration. Since we're sure the Strapi backend and API endpoints are working well, let's move on to the frontend.
Setting up an Astro Project
Here, we'll get to build the UI and app's functionality using Astro.
- In the root of our project (blog-app), let's run the following command to create our Astro project:
npm create astro@latest- Follow the installation prompts and answer the given questions.
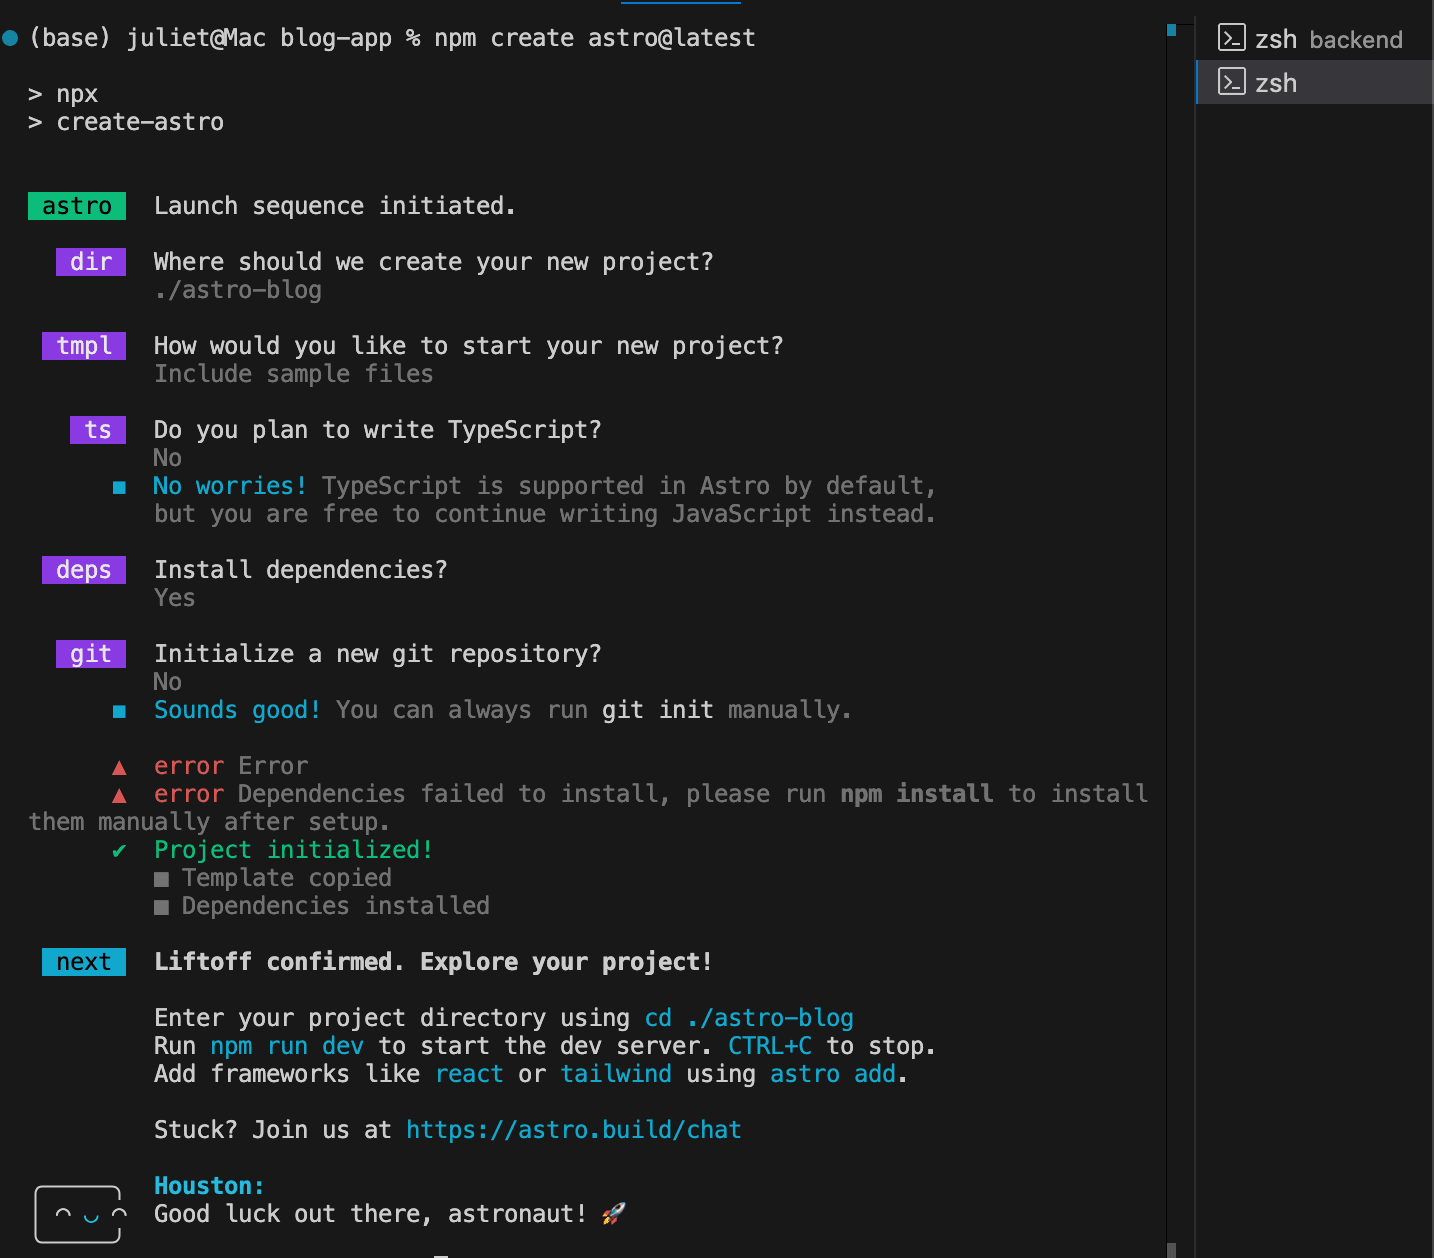
This will install the latest versio of Astro, which is Astro 4.
-
After installation, we'll change the directory into astro-blog, which is the name we gave our Astro project during installation (
cd astro-blog) and install Tailwind CSS, which is the CSS framework we'll use to style the application. -
We'll need to run the following command to install Tailwind CSS into our project:
npx astro add tailwind-
Answer yes to every question asked and wait for it to finish installing.
-
To start up the frontend astro project, run this command:
npm run dev
OR
yarn dev
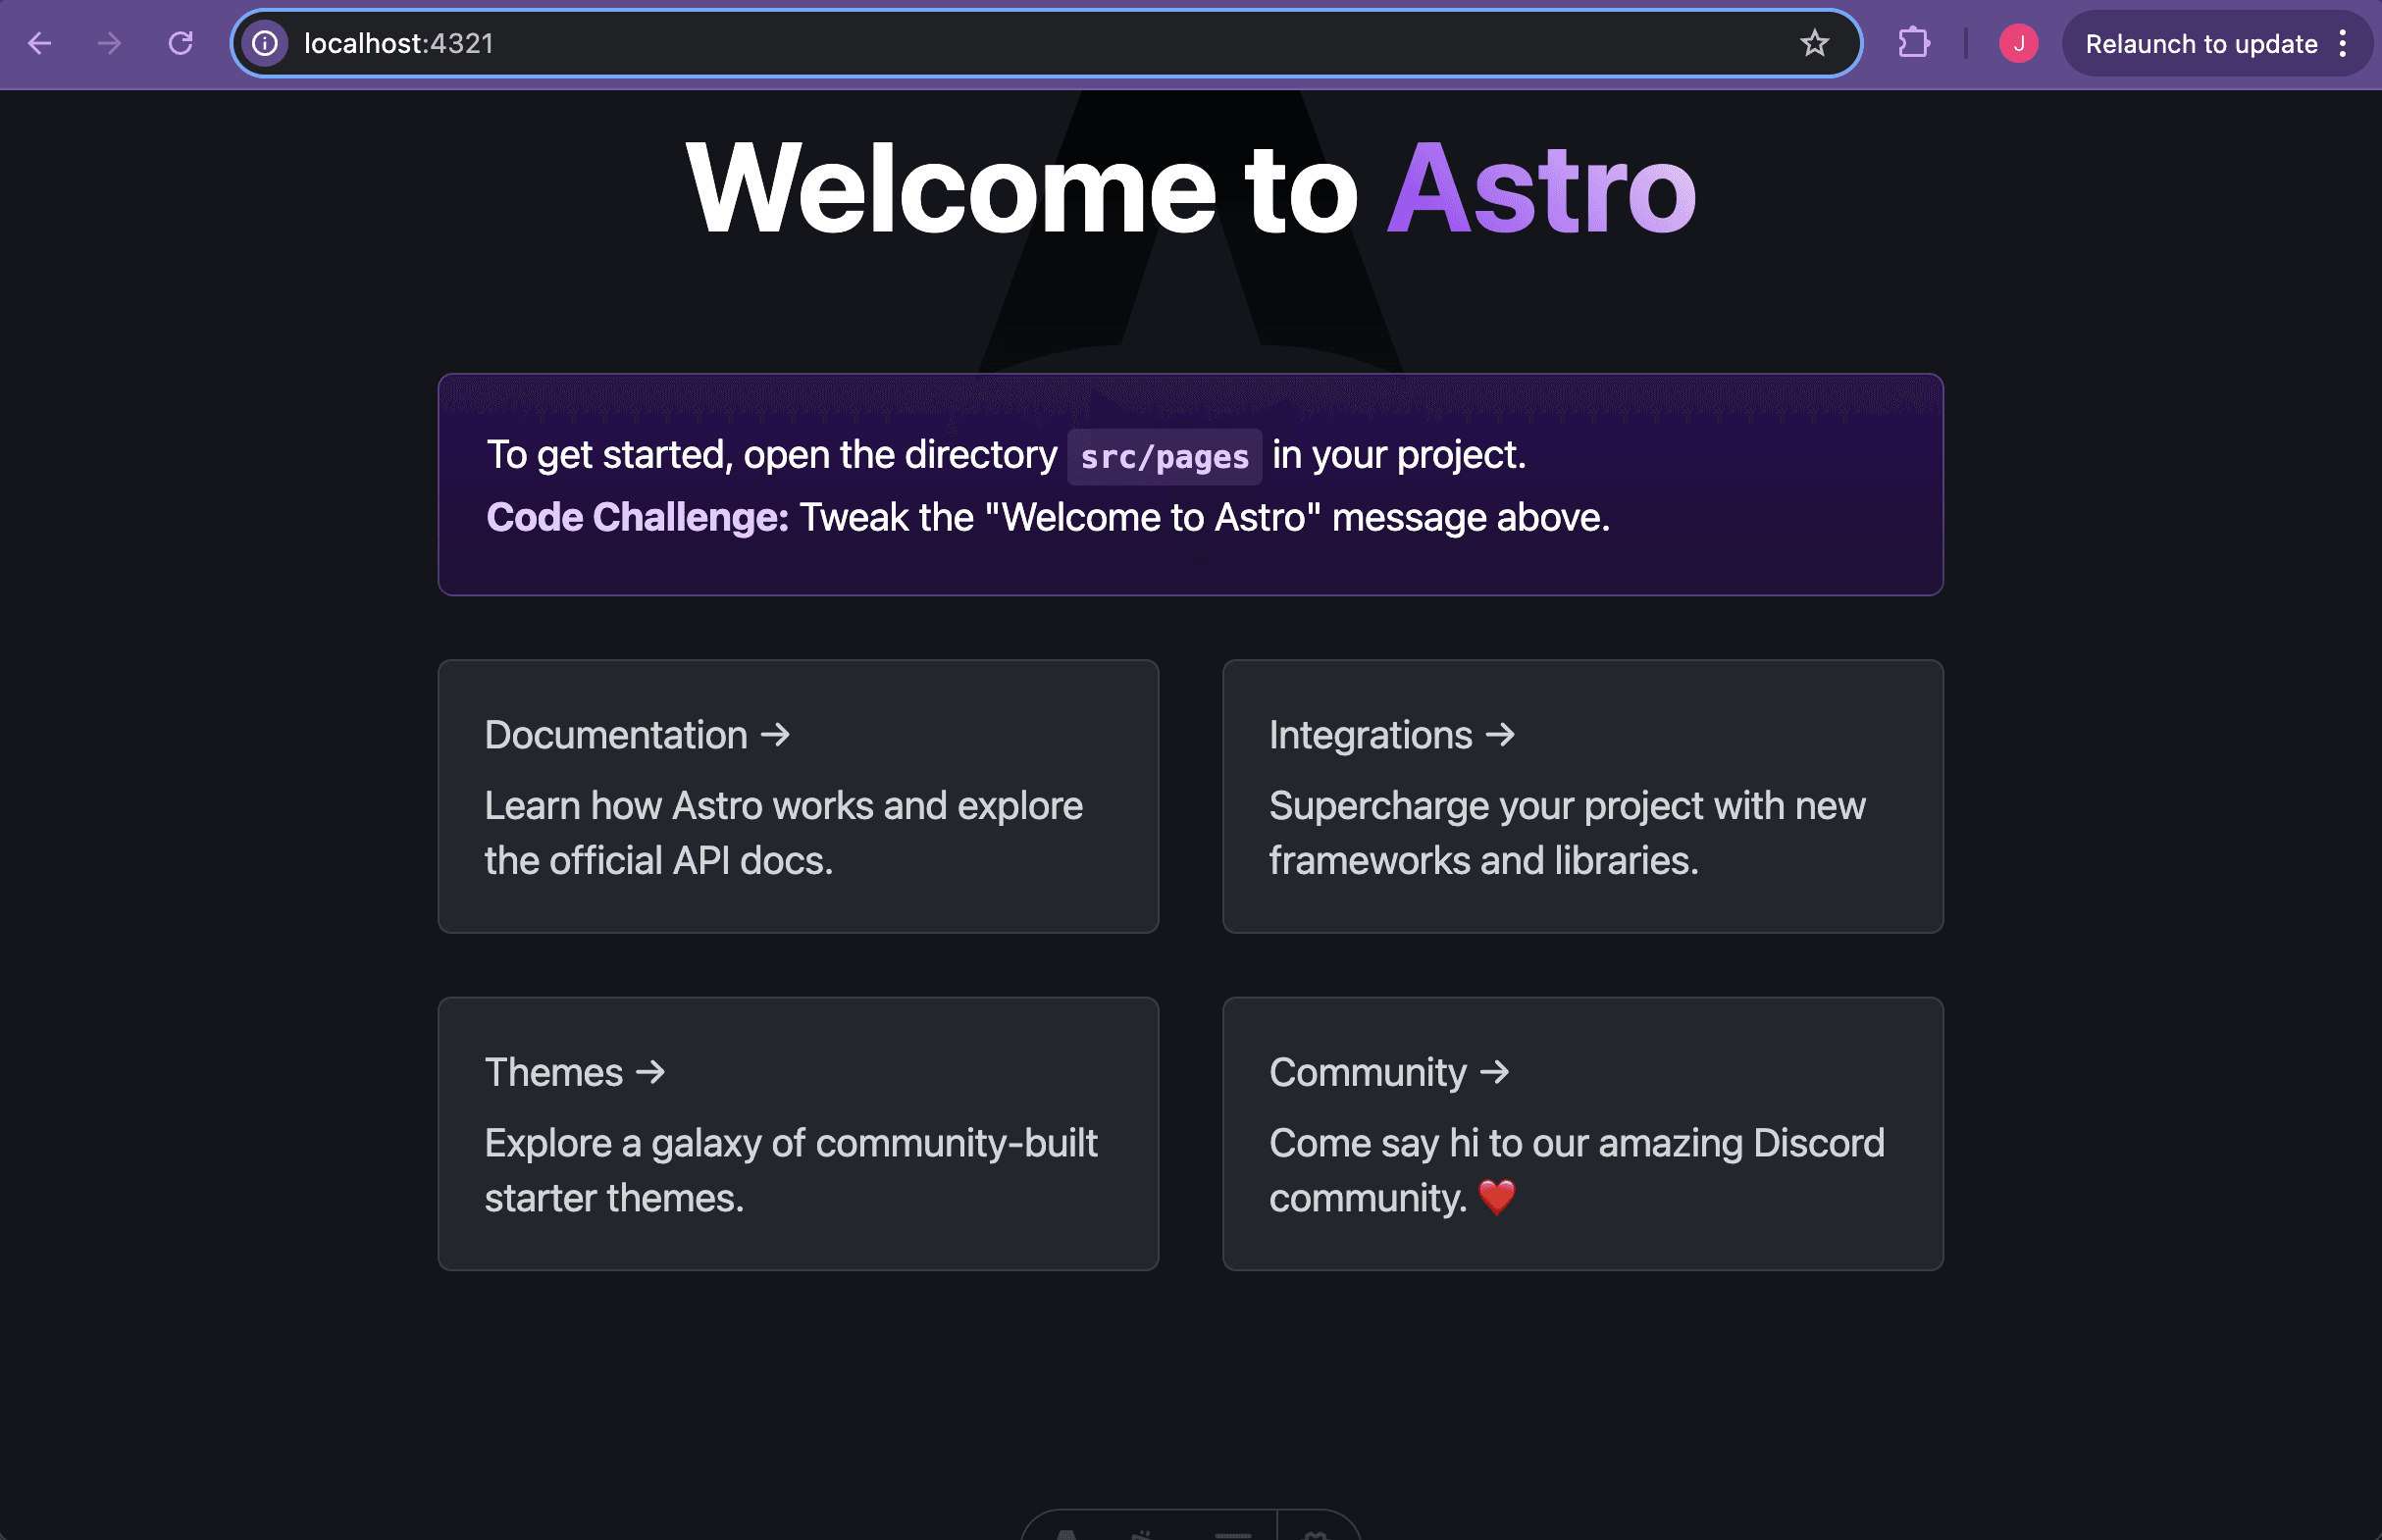
You'll get this welcome page on your browser:
Great! Let's move on.
NB: For those not familiar with Astro or if this is your first time building with Astro, it's recommended you install the Astro VS Code Extension to properly format your Astro code, if VS Code is your preferred IDE.
If you're using any other IDE asides VS Code, check out the Astro's editor setup page to find out the recommended extension for your preferred IDE.
Setting up the Frontend
Check out the default folder structure of an Astro project:
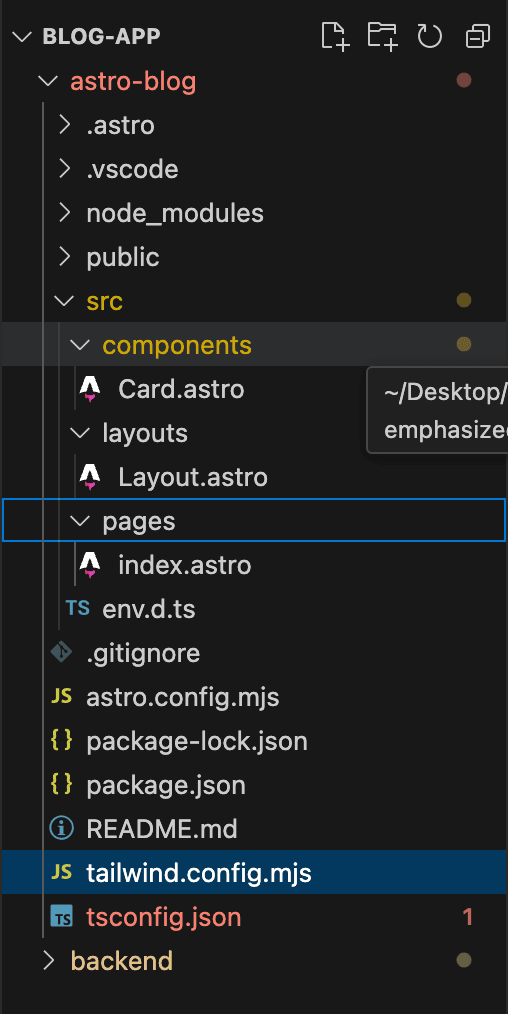
Astro comes with its component file. It is a single-file component framework and the '.astro' files houses all the HTML, JS, and styles as one single file.
If you want to learn more about Astro's folder structures and files, check out the Astro project structure documentation.
Astro supports other frameworks and styling options but in this tutorial, we are going to choose HTML, JS, and Tailwind. Check out the various renderers and style options to learn more about them.
Building The Frontend Interface
We'll build only two pages, the:
- Blog listing page, which will list out all the blogs in our application.
- Individual blog page, which will display the full content for individual blogs.
Setting up the Layout
We can start by modifying the Layout component in the layouts folder. This layout component will serve as a template for each page and will include the header and footer (optional), and it will be consistent across all pages, along with a slot for the main content.
To get started, let's create the base layout.
- In the src/layouts/Layout.astro file, add a layout with a header by pasting the following code:
---
interface Props {
  title: string;
}

const { title } = Astro.props;
---

<!doctype html>
<html lang="en">
  <head>
    <meta charset="UTF-8" />
    <meta name="description" content="Astro description" />
    <meta name="viewport" content="width=device-width" />
    <link rel="icon" type="image/svg+xml" href="/favicon.svg" />
    <meta name="generator" content={Astro.generator} />
    <title>{title}</title>
  </head>
  <body>
    <main>
      <header class="shadow mb-8">
        <div>
          <a
            href="/"
            class="block text-black text-2xl font-bold text-center py-4"
          >
            Astro Blog
          </a>
        </div>
      </header>
      <div class="container mx-auto my-4">
        <slot />
      </div>
    </main>
  </body>
</html>

<style is:global></style>
Notice how all of this code is wrapped between two ""--- /"" code fences? This is the Frontmatter Script part of the Astro component, which allows dynamic building components.
If you want to learn more about the layouts in Astro, check out this section of the Astro documentation.
Building out the UI Components
Since we've set up roles and permissions, we'll fetch blog data from Strapi's REST API for use in our Astro components.
We'll start by creating 3 components for the UI:
BlogGridItemBlogGridSingleBlogItem
Before we create the blog grid items component, let's create an '.env' variable file in the root of our Astro project to store the Strapi endpoint URL:
STRAPI_URL=http://localhost:1337Create the Blog Grid Items
This blog grid item component will represent a single blog post in the grid. It will display the title of the blog, featured image, excerpt, and the author's details.
- In our components folder, let's create a BlogGridItem component
src/components/BlogGridItem.astroand paste the following lines of code inside it:
 ---
const { post } = Astro.props;
const { slug, featuredImage, title, excerpt, author } = post;

const url = import.meta.env.STRAPI_URL;

const authorImage = author.bioImage?.url || null;
const postImage = post.featuredImage?.url || null;

console.log("Logging posts here", post)
---

<div
  class="rounded-md overflow-hidden shadow-sm p-4 transition-transform h-auto"
>
  <a href={`/post/${slug}`}>
    <div class="rounded-md h-48 w-full overflow-hidden">
      <img
        class="object-cover w-full h-full"
        src={postImage
          ? url + postImage
          : "https://via.placeholder.com/1080"}
      />
    </div>
    <div>
      <h1 class="my-2 font-bold text-xl text-gray-900">{title}</h1>
      <p class="my-2 text-gray-700 line-clamp-3">{excerpt}</p>
    </div>
    <div class="flex justify-between my-4 items-center">
      <div class="flex space-x-2 items-center overflow-hidden">
        <img
          class="inline-block h-8 w-8 rounded-full ring-2 ring-white"
          src={authorImage
            ? url + authorImage
            : "https://via.placeholder.com/1080"}
          alt="author picture"
        />
        <p class="font-medium text-xs text-gray-600 cursor-pointer">
          {author?.name}
        </p>
      </div>
      <div class="inline-flex rounded-md">
        <a
          href={`/post/${slug}`}
          class="inline-flex items-center justify-center px-5 py-2 border border-transparent text-base font-medium rounded-md text-white bg-yellow-500 hover:bg-yellow-400"
        >
          Read article
        </a>
      </div>
    </div>
  </a>
</div>
Code explanation:
-
First we destructured post data to extract key properties of the post object, such as slug for navigation, title for the headline, and excerpt for a short description.
-
After that, we provided fallback URLs for the featured & bio images so that if the API doesn’t return valid image paths, it will dynamically construct URLs for post and author images.
-
We added an href link tag to construct a link to the single post page using the post's slug. This makes it possible that any part of a blog item that is clicked takes the user to that particular blog post page.
-
We then rendered the post metadata (title, excerpt, and author details) to display on the page and of course, styled the page using Tailwind CSS.
Creating the Blog Grids
The BlogGrid component will contain a list of BlogGridItem. This component will display a grid of blog posts. Each post will be rendered using the BlogGridItem component.
- We'll start by creating a file under
src/components/BlogGrid.astroand pasting the following code inside it:
---
import BlogGridItem from "./BlogGridItem.astro";
const { posts } = Astro.props;

console.log("Posts in parent component:", posts);
---

<div class="grid grid-cols-3 gap-6">
  {
    posts?.data && posts.data.length > 0 ? (
      posts.data.map((post, index) => <BlogGridItem key={index} post={post} />)
    ) : (
      <p>No posts found</p>
    )
  }
</div>
Code explanation:
-
First, we checked if posts are available
(posts?.data) -
If posts are available, we'll map through them to render
BlogGridItem. If they aren't available, we'll render a text saying "No posts found" instead.
Creating the Single Blog Item
This component will render the full content of a single blog post.
- To get started with this, we'll need to install 3 libraries namely; marked, date-fns, and the qs library in the project directory of our Astro project:
npm install marked date-fns qs
OR
yarn add marked date-fns qs
The marked library converts Markdown to HTML. If we recall, while we were creating the fields for the Post collection in our Strapi panel, we set the field type for content to be "Rich Text-Markddown" and not "Text". This means we want the content of the blog to be in markdown format, not just as regular text.
We'll use the date-fns library to manipulate JavaScript dates in a browser, while the qs library converts a JavaScript object into a query string that is sent to Strapi. This enables us to define complex populate and filter logic directly in JavaScript.
- After successfully installing these libraries, we'll create a file under
src/components/SingleBlogItem.astroand paste the following lines of code inside it:
---
import { marked } from "marked";
import { formatDistance, format } from 'date-fns';
const { post } = Astro.props;
const { featuredImage, title, content, author, readingTime, publishedAt } = post;
const url = import.meta.env.STRAPI_URL;
const authorImage = author.bioImage?.url || null;
const postImage = post.featuredImage?.url || null;
---
<div class="container mx-auto">
<div class="w-full flex justify-start rounded-md">
<a
href={`/`}
class="inline-flex items-center justify-center px-5 py-2 border border-transparent text-base font-medium rounded-md text-white bg-yellow-500 hover:bg-yellow-400"
>
Back
</a>
</div>
<div class="my-4 text-center">
<h1 class="text-center text-4xl leading-tight text-gray-900 my-4 font-bold">
{title}
</h1>
<div class="text-gray-500 flex justify-center items-center space-x-2">
<span class="flex space-x-2 items-center overflow-hidden">
<img
class="inline-block h-8 w-8 rounded-full ring-2 ring-white"
src={authorImage
? url + authorImage
: "https://via.placeholder.com/1080"}
alt="author picture"
/>
<p class="font-medium text-xs text-gray-600 cursor-pointer">
{author?.name}
</p>
</span>
<span>·</span>
<span>{format(new Date(publishedAt), 'MM/dd/yyyy')}</span>
<span>·</span>
<span>{readingTime}</span>
</div>
</div>
<div class="rounded-md h-full w-full overflow-hidden">
<img
class="object-cover w-full h-full"
src={postImage
? url + postImage
: "https://via.placeholder.com/1080"}
/>
</div>
<article class=" prose max-w-full w-full my-4">
<div class="rich-text" set:html={marked.parse(content)} />
</article>
</div>
<style is:global>
/*******************************************
Rich Text Styles
*******************************************/
/* Headers */
article .rich-text h1 {
@apply text-4xl font-bold mb-8 text-gray-800;
}
article .rich-text h2 {
@apply text-3xl font-bold mb-8 text-gray-800;
}
article .rich-text h3 {
@apply text-2xl font-bold mb-6 text-gray-800;
}
article .rich-text h4 {
@apply text-xl font-bold mb-4 text-gray-800;
}
article.rich-text h5 {
@apply text-lg font-bold mb-4 text-gray-800;
}
article .rich-text h6 {
@apply text-base font-bold mb-4 text-gray-800;
}
/* Horizontal rules */
article .rich-text hr {
@apply text-gray-800 my-8;
}
article .rich-text a {
@apply text-gray-900 underline text-xl leading-relaxed;
}
/* Typographic replacements */
article .rich-text p {
@apply mb-8 text-xl leading-relaxed text-gray-700;
}
/* Emphasis */
article .rich-text strong {
@apply font-bold text-xl leading-relaxed;
}
article .rich-text em {
@apply italic text-xl leading-relaxed;
}
article .rich-text del {
@apply line-through text-xl leading-relaxed;
}
/* Blockquotes */
article .rich-text blockquote {
@apply border-l-4 border-gray-400 pl-4 py-2 mb-4;
}
/* Lists */
article .rich-text ul {
@apply list-disc pl-4 mb-4 text-gray-800;
}
article .rich-text ol {
@apply list-decimal pl-4 mb-4 text-gray-800;
}
article .rich-text li {
@apply mb-2 text-gray-800;
}
article .rich-text li > ul {
@apply list-disc pl-4 mb-2;
}
article.rich-text li > ol {
@apply list-decimal pl-4 mb-2;
}
/* Code blocks */
article .rich-text pre {
@apply font-mono text-gray-800 text-gray-800 rounded p-4 my-6;
}
article .rich-text code {
@apply font-mono text-gray-800 text-gray-800 rounded px-2 py-1;
}
/* Tables */
article .rich-text table {
@apply w-full border-collapse text-gray-800 my-6;
}
article .rich-text th {
@apply text-gray-800 text-left py-2 px-4 font-semibold border-b text-gray-800;
}
article .rich-text td {
@apply py-2 px-4 border-b text-gray-800;
}
/* Images */
article .rich-text img {
@apply w-full object-cover rounded-xl my-6;
}
/* Custom containers */
article .rich-text .warning {
@apply bg-yellow-100 border-yellow-500 text-yellow-700 px-4 py-2 rounded-lg mb-4;
}
</style>Code explanation:
-
First, we destructured the post data to retrieve the data necessary to populate the single post view, including the post's main content and metadata (e.g., title, author, content, publicationDate, featuredImage, readingTime, etc).
-
We then created a fallback for the media (featuredImage and bioImage) to ensure the UI doesn’t break if image URLs are unavailable. this will set a default image for the post and bio, if the image URLs aren't available
-
We also formatted the post's publication date
publishedAtusing the date-fns library we previously installed. -
To render the full content for each post, we used the marked library to render Markdown content into HTML
(set:html={marked.parse(content)}). This displays our post metadata, including title, featured image, and content. -
After all that, we styled the page.
Creating the Pages
We'll now need to create the page to put all our components together.
One thing to note is that any '.astro' file created inside the pages directory will be treated as a route because Astro is a file-based routing framework.
Even '.md' files created inside the pages directory will be treated as routes, but other file extensions would not be treated as routes. Go through this Astro pages documentation to learn more about pages in Astro.
Creating the Main Page
The index.astro component is the entry point for the blog application. This is where the blog posts from Strapi will be fetched, and will pass them to the BlogGrid component, and wrap everything in a Layout.
To start building our main page, we'll open the index.astro file and paste these lines of code inside it:
---
import qs from "qs";

import Layout from "../layouts/Layout.astro";
import BlogGrid from "../components/BlogGrid.astro";

let baseUrl = import.meta.env.STRAPI_URL + "/api/posts";

const query = qs.stringify({
  populate: {
    featuredImage: {
      fields: ["name", "width", "height", "url"],
    },
    author: {
      populate: {
        bioImage: {
          fields: ["name", "width", "height", "url"],
        },
      },
    },
    category: {
      populate: true,
    },
  },
}, { encode: false });

const url = `${baseUrl}?${query}`;

const posts = await fetch(url)
  .then((response) => response.json())
  .catch((error) => {
    console.error("Error fetching posts:", error);
    return null;
  });

console.log(posts);
---

<Layout title="Welcome to Astro.">
  <BlogGrid posts={posts} />
</Layout>
Code explanation:
-
We created a
baseUrlthat points to the posts endpoint in our Strapi API. -
The
qs.stringifyfunction builds a query string that requests additional data (like featured images, authors, and categories). By using the populate feature in Strapi, we were able to include related entities in the API response. -
The query builder here requests the
featuredImagefield of the post, includes the author relation, populates theirbioImagefield, and keeps the query human-readable using the{ encode: false }flag. Refer to the official Strapi Interactive Query Builder documentation for the latest usage. -
We fetched the related data like the featured image, author bio image, and category details, and populated it.
-
We then used the
fetchmethod to fetch data from Strapi API using the url. If an error occurs, it will be logged and will return 'null'. -
Finally, we wrapped the content in a
Layoutand passed the fetched posts toBlogGridcomponent to render and display on the browser.
Note: The qs.stringify method builds a query string for API requests. In Strapi, this query can include fields like populate, filters, and sort.
Our blog application is almost ready.
Let's move on to create the last component, which is the individual post item page.
Creating a Single Blog Item Page
Astro uses file-based routing which supports dynamic parameters using [bracket] notation into the filename. This allows us to map a specific file to make different routes.
We'll create a [slug].astro component which will be the dynamic route for individual blog posts. It will fetch data for a specific post based on its slug and render it using the SingleBlogItem component.
- Create a post folder inside the pages directory and create a
[slug].astrocomponent inside it. This component has bracket notation so the route will be mapped to anything that follows /post. Eg:/post/hello-world,/post/lorem-ipsum, etc.
Paste these lines of code inside the [slug].astro component:
---
import qs from "qs";
import Layout from "../../layouts/Layout.astro";
import SingleBlogItem from "../../components/SingleBlogItem.astro";

export async function getStaticPaths() {
  const baseUrl = import.meta.env.STRAPI_URL + "/api/posts";

  const query = qs.stringify({
    populate: {
      featuredImage: {
        fields: ["name", "width", "height", "url"],
      },
      author: {
        populate: {
          bioImage: {
            fields: ["name", "width", "height", "url"],
          },
        },
      },
      category: {
        populate: true,
      },
    },
  }, { encode: false });

  const url = `${baseUrl}?${query}`;

  const data = await fetch(url)
    .then((response) => response.json())
    .catch((error) => {
      console.error("Error fetching posts:", error);
      return null;
    });

  return data.data.map((post) => ({
    params: { slug: post.slug },
    props: { post },
  })) || [];
}

const { post } = Astro.props;
---

<Layout title="Blog">
  <SingleBlogItem post={post} />
</Layout>
Code explanation:
-
Similar to the
index.astrocomponent, we created abaseUrlthat points to the posts endpoint in our Strapi API. -
We then created the
qs.stringifyfunction to build a query string that requests additional data (like featuredImage, author, and category) -
The
getStaticPathsfunction fetches all posts from Strapi to generate static paths for each blog post dynamically during the build process. Each path corresponds to a slug, which is a unique identifier for the blog post. -
This then extracts the slug for each post and assigns the full post data as props, allowing each post to have its own URL, such as "/post/blog-slug".
-
Finally, we wrapped the post content in a Layout and passed the post data to the
SingleBlogItemcomponent to render and display the individual blog post.
How These Components Work Together
-
The
index.astrofetches all posts and passes them to BlogGrid. -
The
BlogGrid.astromaps over the posts and passes each post to BlogGridItem. -
The
BlogGridItem.astrocomponent displays a summary of the post with links to its detailed page. -
The
[slug].astrocomponent dynamically generates pages for individual blog posts. -
Lastly, the
SingleBlogItem.astrocomponent displays the full details of a blog post.
And that's it! We're done.
Let's stop our development server and start it up again so that any changes we made can be applied.
Run the npm run dev or yarn dev command.
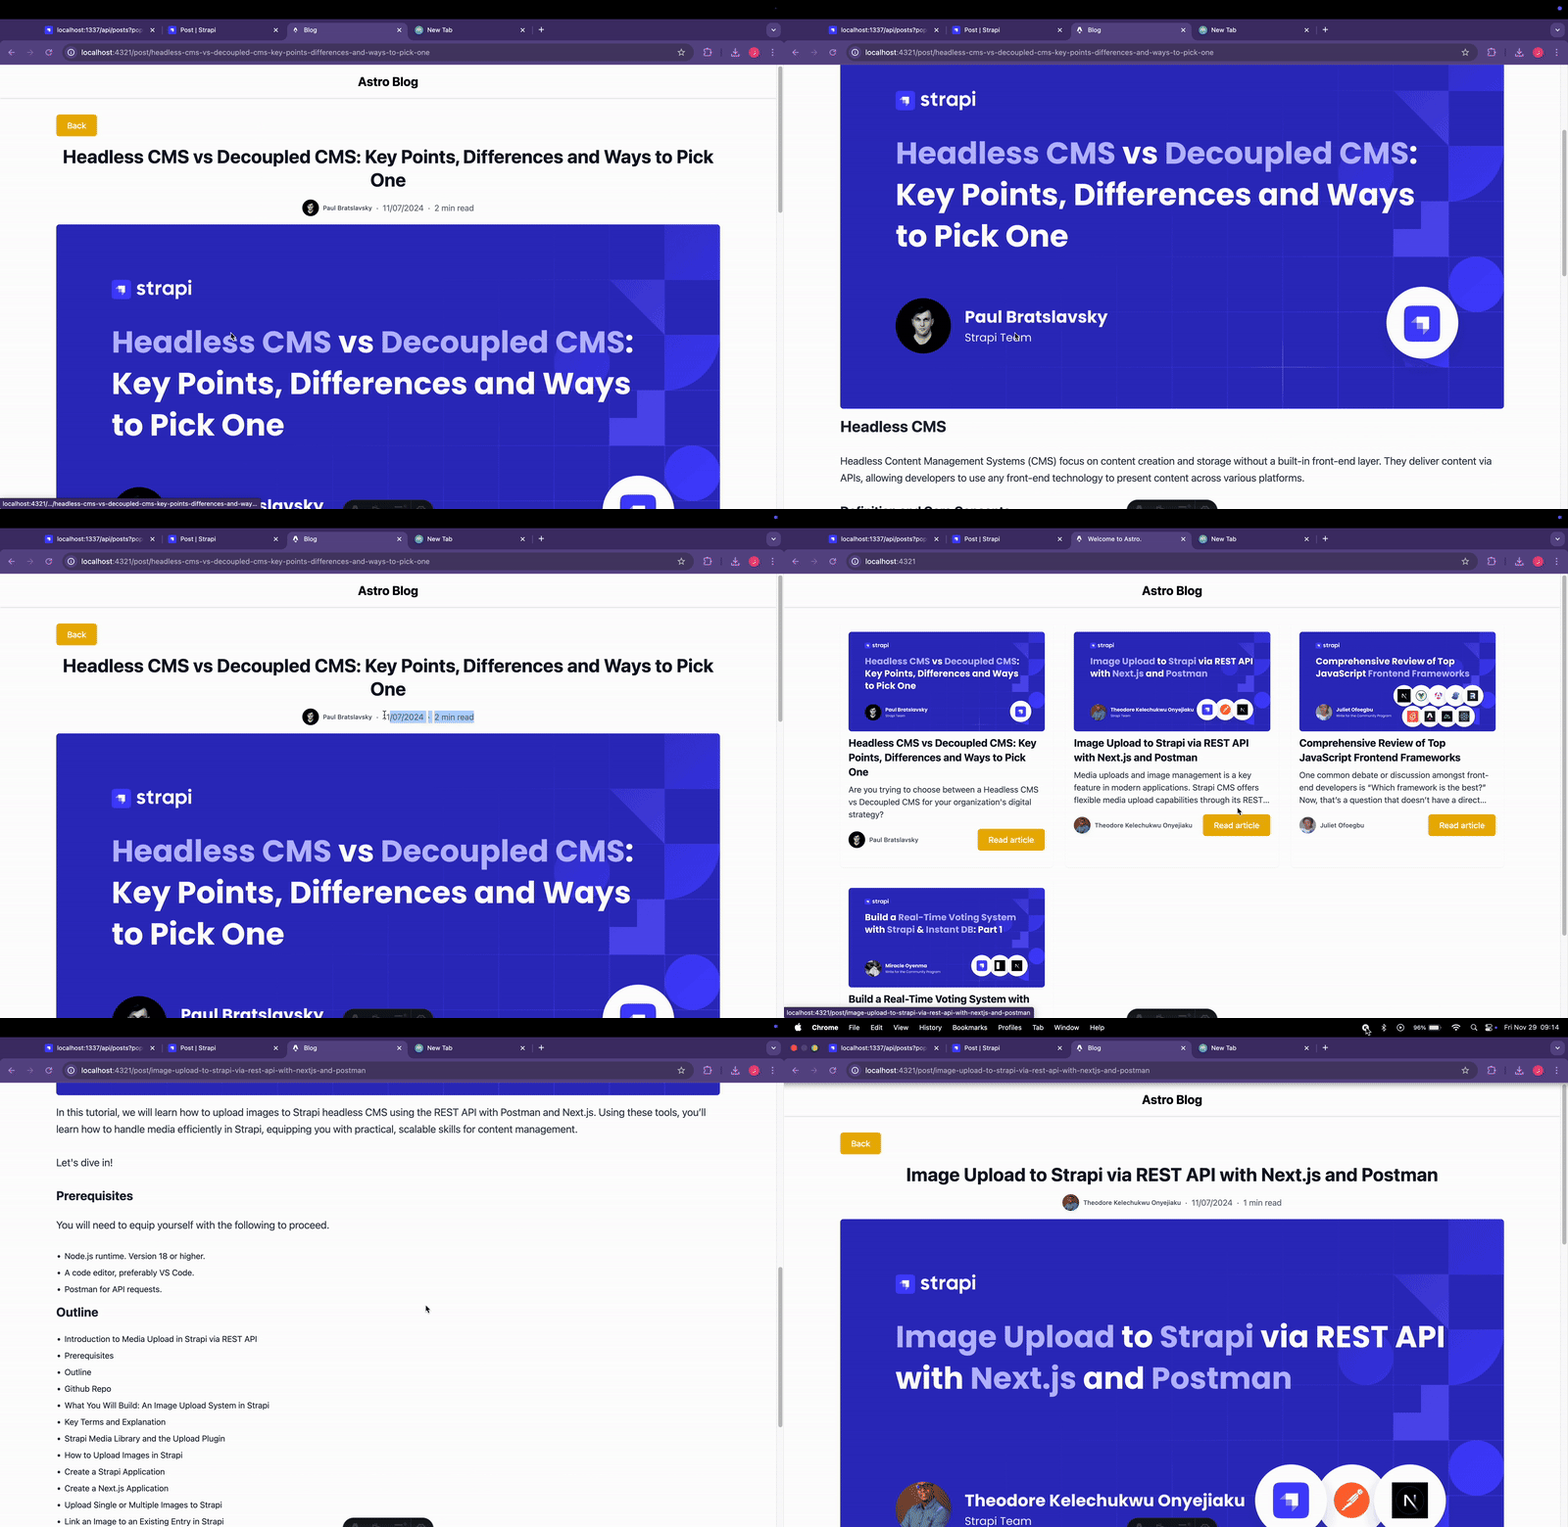
Demo
Here's what our blog application should look like this now:
Conclusion
We’ve succesfully built a fully functioning blog application using Strapi 5 for our backend, Astro 4 for the frontend, and Tailwind CSS to style the blog application.
In this tutorial, we were able to leverage Strapi’s easy-to-manage content capabilities and Astro’s fast and simple rendering to build a functional blog application.
You see how easy it was for us to complete our blog application's backend functionality using Strapi without having to spend so much time building the APIs.
You can find the complete code for this tutorial here on GitHub.