

Tutorial updated by Fredrick Emmanuel and Paul Bratslavsky
This tutorial is part of the « Cooking a Deliveroo clone with Next.js (React), GraphQL, Strapi and Stripe » tutorial series.
Table of contents
- 🏗️ Setup (part 1)
- 🏠 Restaurants (part 2)
- 🍔 Dishes (part 3)
- 🔐 Authentication (part 4)
- 🛒 Shopping Cart (part 5)
- 💵 Order and Checkout (part 6)
- 🚀 Bonus: Deploy (part 7) - Current
Note: the source code is available on GitHub here
🚀 Bonus: deploy
At this point, you only need to deploy our API and the web app. Strapi can be hosted on any major provider offering node deployments (Strapi Cloud, AWS, Heroku, DO, Railway, Render). Read further about the deployment of Strapi.
Prerequisites
- Nodejs v16+ installed
- A GitHub account
- A Vercel account
Deploying the Backend
In this article, we will deploy our backend Strapi source code to Render. Render is s a fully-managed cloud platform where you can host static sites, backend APIs, databases, cron jobs, and all your other apps in one place. It is a fully-managed cloud platform where you can host static sites, backend APIs, databases, cron jobs, and all your other apps in one place.
Getting Started
Let’s install the following packages that will help us to easily destructure our PostgreSQL database’s URL to obtain the PostgreSQL connection details.
npm i pg pg-connection-stringNext, open the database.js file in the config folder and replace the code in it with the one below.
    const path = require("path");

    const parse = require("pg-connection-string").parse;
    const config = parse(process.env.DATABASE_URL);//Getting the URL from the Environment

    module.exports = ({ env }) => {
      const client = env("DATABASE_CLIENT", "postgres");

      const connections = {
        mysql: {
          connection: {
            connectionString: env("DATABASE_URL"),
            host: env("DATABASE_HOST", "127.0.0.1"),
            port: env.int("DATABASE_PORT", 5432),
            database: env("DATABASE_NAME", "strapi"),
            user: env("DATABASE_USERNAME", "strapi"),
            password: env("DATABASE_PASSWORD", "strapi"),
            ssl: env.bool("DATABASE_SSL", false) && {
              key: env("DATABASE_SSL_KEY", undefined),
              cert: env("DATABASE_SSL_CERT", undefined),
              ca: env("DATABASE_SSL_CA", undefined),
              capath: env("DATABASE_SSL_CAPATH", undefined),
              cipher: env("DATABASE_SSL_CIPHER", undefined),
              rejectUnauthorized: env.bool(
                "DATABASE_SSL_REJECT_UNAUTHORIZED",
                true
              ),
            },
          },
          pool: {
            min: env.int("DATABASE_POOL_MIN", 2),
            max: env.int("DATABASE_POOL_MAX", 10),
          },
        },
        postgres: {
          connection: {
            connectionString: env("DATABASE_URL"),//DESTRUCTURING THE URL
            host: config.host,
            port: config.port,
            database: config.database,
            user: config.user,
            password: config.password,
            ssl: env.bool("DATABASE_SSL", false) && {
              key: env("DATABASE_SSL_KEY", undefined),
              cert: env("DATABASE_SSL_CERT", undefined),
              ca: env("DATABASE_SSL_CA", undefined),
              capath: env("DATABASE_SSL_CAPATH", undefined),
              cipher: env(
                "DATABASE_SSL_CIPHER",
                "TLS_ECDHE_RSA_WITH_AES_128_GCM_SHA256"
              ),
              rejectUnauthorized: env.bool(
                "DATABASE_SSL_REJECT_UNAUTHORIZED",
                true
              ),
            },
            schema: env("DATABASE_SCHEMA", "public"),
          },
          pool: {
            min: env.int("DATABASE_POOL_MIN", 2),
            max: env.int("DATABASE_POOL_MAX", 10),
          },
        },
        sqlite: {
          connection: {
            filename: path.join(
              __dirname,
              "..",
              env("DATABASE_FILENAME", "data.db")
            ),
          },
          useNullAsDefault: true,
        },
      };

      return {
        connection: {
          client,
          ...connections[client],
          acquireConnectionTimeout: env.int("DATABASE_CONNECTION_TIMEOUT", 60000),
        },
      };
    };
Now, create the following folders: env and production, and a file: plugins.js, in the config folder.
    config
     ┣ env
     ┃ ┗ production
     ┃ ┃ ┗ plugins.js
Add the following to the plugins.js file that will help config the graphql plugin.
    module.exports = {
      graphql: {
        config: {
          endpoint: "/graphql",
          shadowCRUD: true,
          playgroundAlways: true,
          depthLimit: 10,
          amountLimit: 100,
          apolloServer: {
            tracing: false,
            introspection: true,
          },
        },
      },
    };
Source: https://github.com/strapi/strapi/issues/9105#issuecomment-1080073060
To deploy our Strapi’s source code to Render, we need to deploy the application to GitHub.
    git init
    git add .
    git commit -m "first commit"
    git branch -M main
    git remote add <repository url>
    git push -u origin main
Setting up PostgreSQL
In this section, we will create a PostgreSQL database using the Render services.
-
Navigate to Render’s signup page to create an account if you don’t have one. You can choose to signup with your Google, GitHub or GitLab account.
-
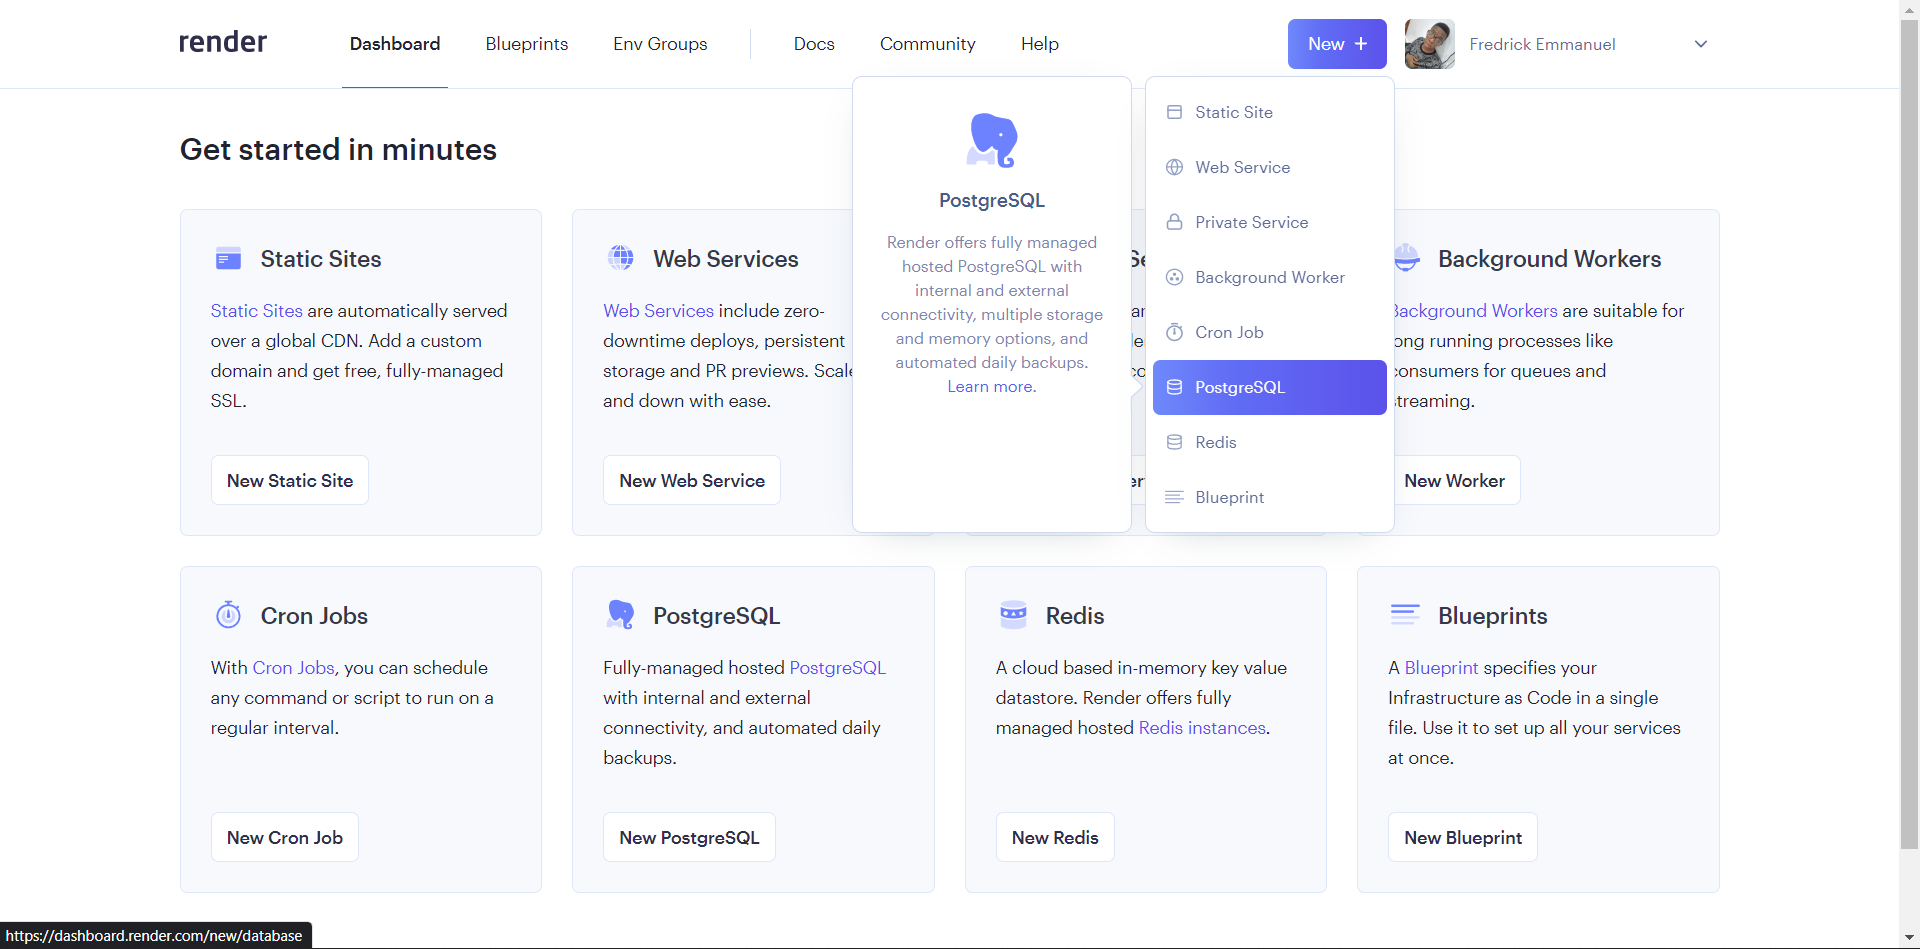
Once the installation is successful, you’d be redirected to your dashboard. Click on New and select PostgreSQL.
-
You’d be redirected to a screen where you’d be prompted to provide the name of the database and the user.
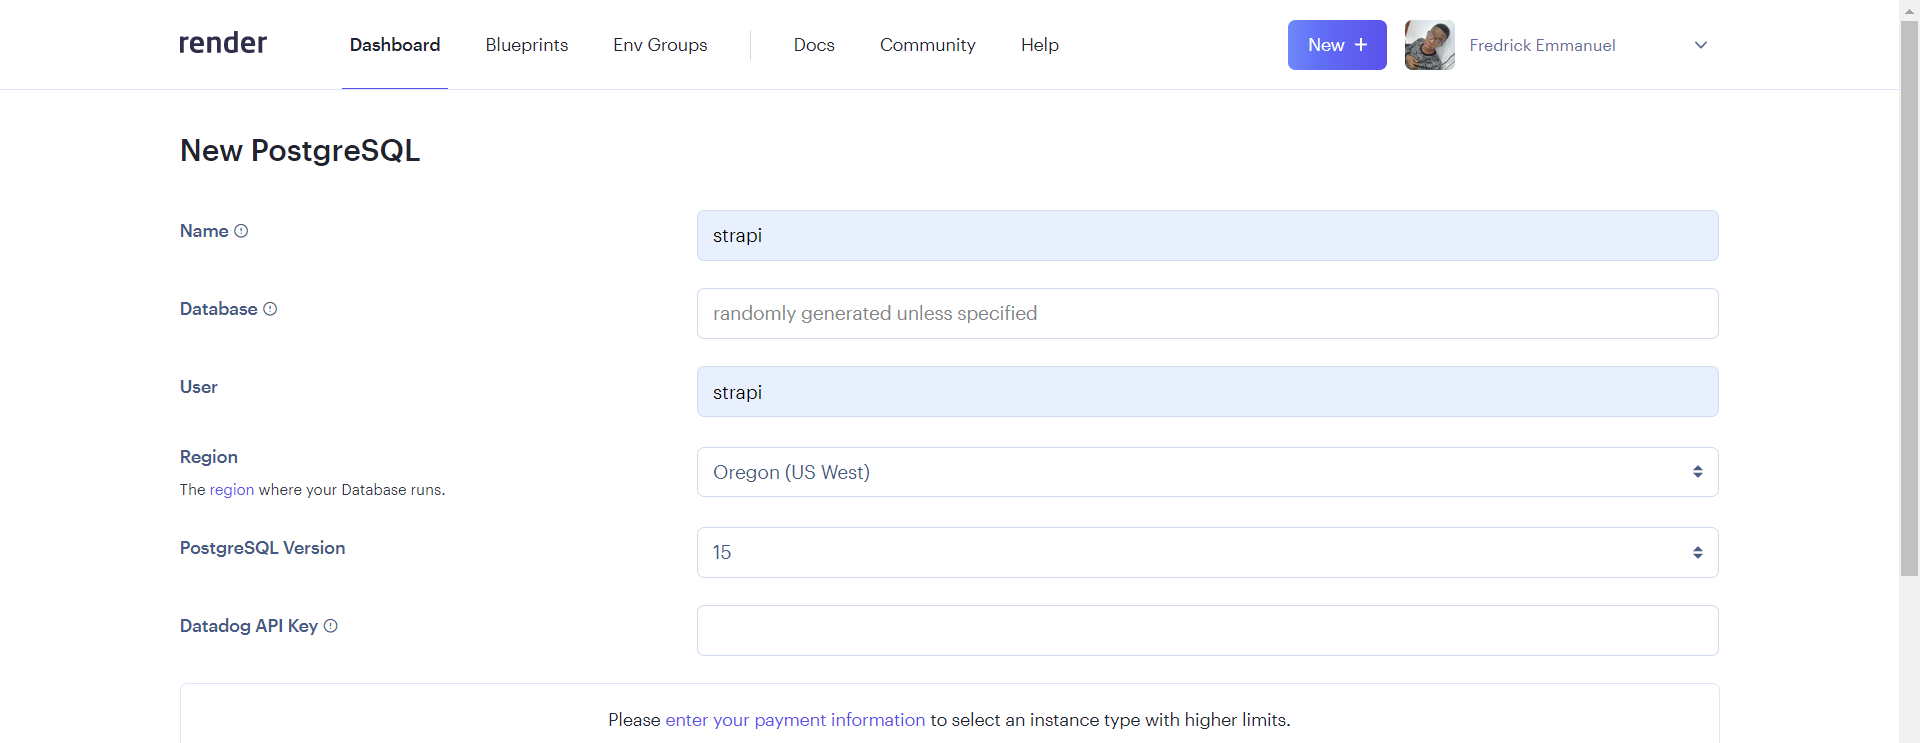
- Lastly, select your desired plan and hit the Create Database button. This tutorial makes use of the free tier as seen in the output below.
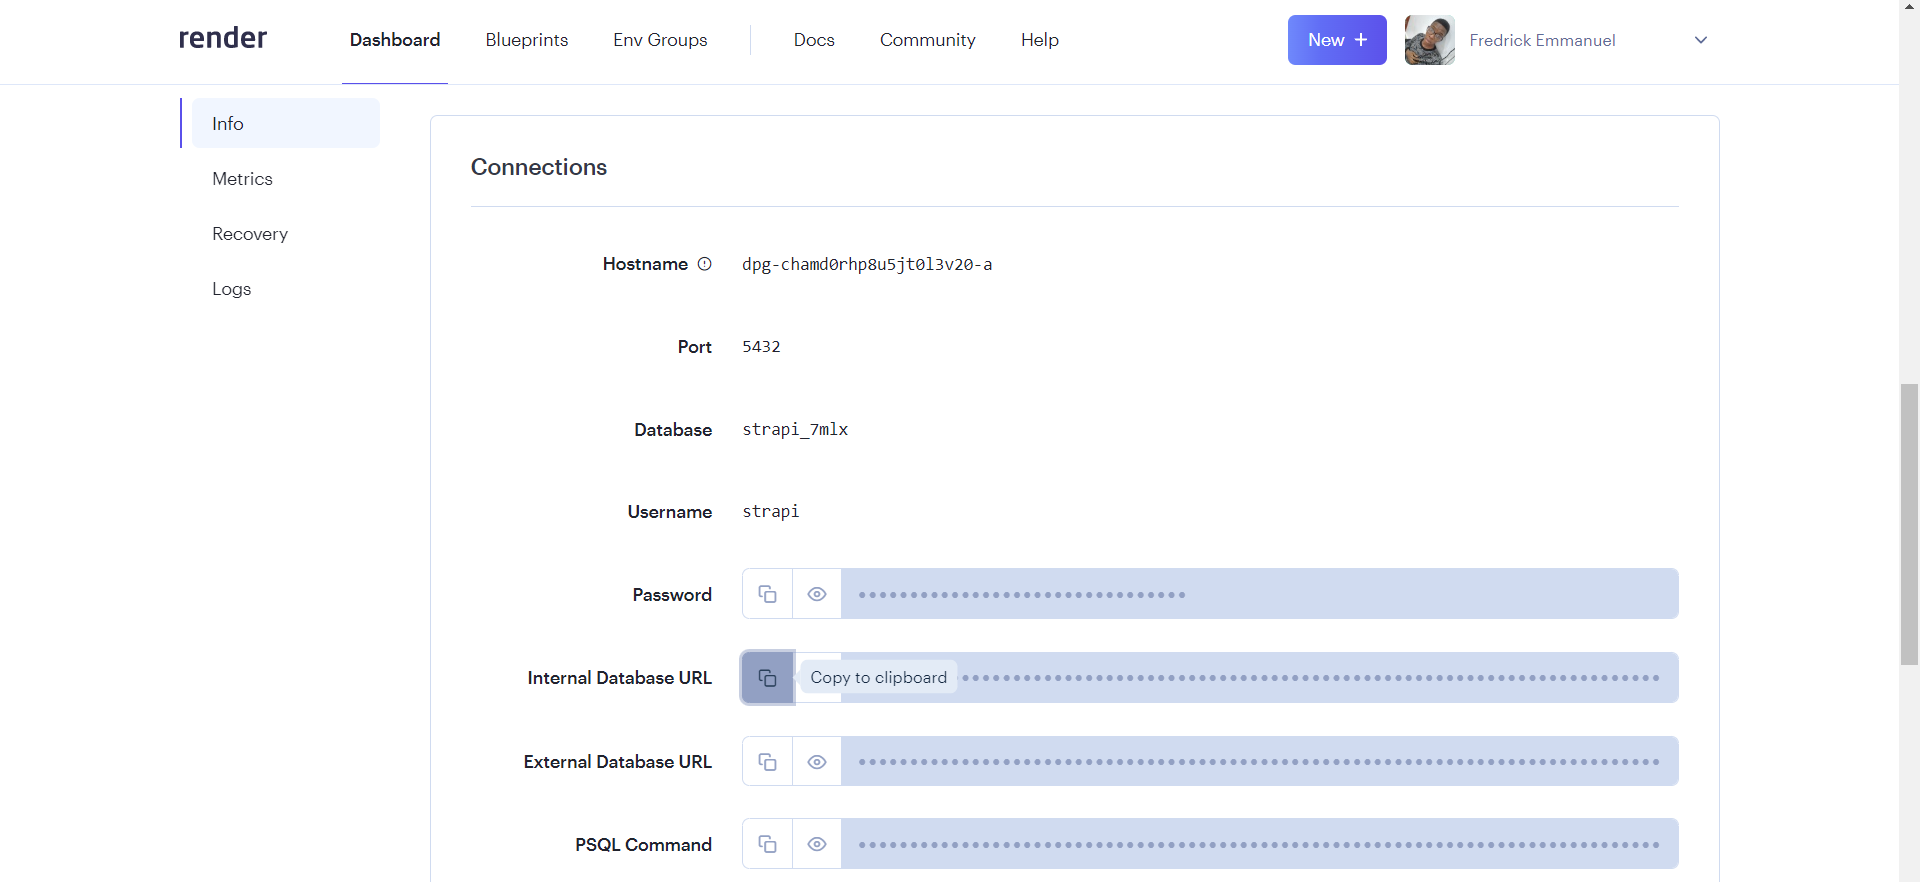
Following all these steps will successfully create our PostgreSQL database. Render has two kinds of PostgreSQL URLs, Internal and External Database URLs. Internal URL is used when the application that is using the Postgres database is hosted in Render. External URL is used when the application is hosted somewhere else and this requires more configuration. Since we are hosting our Strapi application on Render, we would make use of the Internal URL. Scroll to the Connections section and copy the Internal Database URL.
Deploying Strapi
-
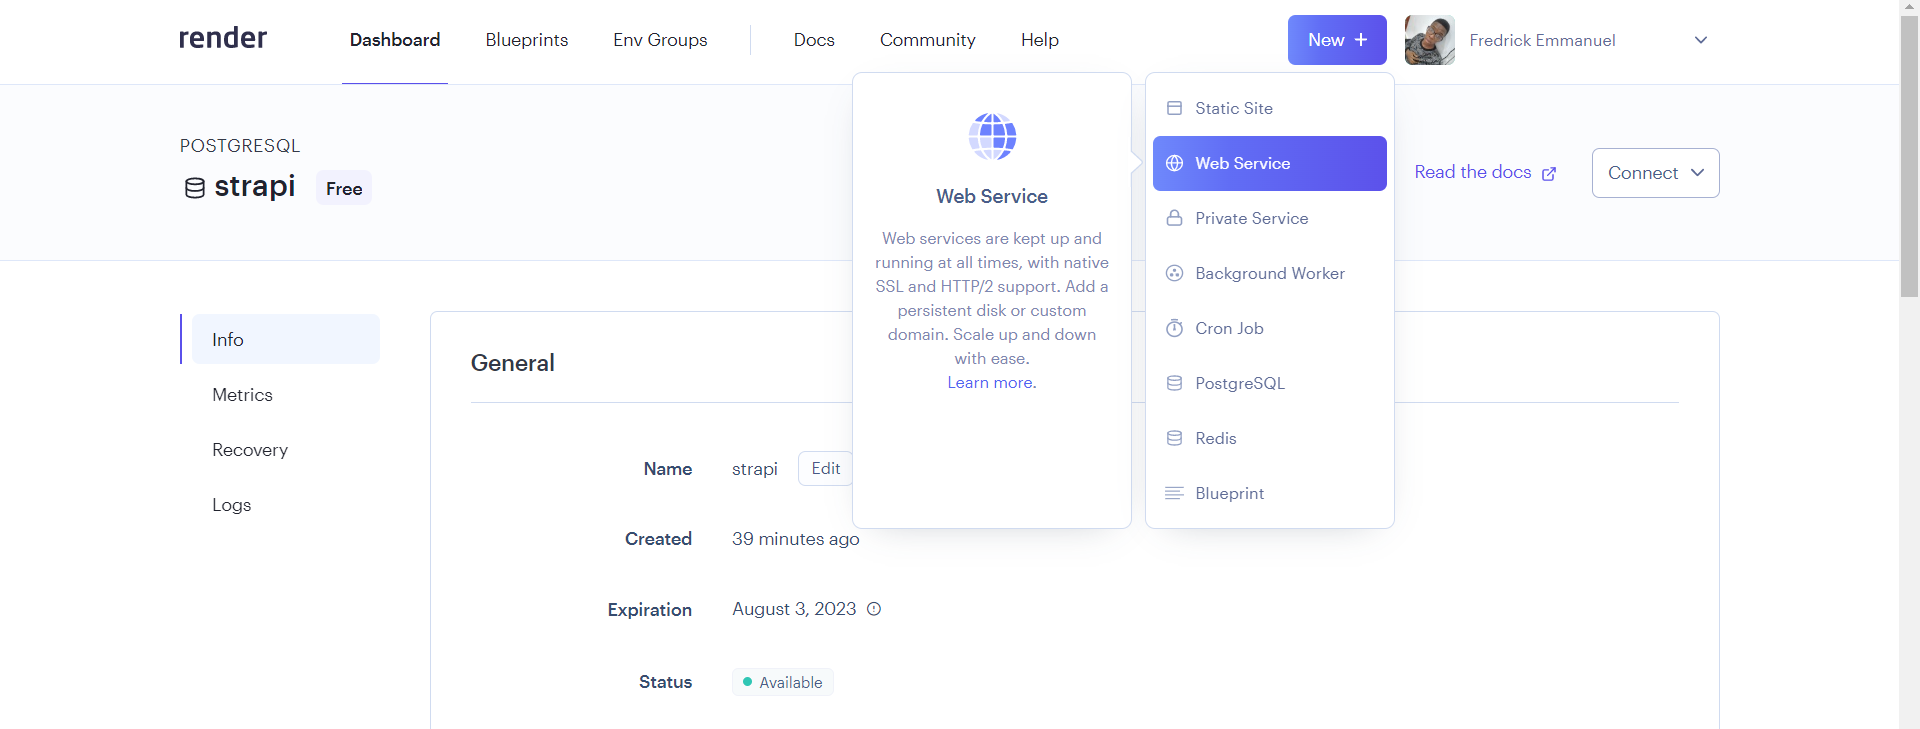
Once the database has been created successfully, select New and click on Web Services.
-
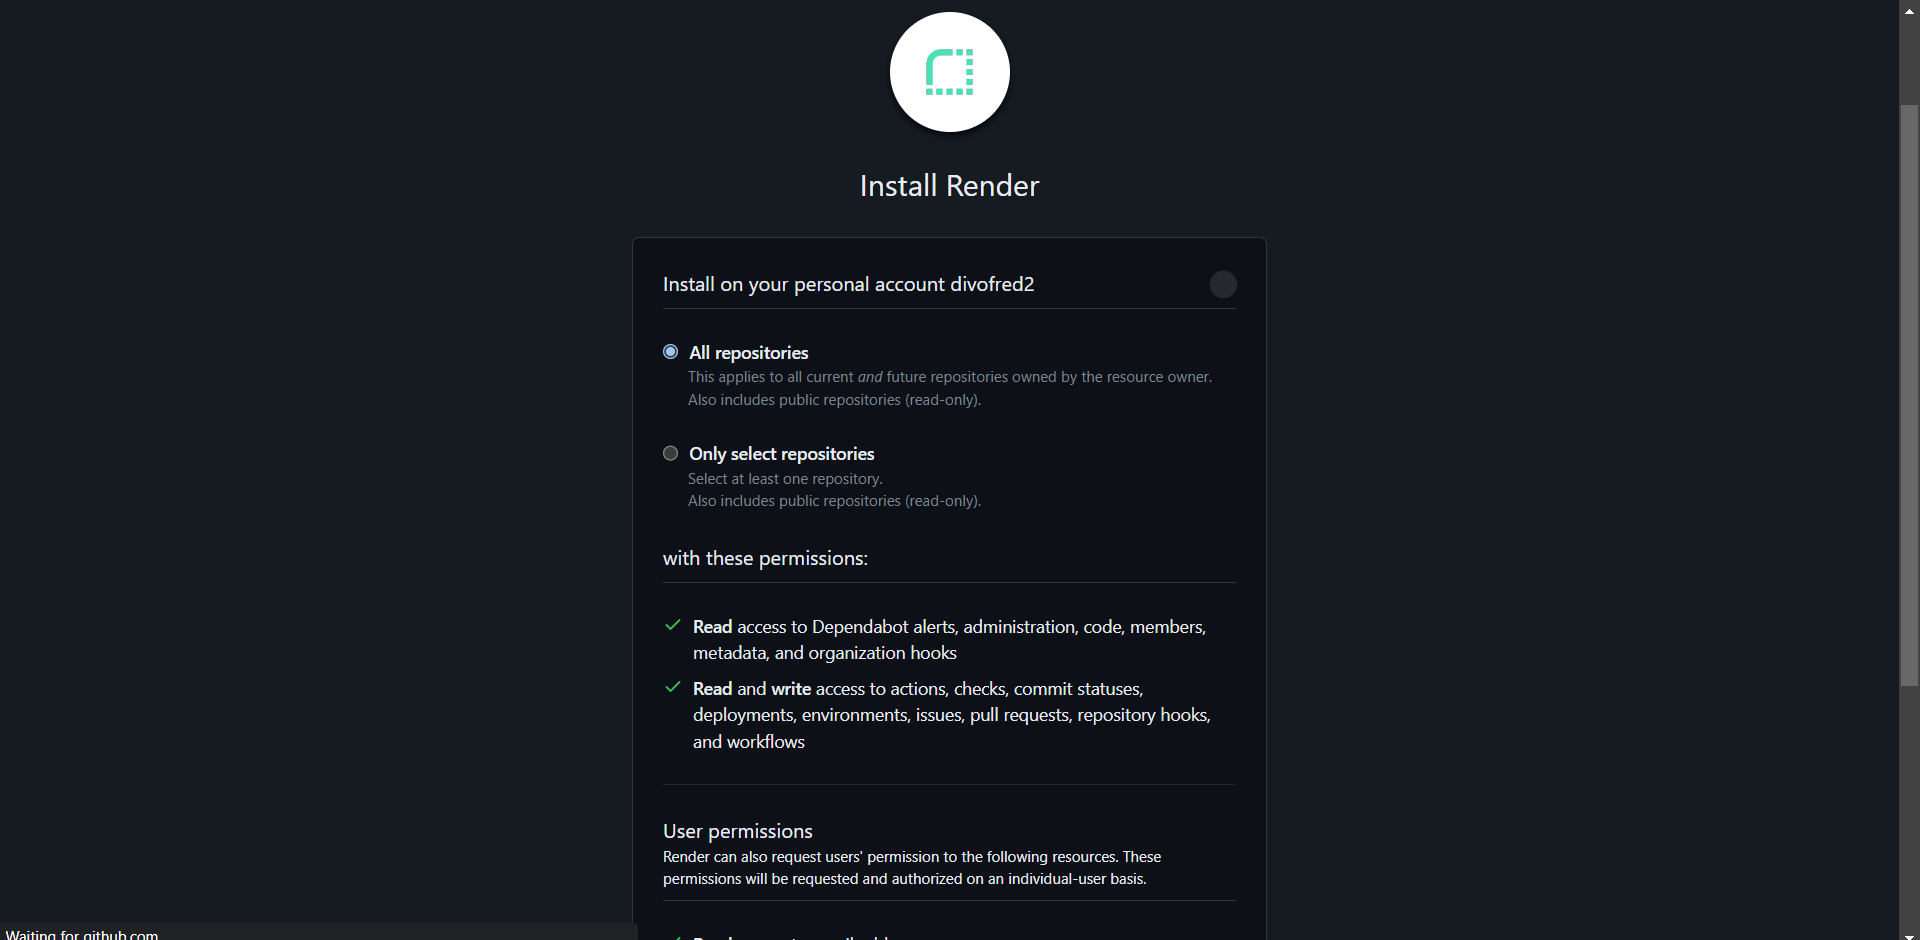
Next, you’d be prompted to connect your GitHub account. Once you’re connected, select All repository or specify the Strapi repository.
-
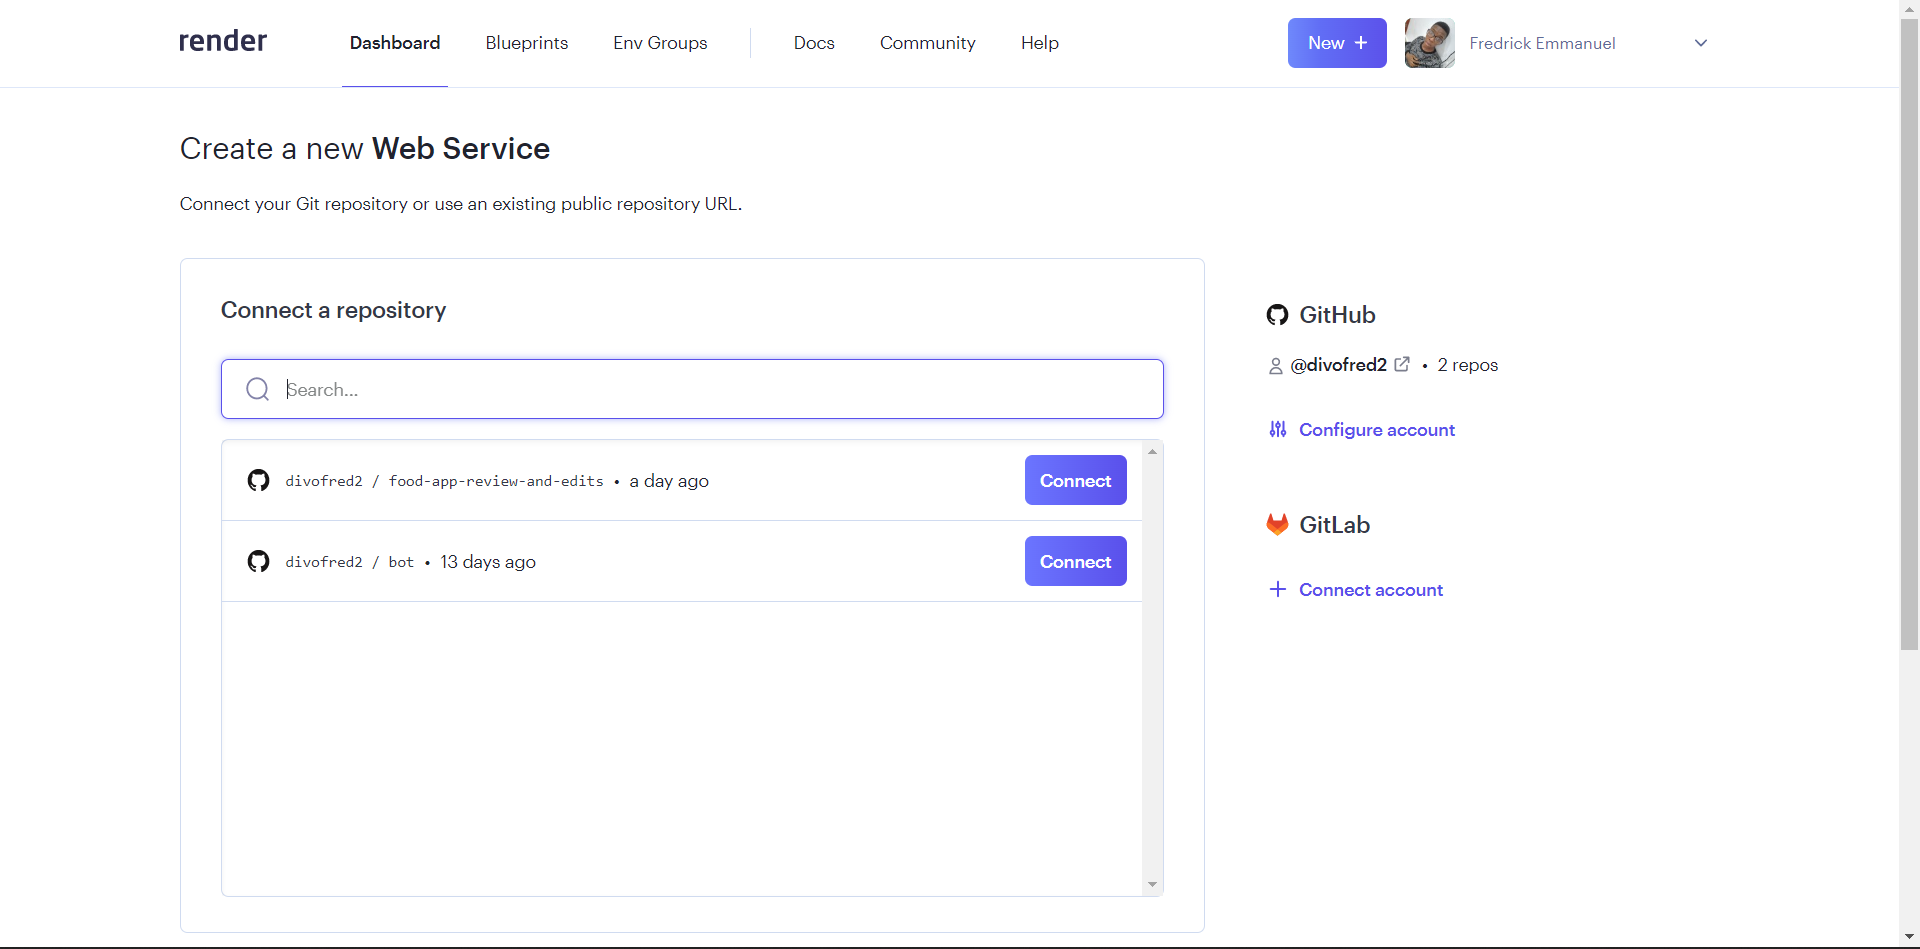
Search for the Strapi repository and click Connect.
-
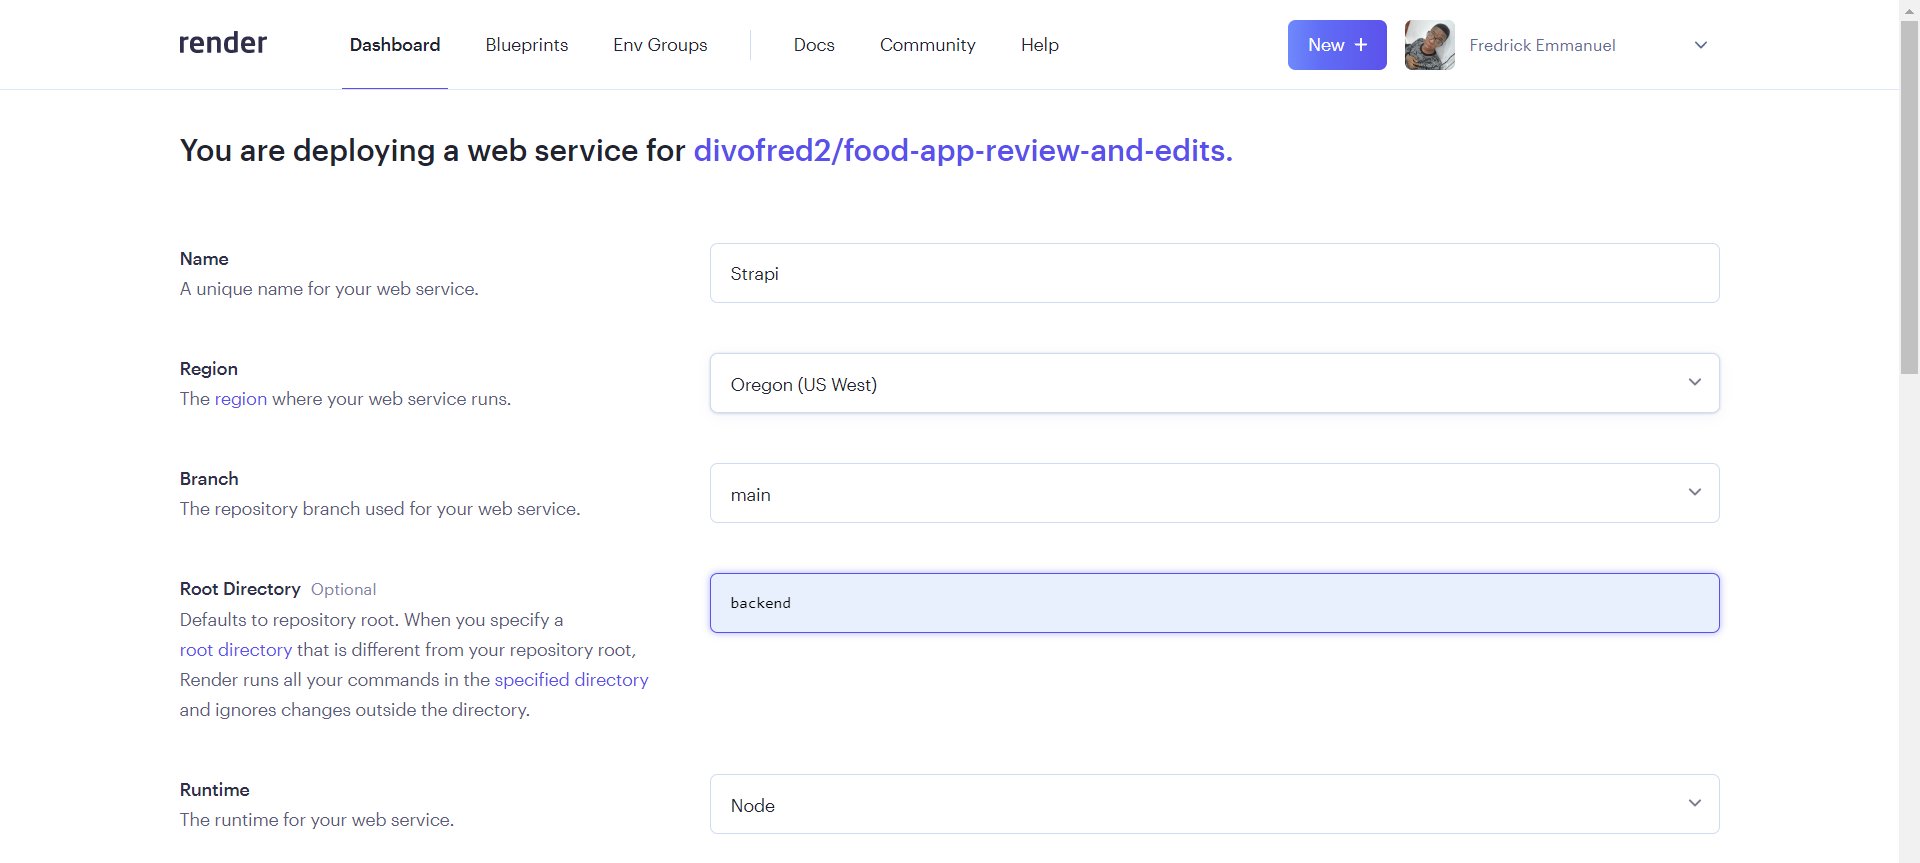
Next, give the project a name and set the Root Directory to the folder that contains Strapi’s source code.
-
Set the Build Command to
npm install && npm run buildand the Start Command tonpm start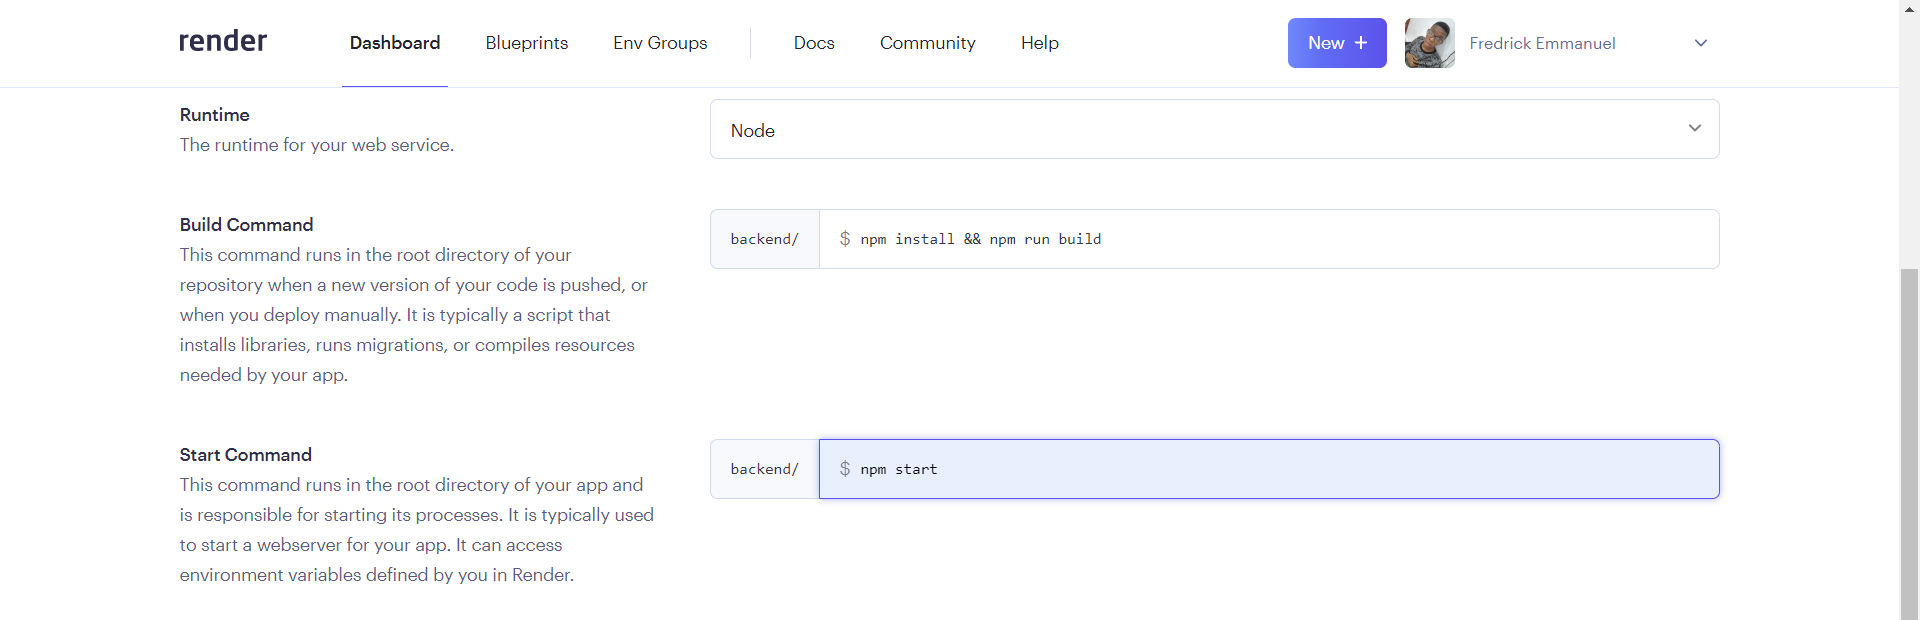
-
This tutorial selects the free tier in the Select Plan section. You can choose to select another plan according to your taste.
-
Scroll to the bottom, click on Advanced, and let’s add the following to the environment variable. Paste the Internal Database URL you copied from the previous section.
    DATABASE_URL: Internal Database URL
    APP_KEYS: s4RAEbsJAcvpmMgGdWkmMQ==,/yh3FHR2u3SHyaSH8v1IZw==,5TcP4sY0KOl5t7a3ycuBwg==,thCs474mxnaSVY1+fk3QtA==
    JWT_SECRET: S8n42b7XulDz0A2z+/xeZQ==
    API_TOKEN_SALT: Onwo9oDUUf294KJ8W25IbQ==
    ADMIN_JWT_SECRET: ZOnwo9oDUUf294KJ8W25IbQ==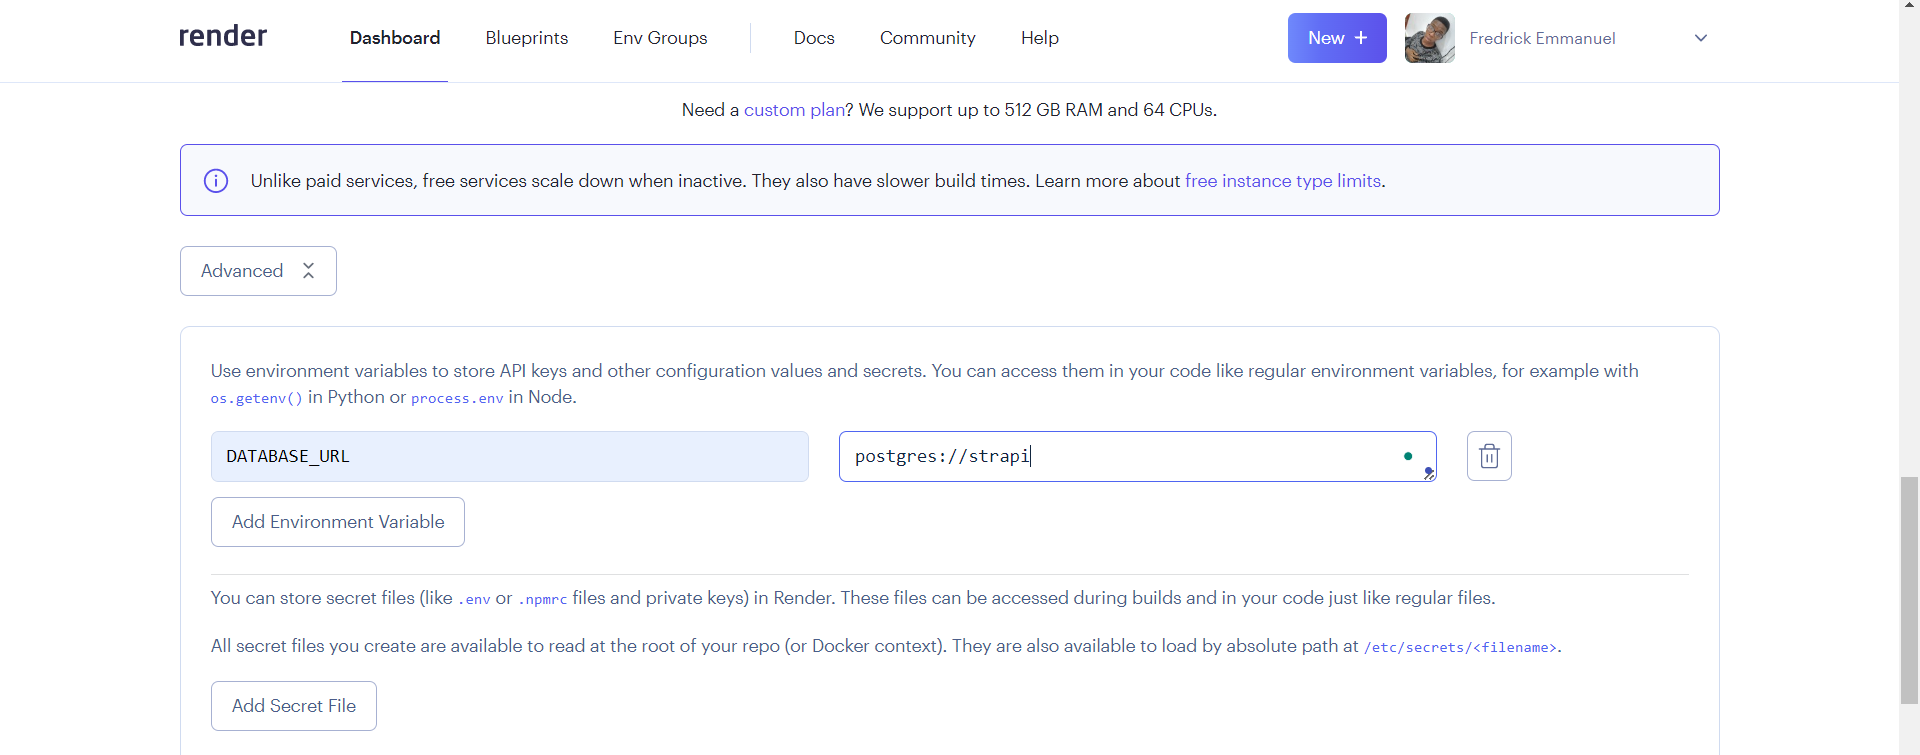
- Lastly, scroll down and click Create Web Service and watch the build logs for any errors.
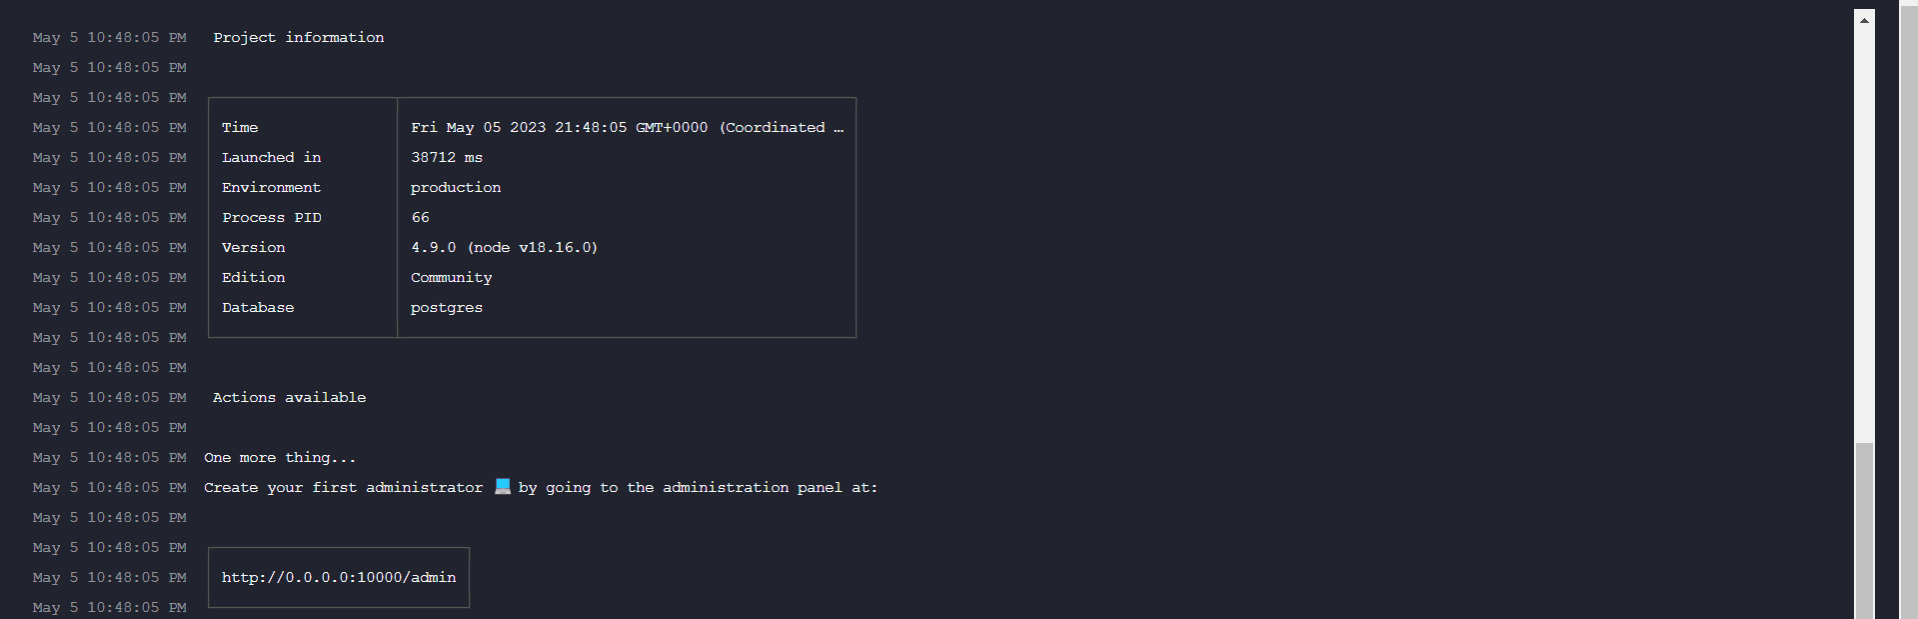
Feel free to comment in the comment section on any errors encountered while deploying the code.
Setting up Strapi Admin
Once your Strapi project is live, you’d be provided with a URL that will be used to access your Strapi admin panel. This URL can be found at the top of the page.
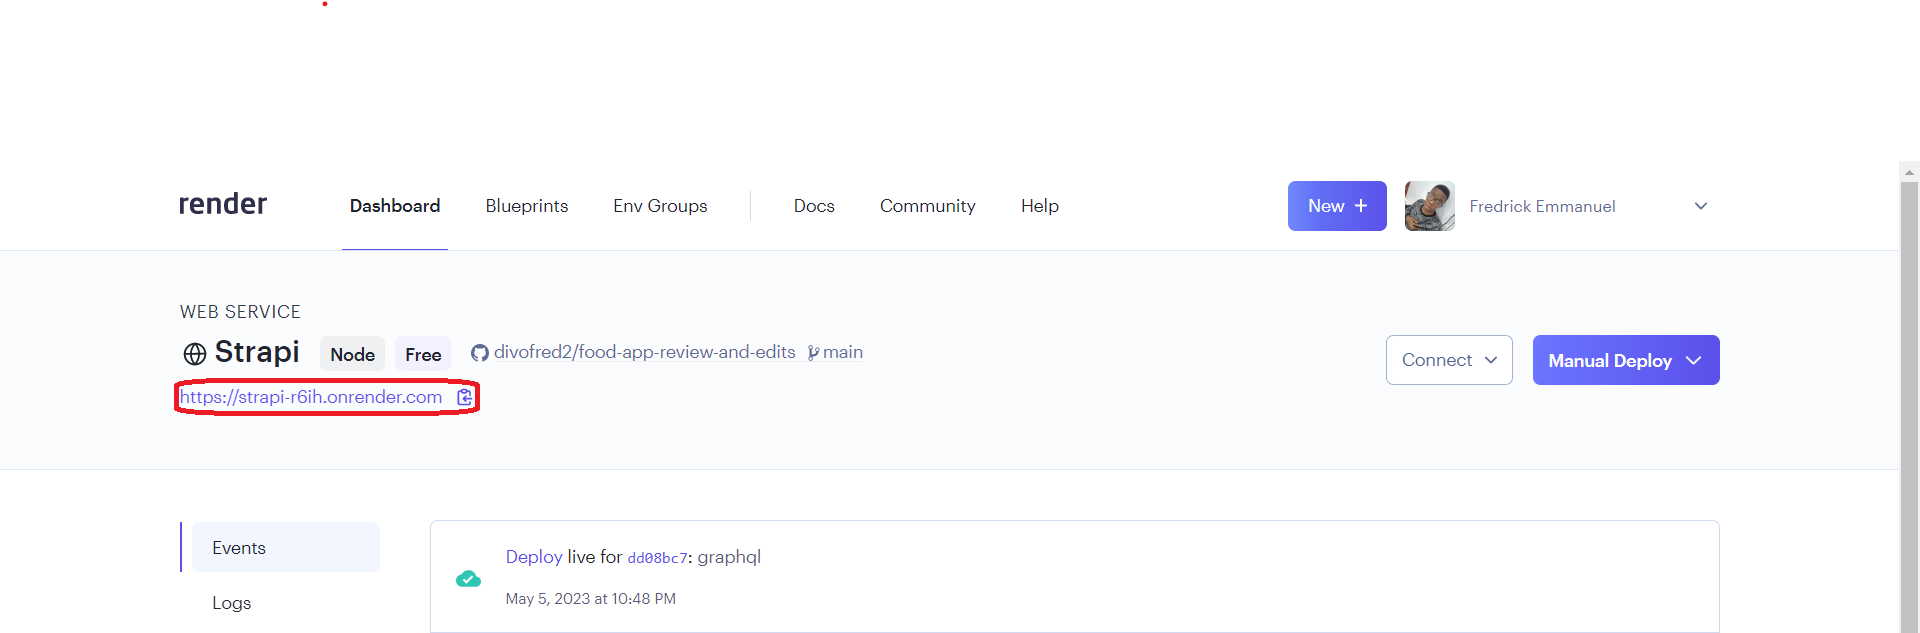
Copy out the URL and append /admin to access your admin dashboard. If you are not registered, you’d be prompted to create an admin user.
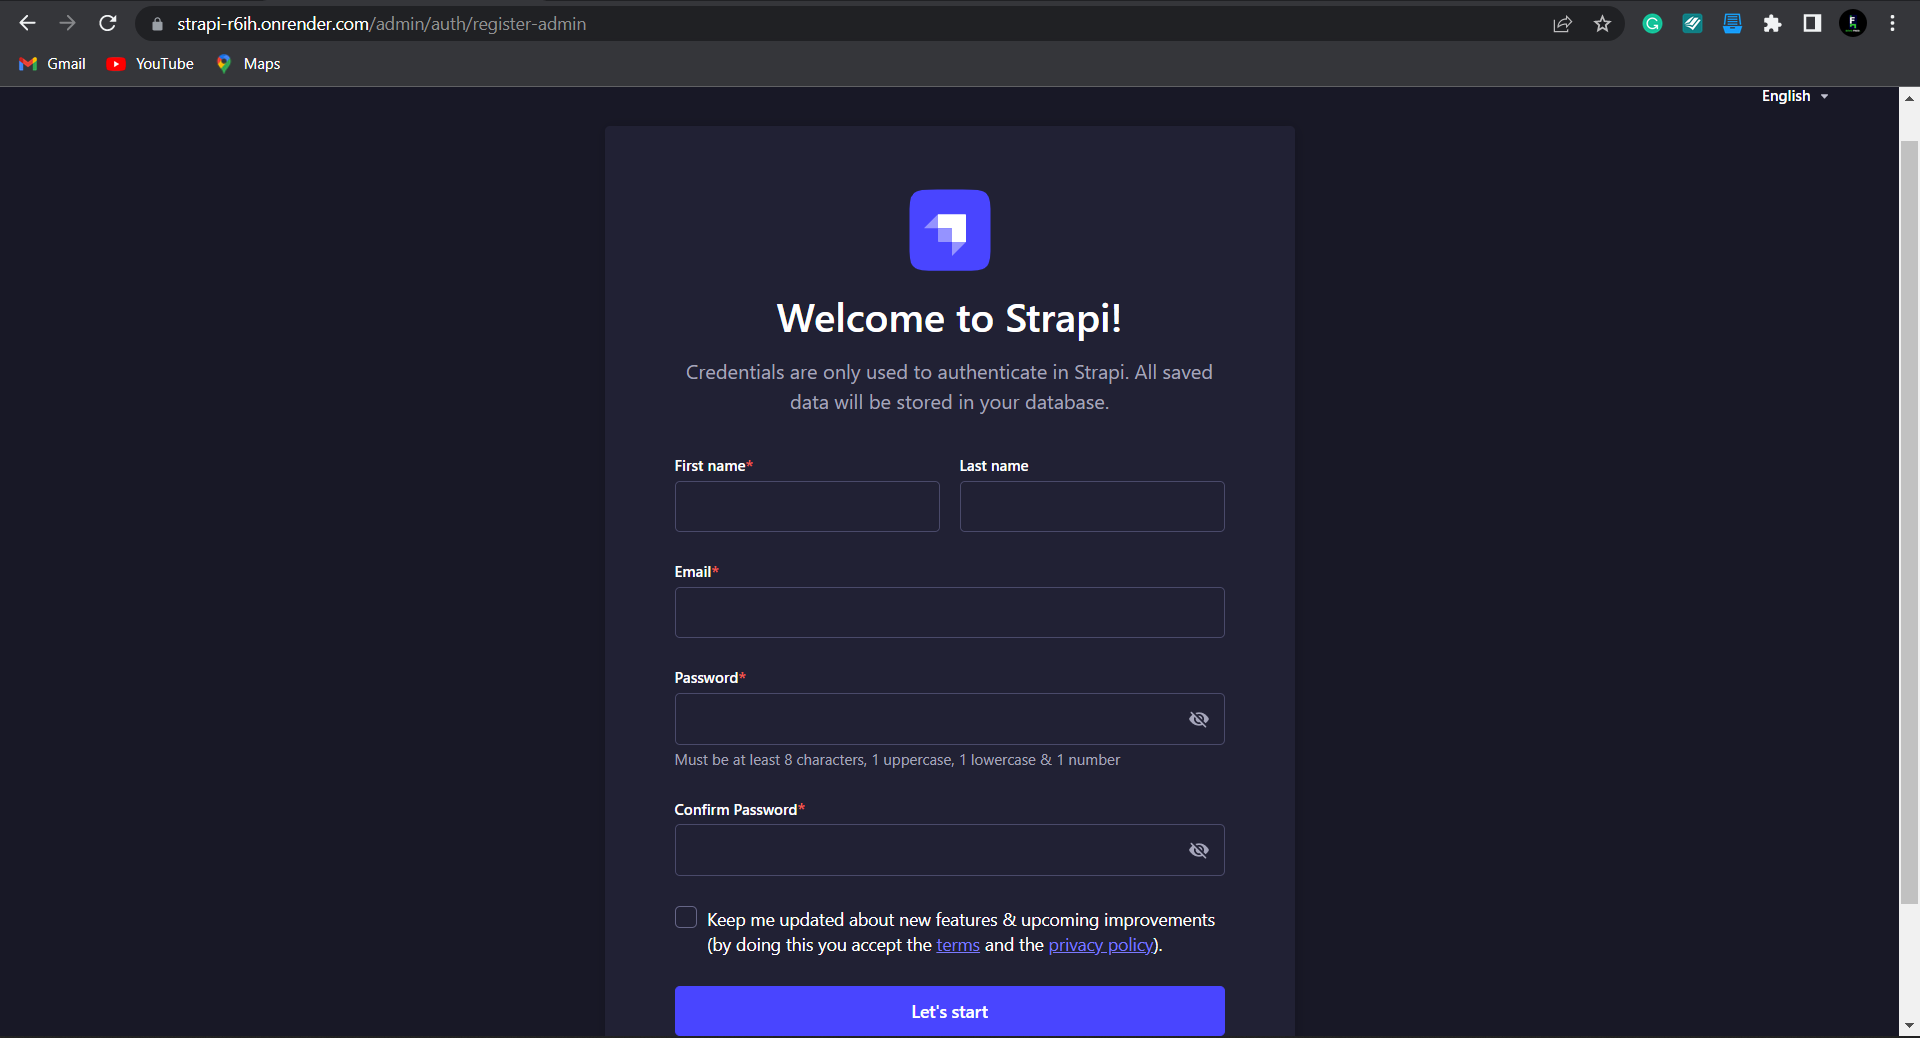
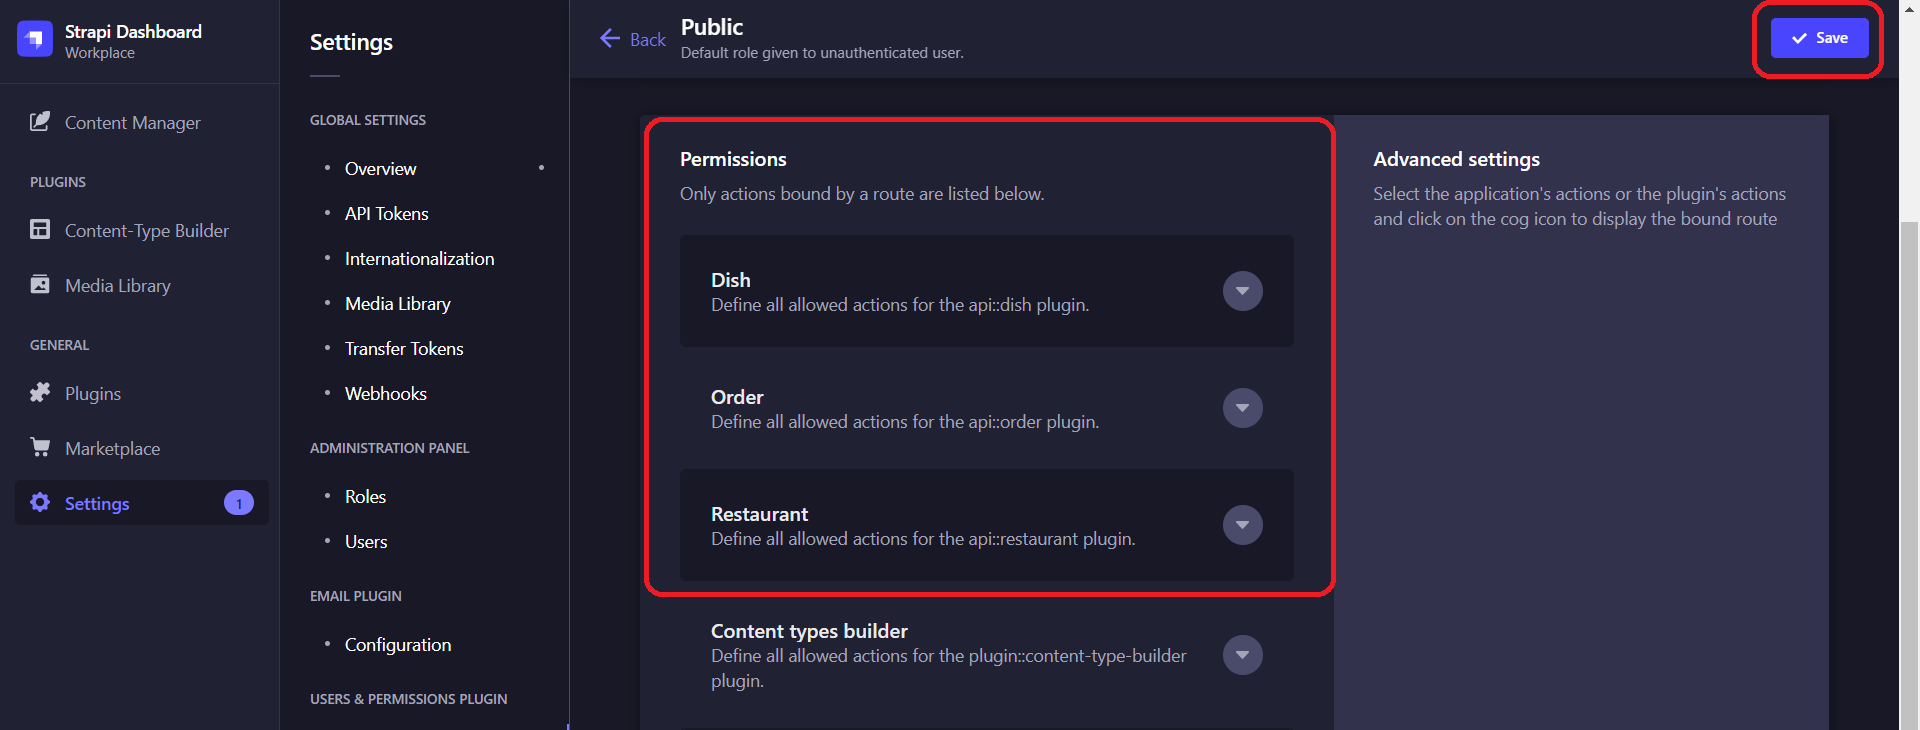
In your Strapi’s admin dashboard, click on the following to configure permissions for the various content types.
    ┣ Settings
    ┃ ┣ Roles
    ┃ ┃ ┗ public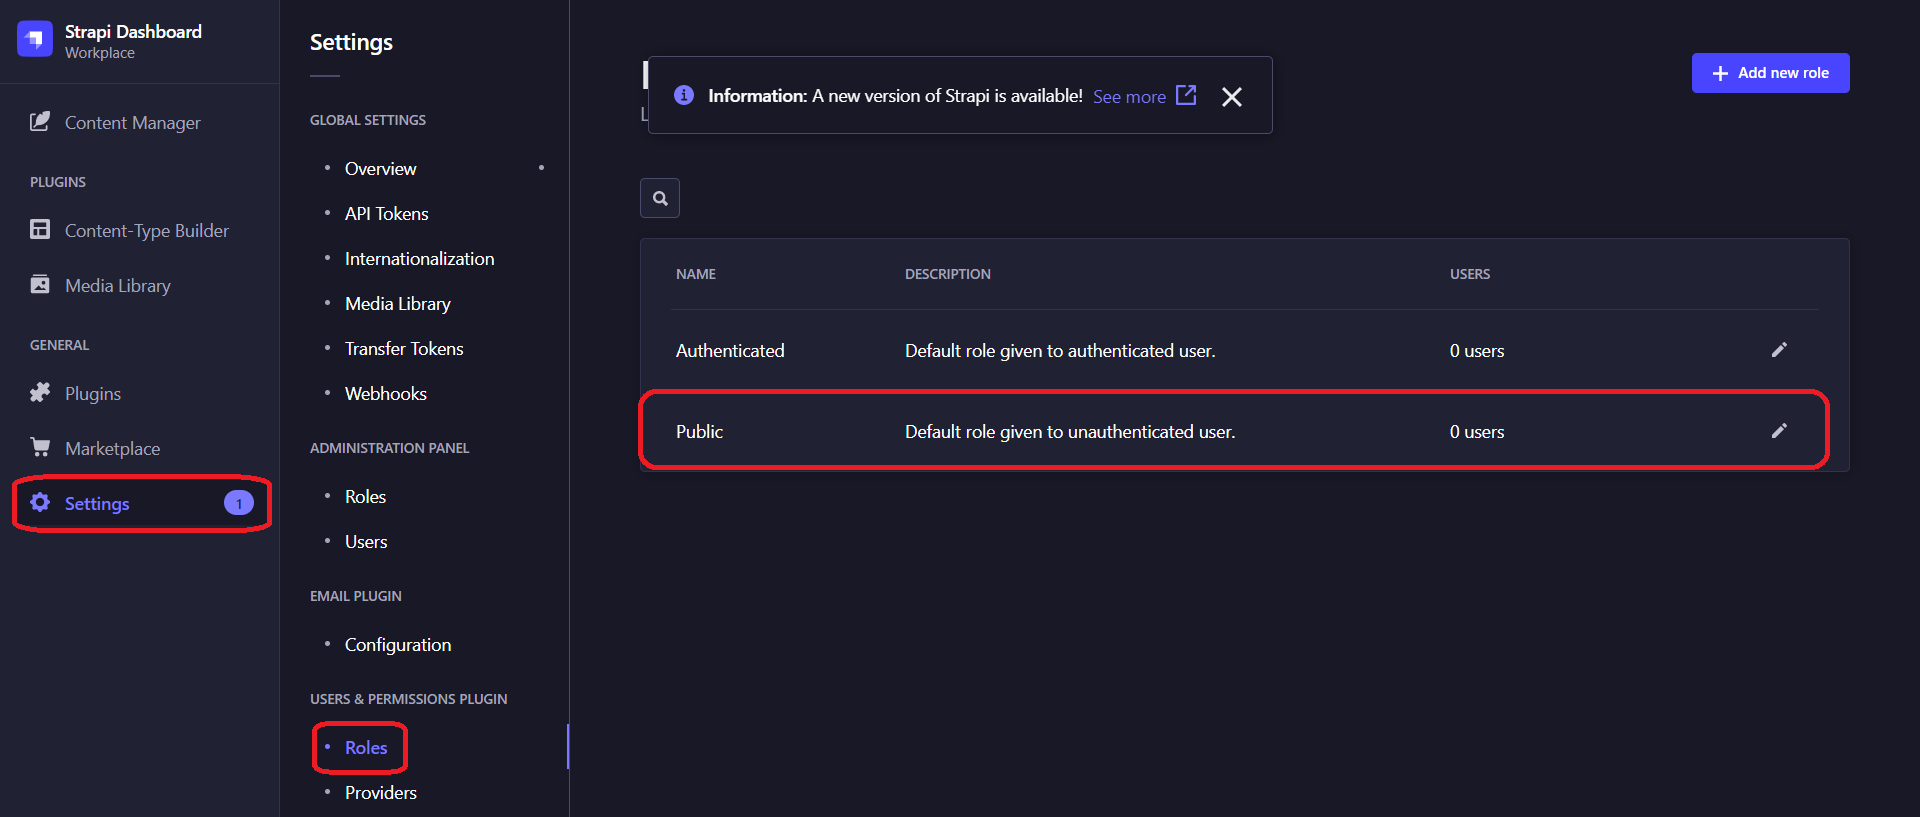
Select the specific CRUD operations you need for the various content types and hit Save.
Deploying the Frontend
In this tutorial, we will make use of the Vercel hosting platform to deploy our NextJS code.
-
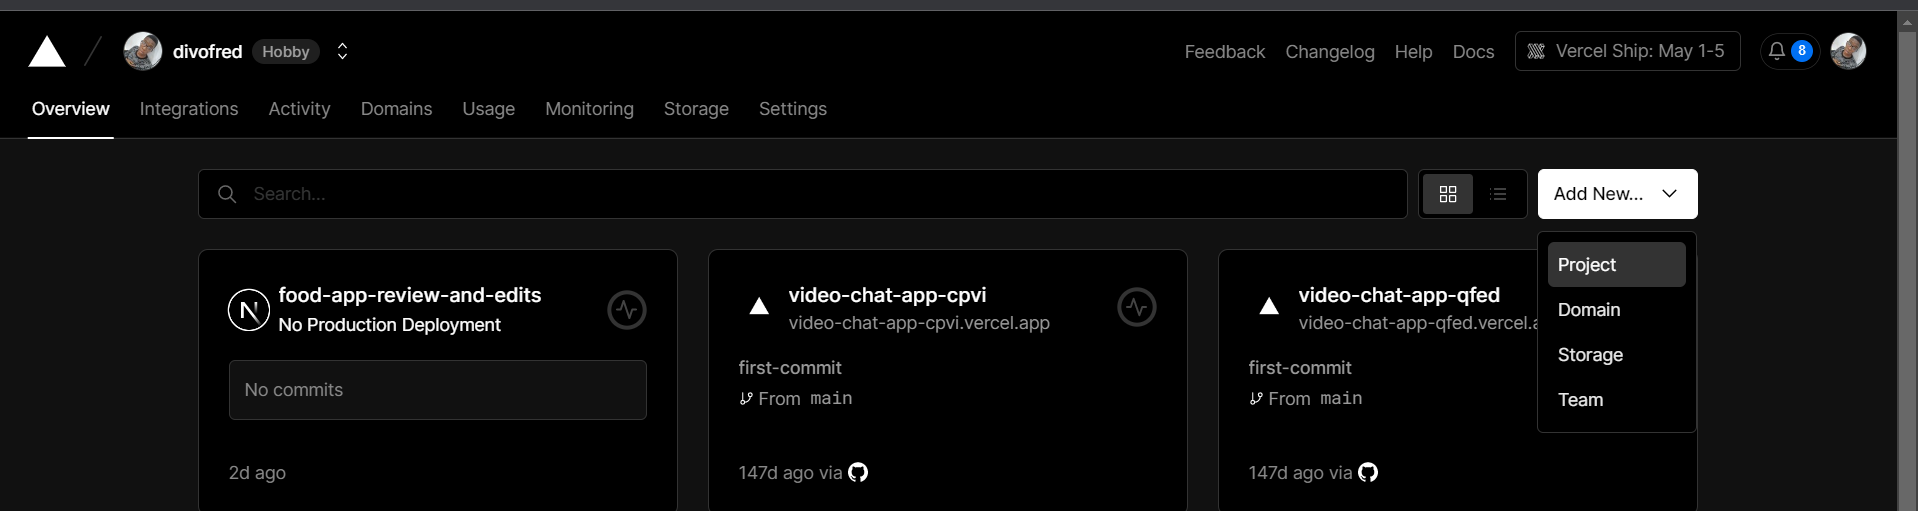
Head to your Vercel dashboard, select Add New and click on Project.
-
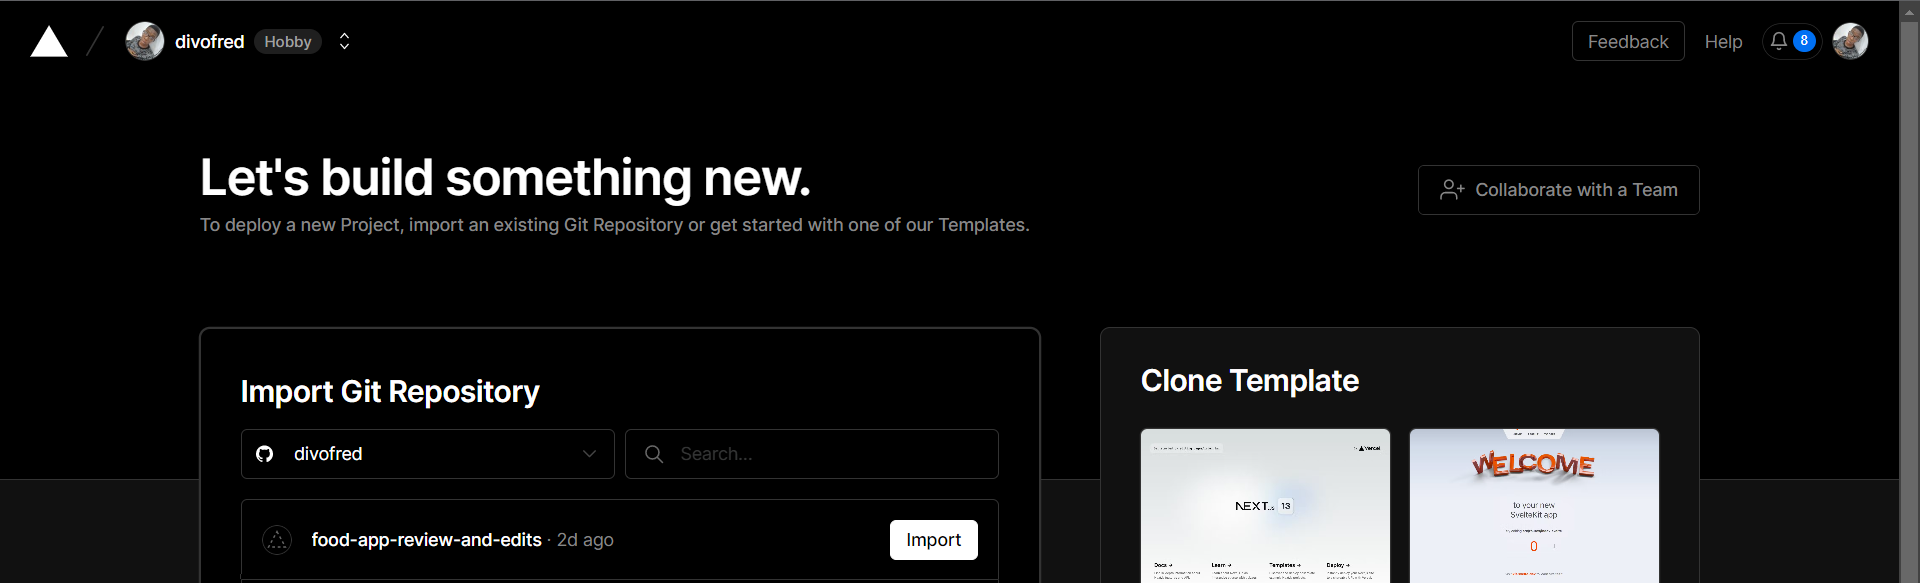
Search for the repository and hit import.
-
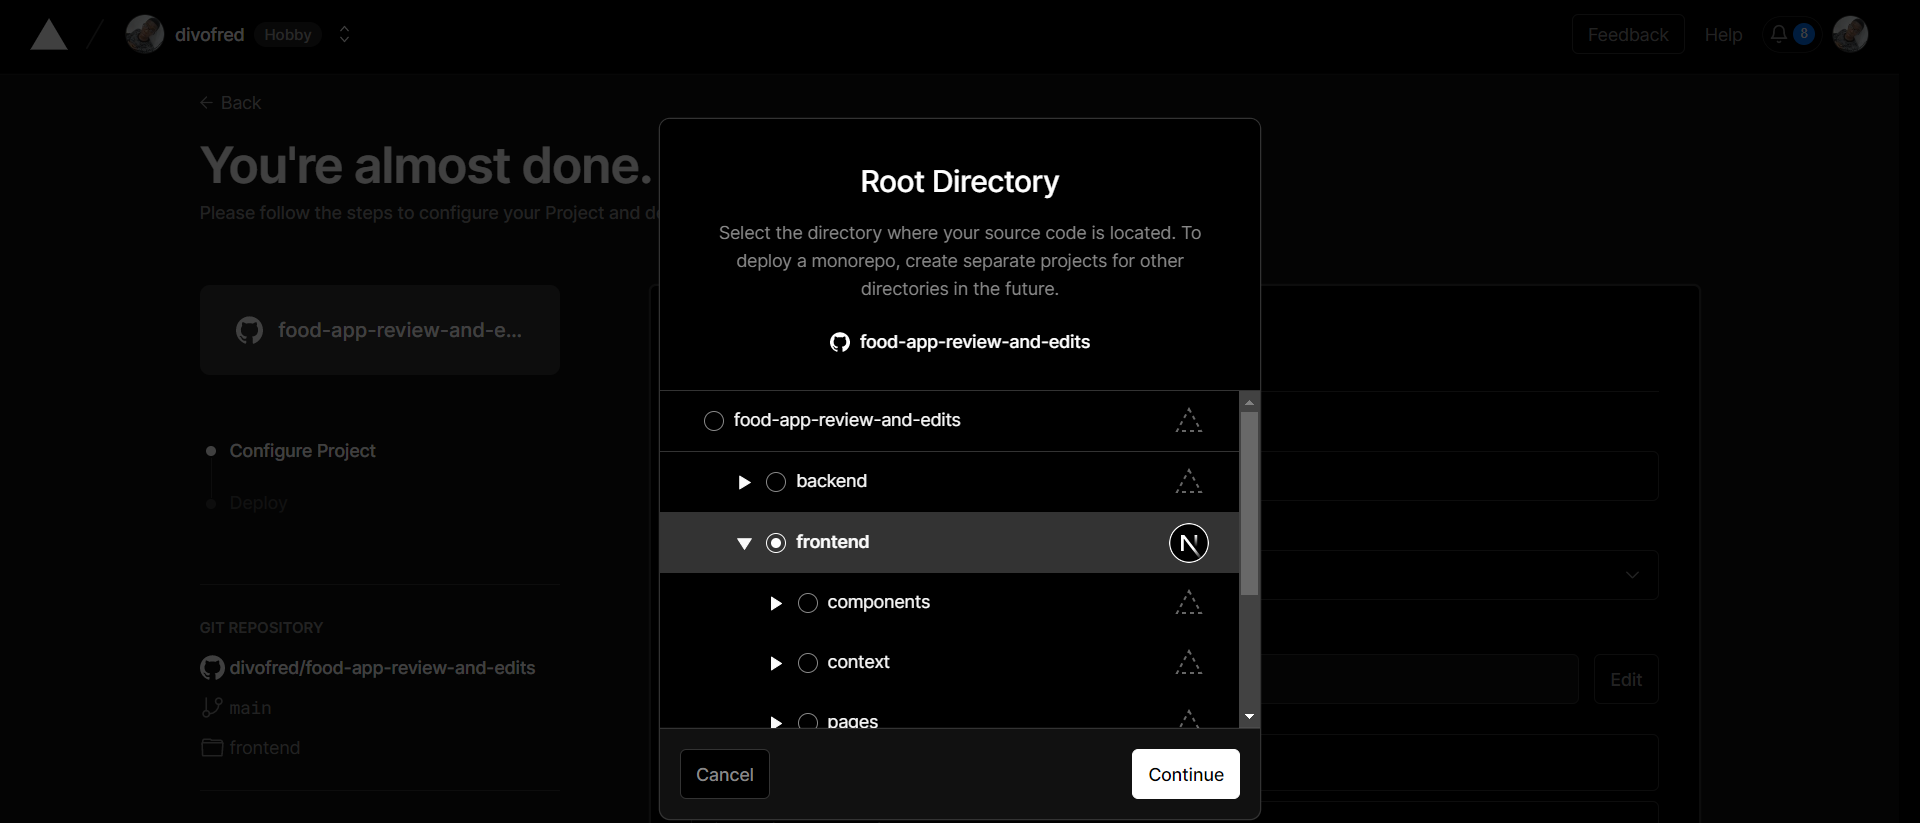
Under Root Directory, click on Edit and select the Frontend folder.
-
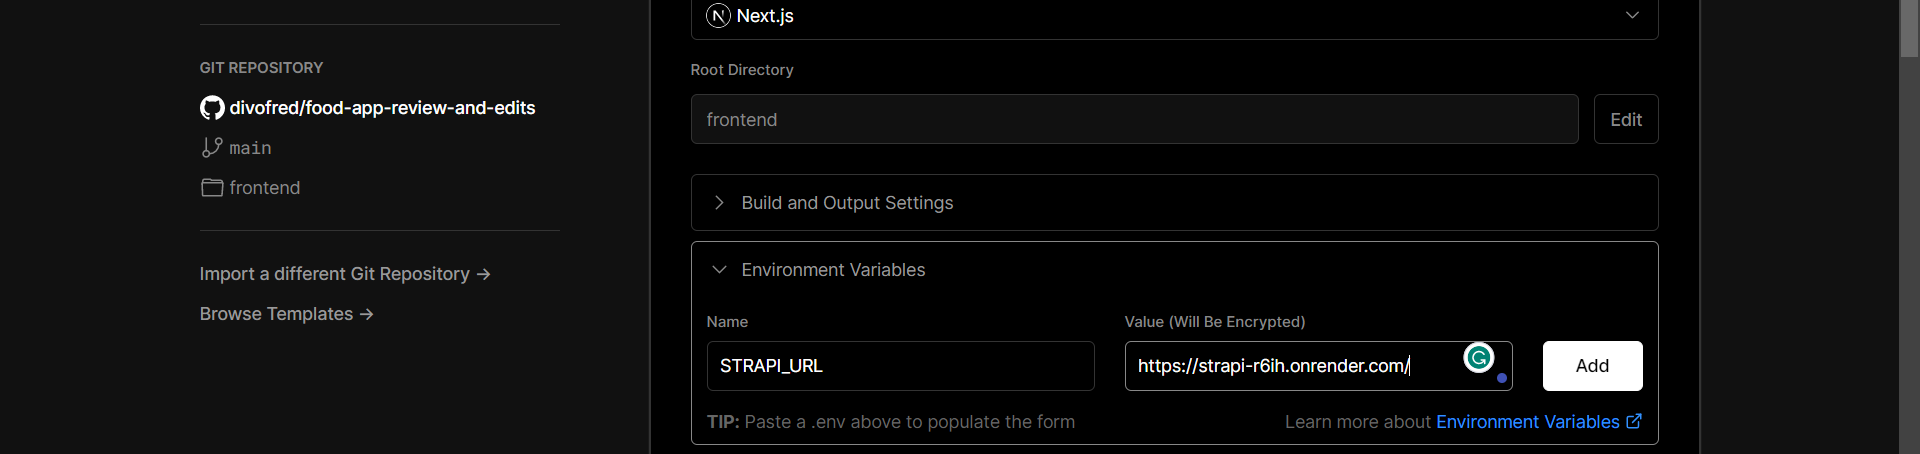
Click on Environment Variables and add the deployed Strapi URL.
-
Lastly, hit Deploy and look at the various logs for any errors.
Conclusion
Huge congrats, you have successfully achieved this tutorial. I hope you enjoyed it!
Note: The source code is available on GitHub here
Still hungry? Feel free to add additional features, adapt these projects to your own needs and give your feedback in the comments section.
Share your meal! Did you enjoy this tutorial? Share it around you!