Introduction
With the current digital era and technological improvement, it has become easier to purchase, sell, and rent properties. Building a real estate listing application is one potential gold mine for entrepreneurs and developers who hope to capitalize on the real estate market.
In this guide, we will build a real estate listing application using Strapi and SvelteKit.
Prerequisites
To follow along with this tutorial, ensure you meet the following prerequisites.
- Basic knowledge of Svelte. You can check out the SvelteKit docs.
- Node.js and Npm/Yarn installed
What is SvelteKit?
SvelteKit is a robust framework for creating fast, reliable, and reactive web applications. Its server-side rendering allows you to quickly build SEO-friendly apps, which is essential for online businesses.
In this comprehensive SvelteKit tutorial, we will cover everything from setting up SvelteKit, SvelteKit authentication, persisting data in SvelteKit using a store, to adding Tailwind CSS to SvelteKit, and many more. This thorough coverage will give you the confidence to master SvelteKit.
You can read on the SvelteKit docs to learn more.
What is Strapi?
Strapi is a free and open-source content management system (CMS) built with Node.js.
It's used in web development to create, manage, and expose content-rich experiences to any digital device.
With what we know so far, let's build a Real Estate Listing Platform!
Set up Strapi CMS
Once you meet the requirement above, create a main folder, real-estate, to house the backend and frontend of our application. In the real-estate folder run the command below to bootstrap a new Strapi project:
 cd real-estat
 npx create-strapi-app@latest real-estate-back --quickstart
Start the project by running the command below:
npm run developThis will start a Strapi instance on port 1337. If it does not automatically open the page, type localhost:1337 in the browser bar to launch the panel:
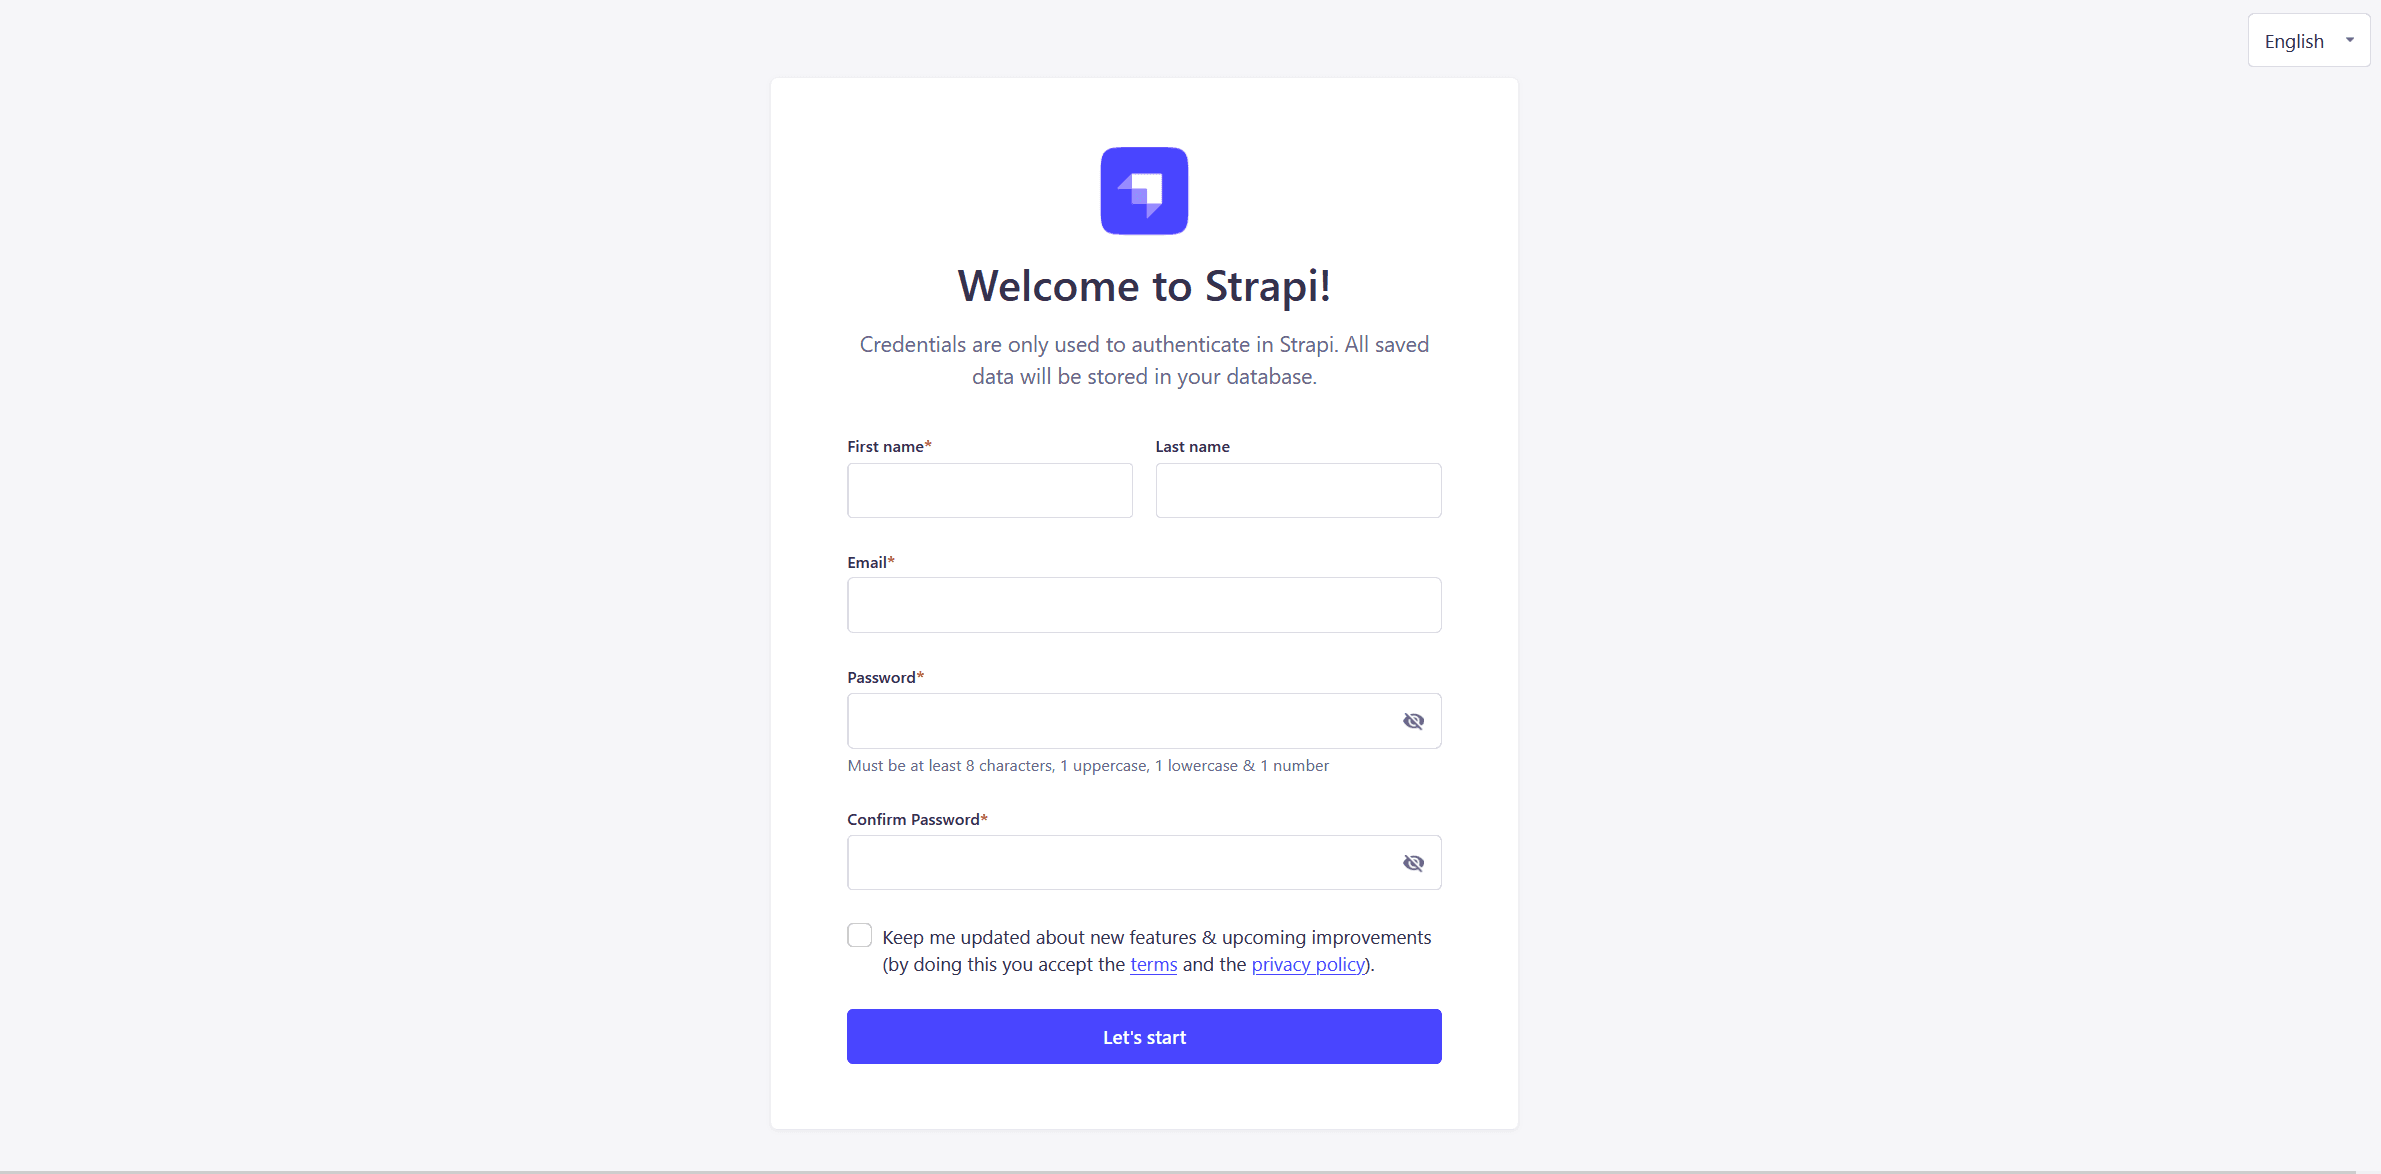
Create a new Strapi admin user and login to start adding content.
Create Collection and Content Types
Adding content with Strapi is a straight forward process. All you need is to create a collection type and seed it with some data.
In this tutorial, we created one collection type Estate having 6 fields:
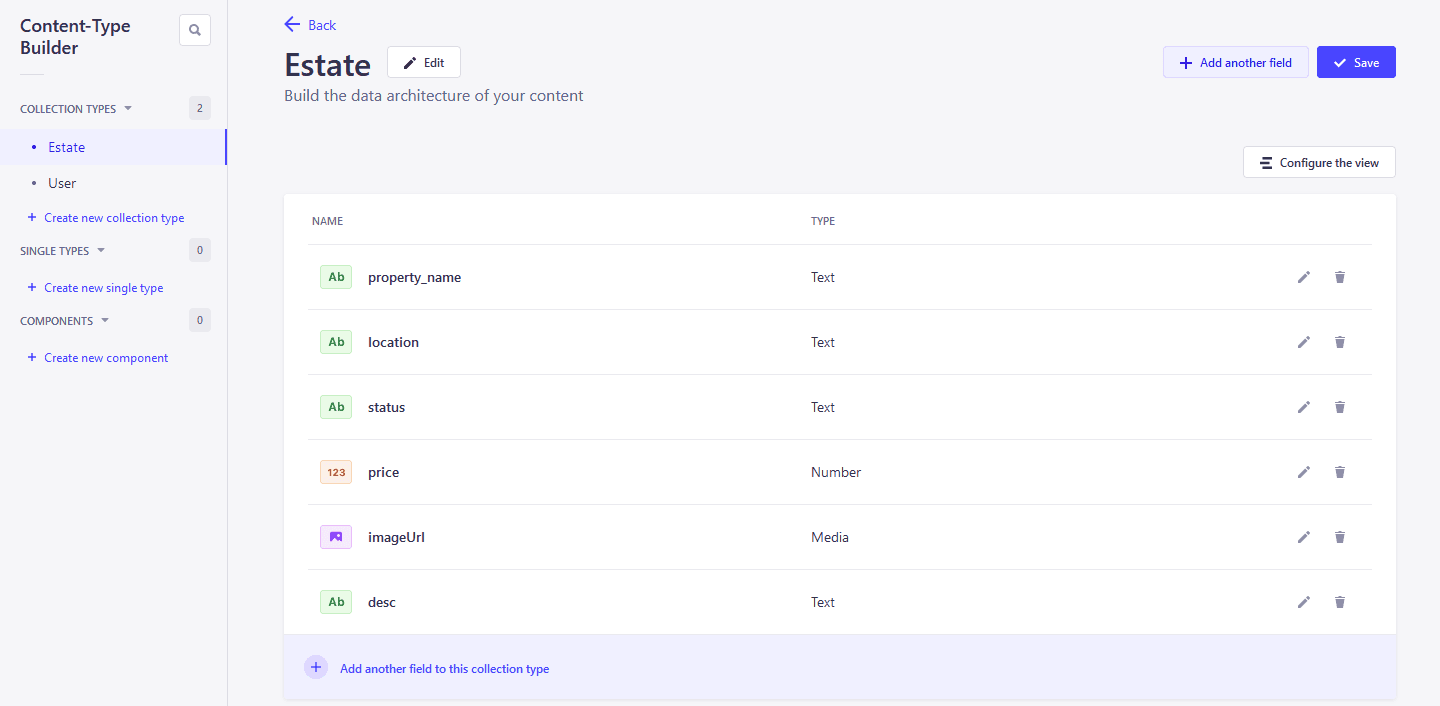
imageurl: Media (single media). This represents the image of the property.property_name: Text (short text). This is the property name.location: Text (short text). This is the place where the estate is locate.status: Text (short text). This field indicates if the estate is for sale or for rent.price: Number. This attribute is the selling/renting price Of the propertydesc: Text (long text). And finally we have the description of the property.
Don’t forget to mark some or all attributes as required.
Once you have created your content type and populated it with some data, you will move to the next step which consists of creating a Sveltekit Project.
Set API Permissions
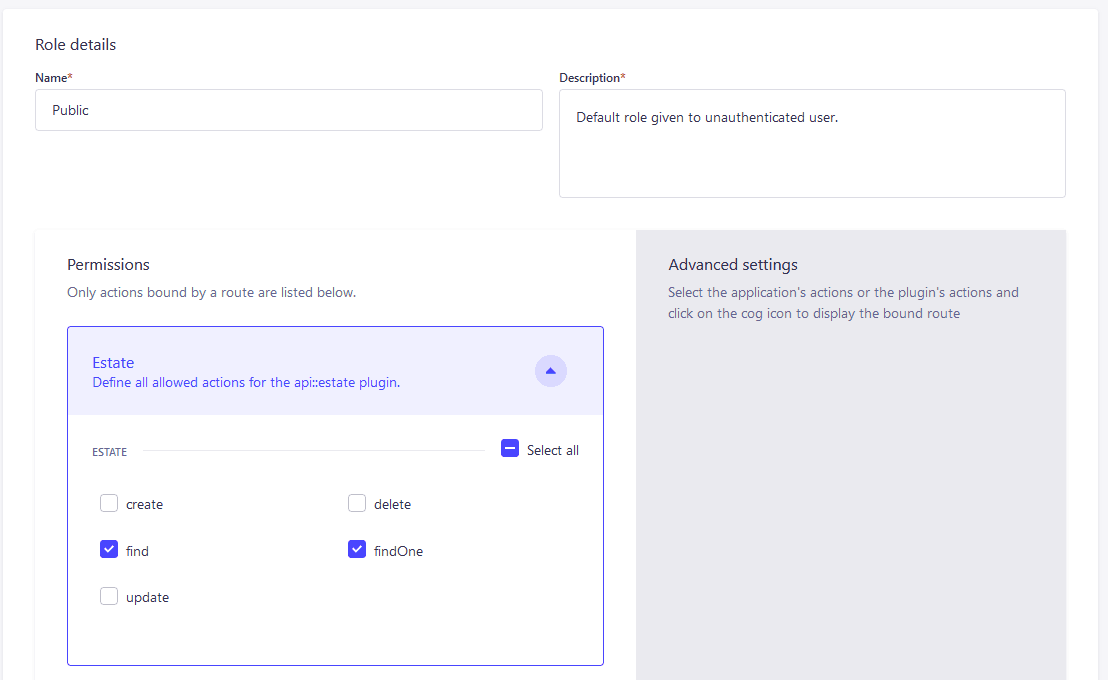
Another last point is to setup roles and permissions for public users so that the can find and findOne estate:
Set up the SvelteKit Project
Go back to thereal-estate directory you created earlier and run the following command to create a new SvelteKit project:
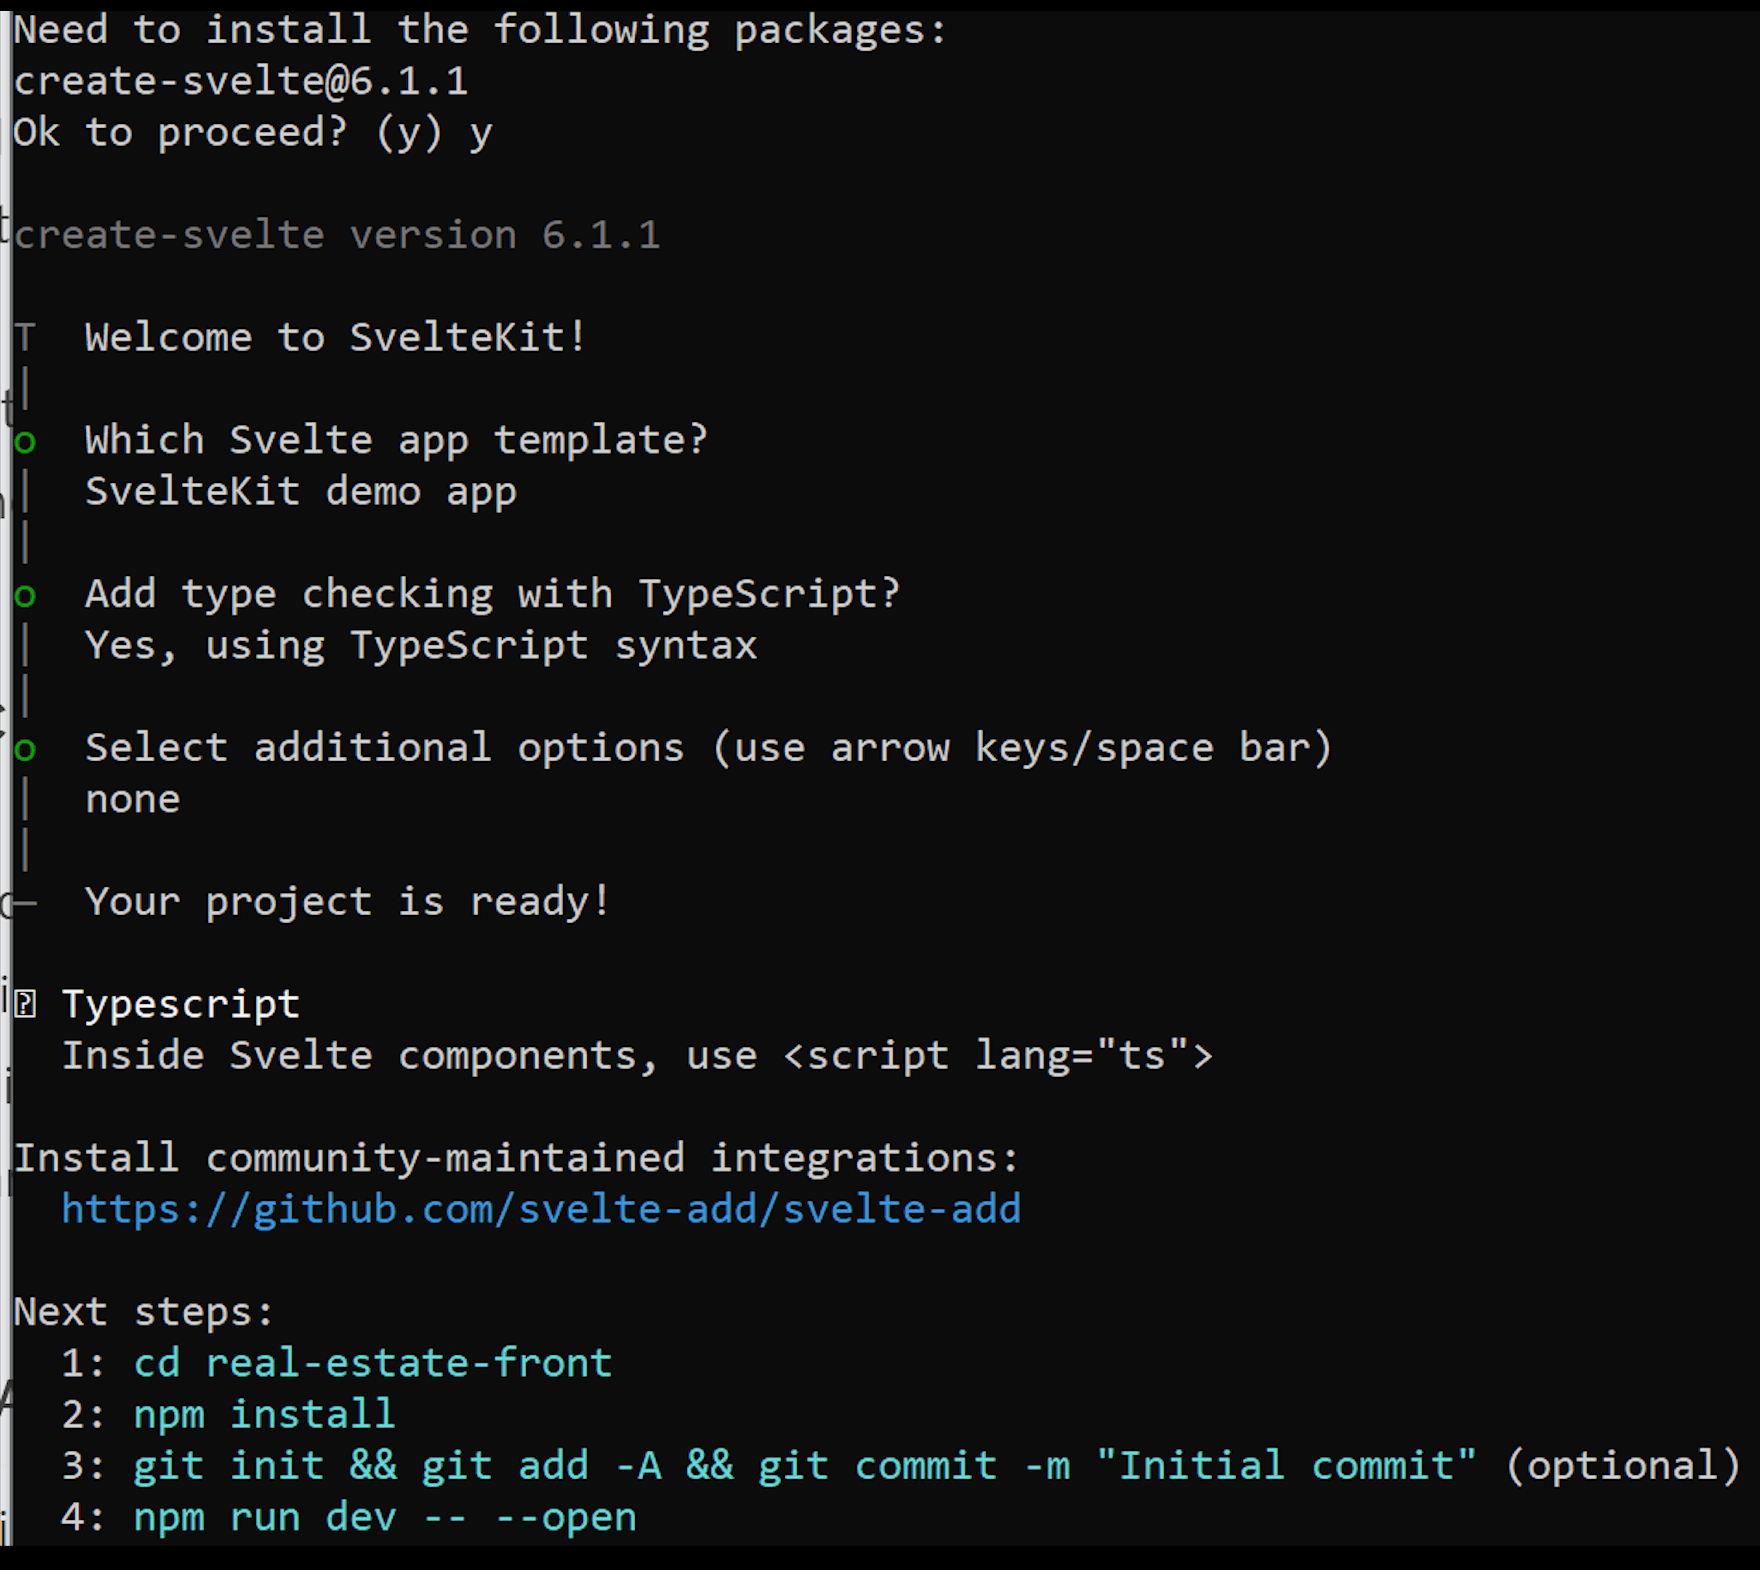
npm create svelte@latest real-estate-frontBe sure to choose the options as shown in the below image.
Install project dependencies:
cd real-estate-front
npm install
Once the dependencies are installed, you can now run the it with the command below:
npm run dev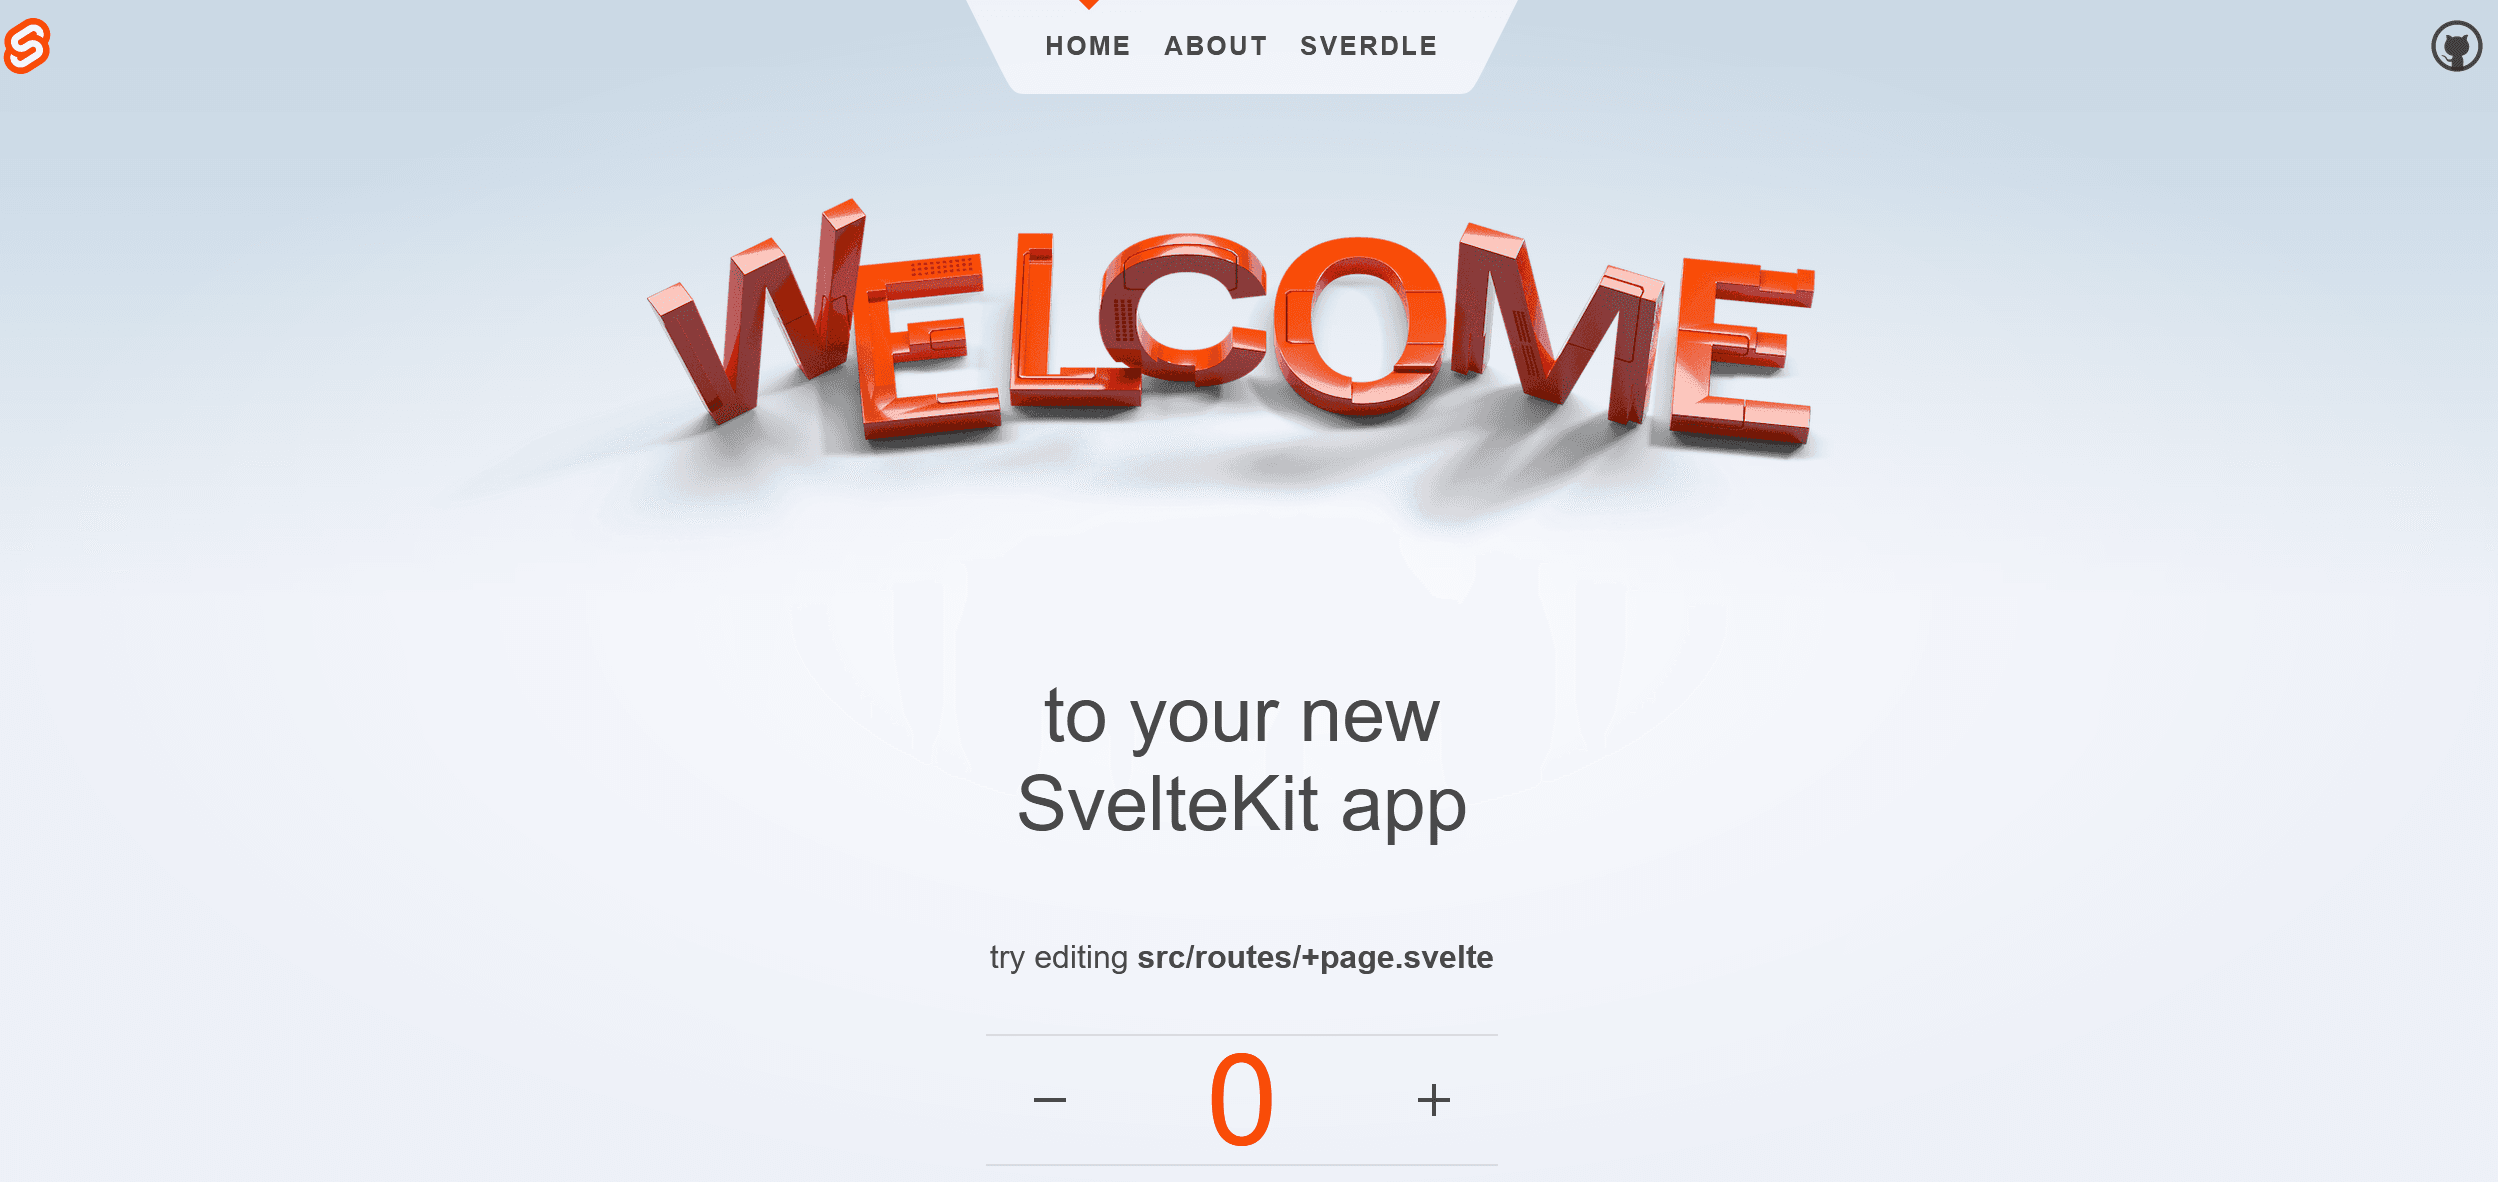
Looking at the structure of the project, we have the routes and lib folder in the src with the app/html file at the root.
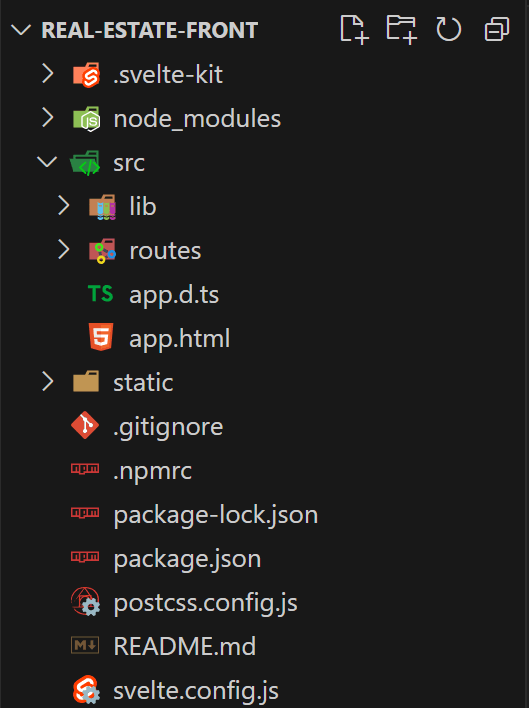
Project Folder Structure
Every file in the src/routes folder will be mapped to actual SvelteKit routes. For example, src/routes/+page.svelte will be accessible at /, src/routes/about/+page.svelte will be accessible at /about and src/routes/estate/[id]/+page.svelte will be accessible via /estate/${id}/ where id is a number or ID of an estate listing. This is how filesystem-based routing generally works in SvelteKit. This is also called SvelteKit routes.
In the src/routes you can also find the +layout.svelte which is a special file that adds a layout to every page. You can equally apply a layout to subdirectories. Learn more about Sveltekit layout here
We will create 5 main folders in the src/routes folder:
- The
aboutfolder which will hold informtion for the about pageabout/+page.svelte - The
createfolder which will hold the file for creating an estatecreate/+page.svelte - The
estatefolder for the details page of an estate. Here you will create an[id]inside which will nest the+page.svelteso it will beestate/[id]/+page.svelte - Then we have the
loginfolderlogin/+page.svelte - And finally the
updatefolder. Create theupdatefolder. Inside it, create another folder,[id]. Then inside the[id]folder, create the page file+page.svelte.
Install Packages
You will use 3 packages in this project:
- Axios for HTTP requests:
npm install axios- Svelte-persist-store to persist data to local storage:
npm install svelte-persisted-store- Tailwind CSS for styling (SvelteKit Tailwind Integration):
npm install -D tailwindcss postcss autoprefixer
npx tailwindcss init -p
Add the paths to all your template files:
content: ['./src/**/*.{html,js,svelte,ts}'],Add the @tailwind directives in the src/routes/syle.css file to finish setting up our SvelteKit Tailwind CSS configuration:
@tailwind base;
@tailwind components;
@tailwind utilities;
Once both projects are setup, you can get to the interesting part of the tutorial which consists of creating and calling API requests, dealing with pagination, and user authentication.
Create HTTP Requests
Axios is a popular JavaScript library used to make HTTP requests from Node.js or XMLHttpRequests from the browser. It is often employed in web development to interact with APIs and perform CRUD operations (Create, Read, Update, Delete).
Inside the src/lib folder, create a file app.ts to start creating the various requests in the code below in the src/lib/api.ts file:
import axios from "axios";

const api = axios.create({
  baseURL: "http://localhost:1337/api",
});

// Get an estate by id
export const getEstateById = async (id: string) => {
  try {
    const response = await api
      .get(`/estates/${id}?populate=*`)
      .then((res) => (res?.data ? res.data.data : []));

    return response;
  } catch (error) {
    console.error("Error fetching estate:", error);
    throw new Error("Server error");
  }
};

// delete an estate
export async function deleteEstateById(id: string) {
  try {
    const response = await api.delete(`/estates/${id}?populate=*`);
    return response.status === 200;
  } catch (error) {
    console.error("Failed to delete estate:", error);
    return false;
  }
}

// create an estate
export function createEstate(estateData: FormData) {
  return api.post("/estates?populate=*", estateData);
}

// Update an estate
export function updateEstate(id: string, estateData: FormData) {
  return api.put(`/estates/${id}?populate=*`, estateData);
}

// get list of estate order by creation date and page limit
export async function getPaginatedEstates(page = 1, limit = 5) {
  try {
    const response = await api.get("/estates?populate=*", {
      params: {
        pagination: {
          page: page,
          pageSize: limit,
        },
        sort: "createdAt:desc",
      },
    });
    return {
      data: response.data,
      pagination: response.data.meta.pagination,
    };
  } catch (error) {
    console.error("Error fetching paginated estates:", error);
    return {
      data: [],
      pagination: {page: 1, pageSize: limit, pageCount: 0, total: 0},
    };
  }
}
export default api;apiis the instance of Axios named with a base URL pointing tolocalhost:1337/api.getEstateByIdretrieves an estate by its ID and sends aGETrequest to/estates/${id}which populates the parameter to get associated data.deleteEstateByIddeletes an estate given its ID.createEstatetakes inestateDataasFormDatato create a new entry.updateEstateupdates an estate listing by sending aPUTrequest to the given URL with the necessary data.- You can sort and paginate entries the Strapi REST API returns. The
getPaginatedEstatesfunctions retrieves a list of estates, ordered by date of creation. It sends aGETrequest with pagination parameters.
From here you can proceed to creating the home page.
Listing Estates
You will display the list of properties in the home page which correspond to your src/routes/+page.svelte:
<script lang="ts">
import {onMount} from "svelte";
import {getPaginatedEstates} from "$lib/api";
let estates: any[] = [];
let currentPage = 1;
let pageSize = 5;
let pageCount = 0;
let totalEstates = 0;
async function loadEstates() {
try {
const result = await getPaginatedEstates(currentPage, pageSize);
if (result.data.data && Array.isArray(result.data.data)) {
estates = result.data.data;
if (result.pagination) {
pageSize = result.pagination.pageSize;
pageCount = result.pagination.pageCount;
totalEstates = result.pagination.total;
} else {
console.error("Pagination data is missing");
}
} else {
throw new Error("Data is not an array or undefined");
}
} catch (error: any) {
console.error("Failed to fetch estates:", error.message);
// Set to empty array on error
estates = [];
}
}
function goToPage(page: number) {
if (page > 0 && page <= pageCount) {
currentPage = page;
loadEstates();
}
}
// Initially load estates
onMount(() => {
loadEstates();
});
</script>
<h1 class="text-center text-3xl font-bold text-blue-500">
Real-Estate Listing
</h1>
<div class="my-4 flex justify-between items-center">
<nav class="flex items-center">
<button
class="mr-10 bg-gray-300 rounded px-3 py-2 text-[12px]"
on:click={() => goToPage(currentPage - 1)}
disabled={currentPage <= 1}>← Previous</button
>
<button
class=" bg-gray-300 rounded px-3 py-2 text-[12px]"
on:click={() => goToPage(currentPage + 1)}
disabled={currentPage >= pageCount}>Next →</button
>
</nav>
<a
href="/create"
class="bg-blue-500 rounded px-5 py-2 hover:bg-blue-700 text-white font-bold"
>Add Properties</a
>
</div>
<main>
{#if estates}
<div class="grid grid-cols-3 mb-4 gap-10">
{#each estates as estate}
<a href={`/estate/${estate.id}`} class="mb-5 mt-10">
<div class="img_content mb-5">
<img
src={`http://localhost:1337${estate.attributes.imageUrl.data?.attributes.url}`}
alt={estate.attributes.imageUrl.data.alternativeText}
/>
</div>
<p class="text-blue-500 font-bold">$ {estate.attributes.price}</p>
<p class="text-blue-500">{estate.attributes.property_name}</p>
<p class="text-blue-500">{estate.attributes.status}</p>
<p class="text-blue-500">At {estate.attributes.location}</p>
</a>
{/each}
</div>
{/if}
</main>
<style>
.img_content {
background-color: blue;
position: relative;
height: 300px;
width: 300px;
}
.img_content img {
object-fit: cover;
height: 300px;
width: 300px;
}
</style>
The Svelte script above fetches paginated real estate listings from the API getPaginatedEstates, then handles navigation between pages with goToPage, and displays properties. It retrieves estates based on the currentPage and displays them dynamically. The Navigation buttons Previous and Next allow you to move between pages. However, if an error occurs during fetching, it handles it gracefully by displaying an empty list.
Svelte's onMount function executes a callback when the component is mounted to the DOM. loadEstates() function is invoked essentially to trigger the initial loading of estates which fetches data from the API and populates the estates.

Estate Detail Page
Now we would like to have more information about a property before proceeding with buying or renting.
To proceed, add the code below in the src/routes/estate/[id]/+page.svelte file:
<script lang="ts">
  import {getEstateById} from "$lib/api.js";
  import {page} from "$app/stores";
  import {onMount} from "svelte";

  let estateId = $page.params.id;
  export let estate: any;
  onMount(async function () {
    const estates = await getEstateById(estateId);
    if (estates) {
      estate = estates;
    } else {
      estate = {};
    }
  });
</script>

{#if estate?.attributes}
  <div class="mt-5 mb-20">
    <h1 class="mb-3">{estate.attributes.property_name}</h1>
    <div class="img_content mb-5 mx-auto">
      <img
        src={`http://localhost:1337${estate.attributes.imageUrl.data?.attributes.url}`}
        alt={estate.attributes.imageUrl.data.alternativeText}
      />
    </div>
    <p class="text-red-500">
      Price: $<span class="font-bold">{estate.attributes.price}</span>
    </p>
    <p class="text-red-500">
      Status: <span class="font-bold"> {estate.attributes.status}</span>
    </p>
    <p class="text-red-500">
      Location: <span class="font-bold"> {estate.attributes.location}</span>
    </p>

    <div class="mt-10">{estate.attributes.desc}</div>
  </div>
{/if}

<style>
  .img_content {
    background-color: blue;
    position: relative;
    height: 500px;
    width: 100%;
  }

  .img_content img {
    object-fit: cover;
    height: 500px;
    width: 100%;
  }
</style>
Here is what the code above does:
-
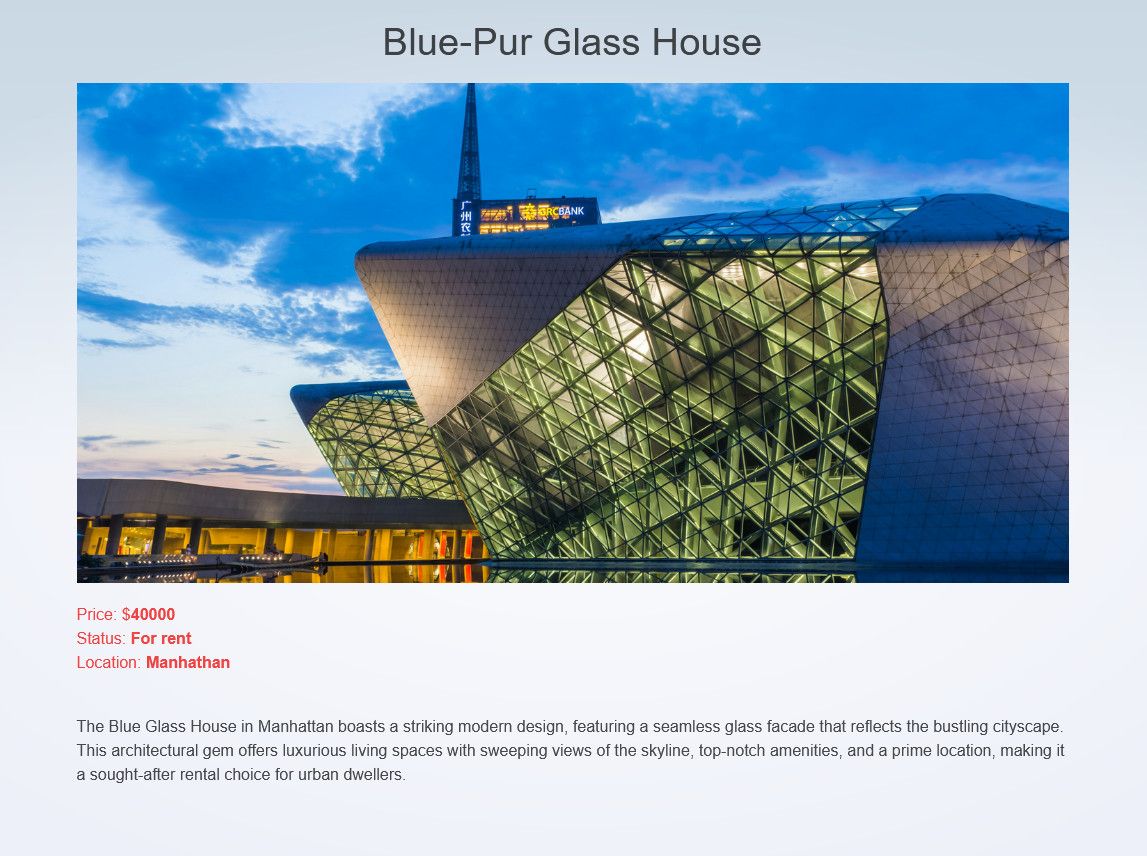
getEstateByIdfetches estate details and If the estate data exists, it assigns it to the estate variable; otherwise, it initializes estate as an empty object and conditionally renders estate details only if estate.attributes exist. -
Clicking on an estate on the home page will direct you to
localhost:5173/estate/id.idhere correspond to the ID of the page property where you will get the property details like the property name, image, price, status, location, and description. -
When you click on an estate on the home page, it will direct you to
localhost:5173/estate/idcorresponding to the ID of the property, where you will display the property details such as the property name, image, price, status, location, and description.
Delete Estate
This operation consists of removing a property from the database. Edit the src/routes/+page.svelte like below
 <script lang="ts">
 import {deleteEstateById} from "$lib/api";
 ...


 ...
	 async function handleDelete(id: string) {
	    try {
	      const isSuccess = await deleteEstateById(id);
	      if (isSuccess) {
	        estates = estates.filter((estate) => estate.id !== id);
	      } else {
	        console.error("Failed to delete estate");
	      }
	    } catch (error) {
	      console.error("Error deleting estate:", error);
	    }
	  }
 ...

</script>

  <main>
	{#if estates}
	  <div class="grid grid-cols-3 mb-4 gap-10">
		{#each estates as estate}
		  <a href={`/estate/${estate.id}`} class="mb-5 mt-10">
			<div class="img_content mb-5">
			  <img
				src={`http://localhost:1337${estate.attributes.imageUrl.data?.attributes.url}`}
				alt={estate.attributes.imageUrl.data.alternativeText}
			  />
			</div>
			<p class="text-blue-500 font-bold">$ {estate.attributes.price}</p>
			<p class="text-blue-500">{estate.attributes.property_name}</p>
			<p class="text-blue-500">{estate.attributes.status}</p>
			<p class="text-blue-500">At {estate.attributes.location}</p>

                        <!--delete estate-->

			<div class="grid grid-cols-2 mt-2 text-center gap-2">
				<a
				   href=""
				   on:click|preventDefault={() => handleDelete(estate.id)}
				   class="bg-red-500 rounded px-5 py-2 hover:bg-red-700 text-white font-bold"
				>Delete</a>
			</div>
		  </a>
		{/each}
	  </div>

	  {/if}

  </main>
From the snippet above, handleDelete tries to delete the estate by calling the deleteEstateById function from the API. It awaits the result of the deletion operation. If the deletion operation is successful (isSuccess is true), it updates the estates array by filtering out the deleted estate based on its ID, else it logs an error message to the console to the user.
Create Estate
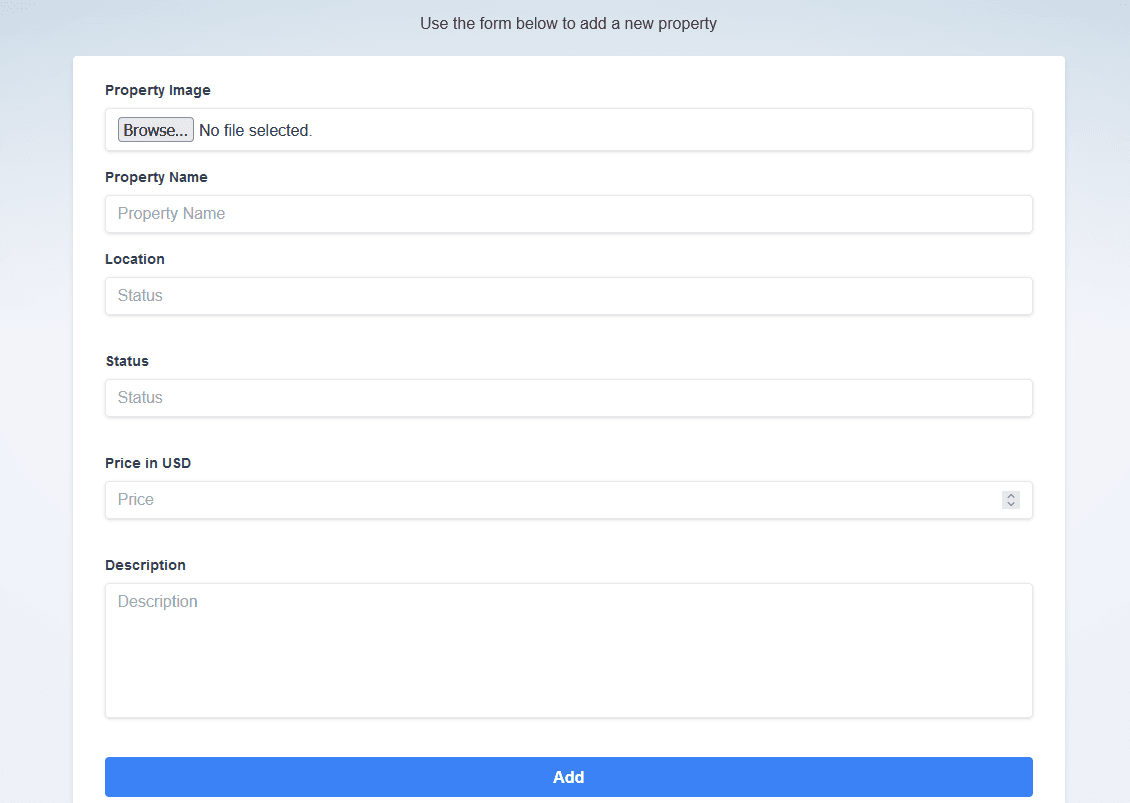
If you would like to give the possibility to a user to add a property for listing in the frontend, you will use the createEstate() to add new entries. In the src/routes/create/+page.svelte, add the following code in your:
<script lang="ts">
  import {goto} from "$app/navigation";
  import { createEstate } from "$lib/api";

  let property_name = "";
  let status = "";
  let price: number;
  let desc = "";
  let location = "";
  let file: FileList;

  async function submitEstate() {
    const formData = new FormData();
    if (file && file.length > 0) {
      // Append the first file
      formData.append("files.imageUrl", file[0]);
    }
    formData.append(
      "data",
      JSON.stringify({property_name, status, price, desc, location})
    );

    try {
      await createEstate(formData);
      // Redirect to home after submission
      goto("/");
    } catch (error: any) {
      console.error("Error creating estate", error.response);
    }
  }
</script>

<div class="w-full mx-auto mt-5">
    <div class="mb-5 text-center">
      <p>Use the form below to add a new property</p>
    </div>

    <form
      on:submit|preventDefault={submitEstate}
      class="bg-white shadow-md rounded px-8 pt-6 pb-8 mb-4"
    >
      <div class="mb-4">
        <label class="block text-gray-700 text-sm font-bold mb-2" for="">
          Property Image
        </label>
        <input
          bind:files={file}
          class="shadow appearance-none border rounded w-full py-2 px-3 text-gray-700 leading-tight focus:outline-none focus:shadow-outline"
          id=""
          type="file"
          placeholder="Property Image"
        />
      </div>
      <div class="mb-4">
        <label class="block text-gray-700 text-sm font-bold mb-2" for="">
          Property Name
        </label>
        <input
          bind:value={property_name}
          class="shadow appearance-none border rounded w-full py-2 px-3 text-gray-700 leading-tight focus:outline-none focus:shadow-outline"
          id=""
          type="text"
          placeholder="Property Name"
        />
      </div>
      <div class="mb-6">
        <label class="block text-gray-700 text-sm font-bold mb-2" for="">
          Location
        </label>
        <input
          bind:value={location}
          class="shadow appearance-none border rounded w-full py-2 px-3 text-gray-700 mb-3 leading-tight focus:outline-none focus:shadow-outline"
          id=""
          type="text"
          placeholder="Status"
        />
      </div>
      <div class="mb-6">
        <label class="block text-gray-700 text-sm font-bold mb-2" for="">
          Status
        </label>
        <input
          bind:value={status}
          class="shadow appearance-none border rounded w-full py-2 px-3 text-gray-700 mb-3 leading-tight focus:outline-none focus:shadow-outline"
          id=""
          type="text"
          placeholder="Status"
        />
      </div>
      <div class="mb-6">
        <label class="block text-gray-700 text-sm font-bold mb-2" for="">
          Price in USD
        </label>
        <input
          bind:value={price}
          class="shadow appearance-none border rounded w-full py-2 px-3 text-gray-700 mb-3 leading-tight focus:outline-none focus:shadow-outline"
          id=""
          type="number"
          placeholder="Price"
        />
      </div>
      <div class="mb-6">
        <label class="block text-gray-700 text-sm font-bold mb-2" for="">
          Description
        </label>
        <textarea
          bind:value={desc}
          rows="5"
          class="shadow appearance-none border resize-none rounded w-full py-2 px-3 text-gray-700 mb-3 leading-tight focus:outline-none focus:shadow-outline"
          id=""
          placeholder="Description"
        ></textarea>
      </div>
      <div class="text-center">
        <button
          class="bg-blue-500 w-full hover:bg-blue-700 text-white font-bold py-2 px-4 rounded focus:outline-none focus:shadow-outline"
          type="submit"
        >
          Add
        </button>
      </div>
    </form>
  </div>
In the code snippet above, the property_name, status, price, desc, location, and file store the property details. The file represents the estate image property. The submitEstate function creates an object(Formdata) that handles file uploads and appends property details to it on submission.
createEstate is used to send a POST request to the API endpoint /estates to add the new property.
The same is true if you try to create an estate. You will get a 403 error since only authenticated users can create a property. If you will like to test the createEstate() right away, you can you can edit the user permissions and roles.
So far, you have seen how to read, delete and create a property with SvelteKit and Strapi, in the next part you will learn how to update an existing property.
Update Estate
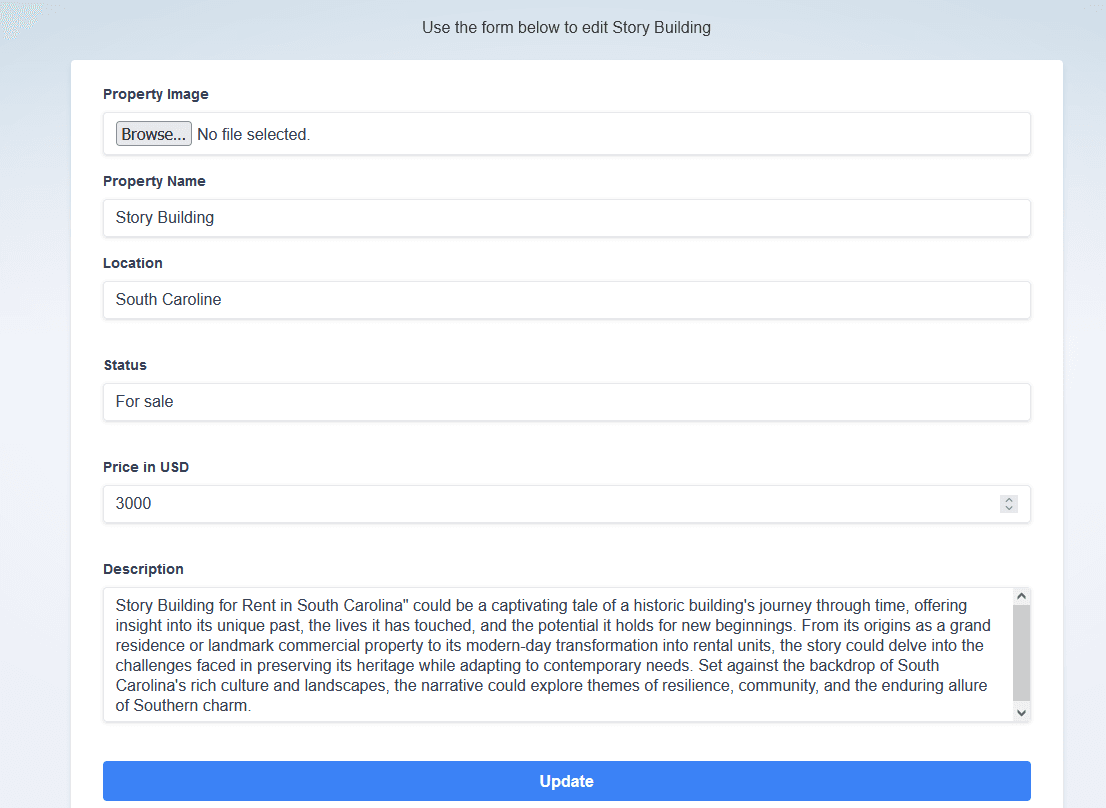
Updating a property is quite similar to creating one except that instead of using a POST request, you will use a PUT request. In your src/routes/update/[id]/+page.svelte file, add the code below:
<script lang="ts">
  import {onMount} from "svelte";
  import {page} from "$app/stores";
  import {getEstateById, updateEstate} from "$lib/api";
  import {goto} from "$app/navigation";

  let selectedFile: File | null = null;

  let estateId = $page.params.id;
  let estate = {
    property_name: "",
    status: "",
    file: FileList,
    price: "",
    location: "",
    desc: "",
  };

  // Load the estate data when the component mounts
  onMount(async () => {
    const response = await getEstateById(estateId);
    if (response.attributes) {
      estate = {...response.attributes};
    }
  });

  // Handle form submission for update
  async function handleSubmit() {
    const formData = new FormData();
    formData.append(
      "data",
      JSON.stringify({
        property_name: estate.property_name,
        status: estate.status,
        price: estate.price,
        location: estate.location,
        desc: estate.desc,
      })
    );
    if (estate.file instanceof File) {
      formData.append("files.imageUrl", estate.file, estate.file.name);
    }

    try {
      await updateEstate(estateId, formData);

      goto("/");
    } catch (error) {
      console.error("Error updating estate:", error);
    }
  }

  function handleFileChange(event: Event) {
    // Correctly type the event target
    const input = event.target as HTMLInputElement;
    if (input.files && input.files.length > 0) {
      // Access the first file
      selectedFile = input.files[0];
    } else {
      // No file selected
      selectedFile = null;
    }
  }
</script>

  <div class="w-full mx-auto mt-5">
    <div class="mb-5 text-center">
      <p>Use the form below to edit {estate.property_name}</p>
    </div>

    <form
      on:submit|preventDefault={handleSubmit}
      class="bg-white shadow-md rounded px-8 pt-6 pb-8 mb-4"
    >
      <div class="mb-4">
        <label
          class="block text-gray-700 text-sm font-bold mb-2"
          for="propertyImage"
        >
          Property Image
        </label>
        <input
          on:change={handleFileChange}
          class="shadow appearance-none border rounded w-full py-2 px-3 text-gray-700 leading-tight focus:outline-none focus:shadow-outline"
          id="propertyImage"
          type="file"
          placeholder="Property Image"
        />
      </div>
      <div class="mb-4">
        <label
          class="block text-gray-700 text-sm font-bold mb-2"
          for="propertyName"
        >
          Property Name
        </label>
        <input
          bind:value={estate.property_name}
          class="shadow appearance-none border rounded w-full py-2 px-3 text-gray-700 leading-tight focus:outline-none focus:shadow-outline"
          id="propertyName"
          type="text"
          placeholder="Property Name"
        />
      </div>
      <div class="mb-6">
        <label
          class="block text-gray-700 text-sm font-bold mb-2"
          for="propertyLocation"
        >
          Location
        </label>
        <input
          bind:value={estate.location}
          class="shadow appearance-none border rounded w-full py-2 px-3 text-gray-700 mb-3 leading-tight focus:outline-none focus:shadow-outline"
          id="propertyLocation"
          type="text"
          placeholder="Status"
        />
      </div>
      <div class="mb-6">
        <label
          class="block text-gray-700 text-sm font-bold mb-2"
          for="propertyStatus"
        >
          Status
        </label>
        <input
          bind:value={estate.status}
          class="shadow appearance-none border rounded w-full py-2 px-3 text-gray-700 mb-3 leading-tight focus:outline-none focus:shadow-outline"
          id="propertyStatus"
          type="text"
          placeholder="Status"
        />
      </div>
      <div class="mb-6">
        <label
          class="block text-gray-700 text-sm font-bold mb-2"
          for="propertyPrice"
        >
          Price in USD
        </label>
        <input
          bind:value={estate.price}
          class="shadow appearance-none border rounded w-full py-2 px-3 text-gray-700 mb-3 leading-tight focus:outline-none focus:shadow-outline"
          id="propertyPrice"
          type="number"
          placeholder="Price"
        />
      </div>
      <div class="mb-6">
        <label
          class="block text-gray-700 text-sm font-bold mb-2"
          for="propertyDesc"
        >
          Description
        </label>
        <textarea
          bind:value={estate.desc}
          rows="5"
          class="shadow appearance-none border resize-none rounded w-full py-2 px-3 text-gray-700 mb-3 leading-tight focus:outline-none focus:shadow-outline"
          id="propertyDesc"
          placeholder="Description"
        ></textarea>
      </div>
      <div class="text-center">
        <button
          class="bg-blue-500 w-full hover:bg-blue-700 text-white font-bold py-2 px-4 rounded focus:outline-none focus:shadow-outline"
          type="submit"
        >
          Update
        </button>
      </div>
    </form>
  </div>
From the code above, you will find the following
estateIdis the ID of the estate.onMountasynchronously loads the details of a property on component mount and stores them in the estate variable.- The
handleSubmitbuilds an object(FormData) containing the updated estate details and then sends aPUTrequest to the server to update the estate details with theupdateEstatefunction from theapi.ts. A positive response redirects you to the home page otherwise it logs into the console an error message. - We equally have the
handleFileChangefunction that updatesfilevariable with the selected file. And once again, the input fields are bound to the respective properties of theestatevariable. To associate this function with the estate and open the edit page whenever you click on an estate on the the homepage, you need to make some adjustments in thesrc/routes/+page.sveltefile like below:
<script>
...
import { goto } from "$app/navigation";


 // Function to handle page changes

  function editProperty(id: string) {
    // Navigate to the edit form with id
    goto(`/update/${id}`);
  }

...
</script>
...


<div class="grid grid-cols-2 mt-2 text-center gap-2">

    <!--update estate-->

    <a href={`/update/${estate.id}`}
	   on:click={() => editProperty(estate.id)}
	   class="bg-blue-500 rounded px-5 py-2 hover:bg-blue-700 text-white font-bold"
	>Update</a>

    <!--delete estate-->

	<a href=""
	   on:click|preventDefault={() => handleDelete(estate.id)}
	   class="bg-red-500 rounded px-5 py-2 hover:bg-red-700 text-white font-bold"
	>Delete</a>
</div>
When you click on the "Update" button, it calls the editProperty function, which redirects you to the edit form we created earlier with the initial values of the estate.
Set up Authentication
You will not want anyone to just access your application and create an estate or delete one at any moment. You may prefer to give access only to authenticated users. To proceed, set authentication and authorization so that only verified users can have access to functions like, delete, update or create. A simple user can only view the list of estate.
Strapi Users & Permissions plugin is enabled by default and handles user registration, login, and permission settings.
Configure Roles & Permissions in the Strapi admin panel to get started. Navigate to Settings > USERS & PERMISSIONS PLUGIN > Roles.
Here, you can define roles (like "Authenticated") and set permissions for each role concerning what API endpoints they can access.
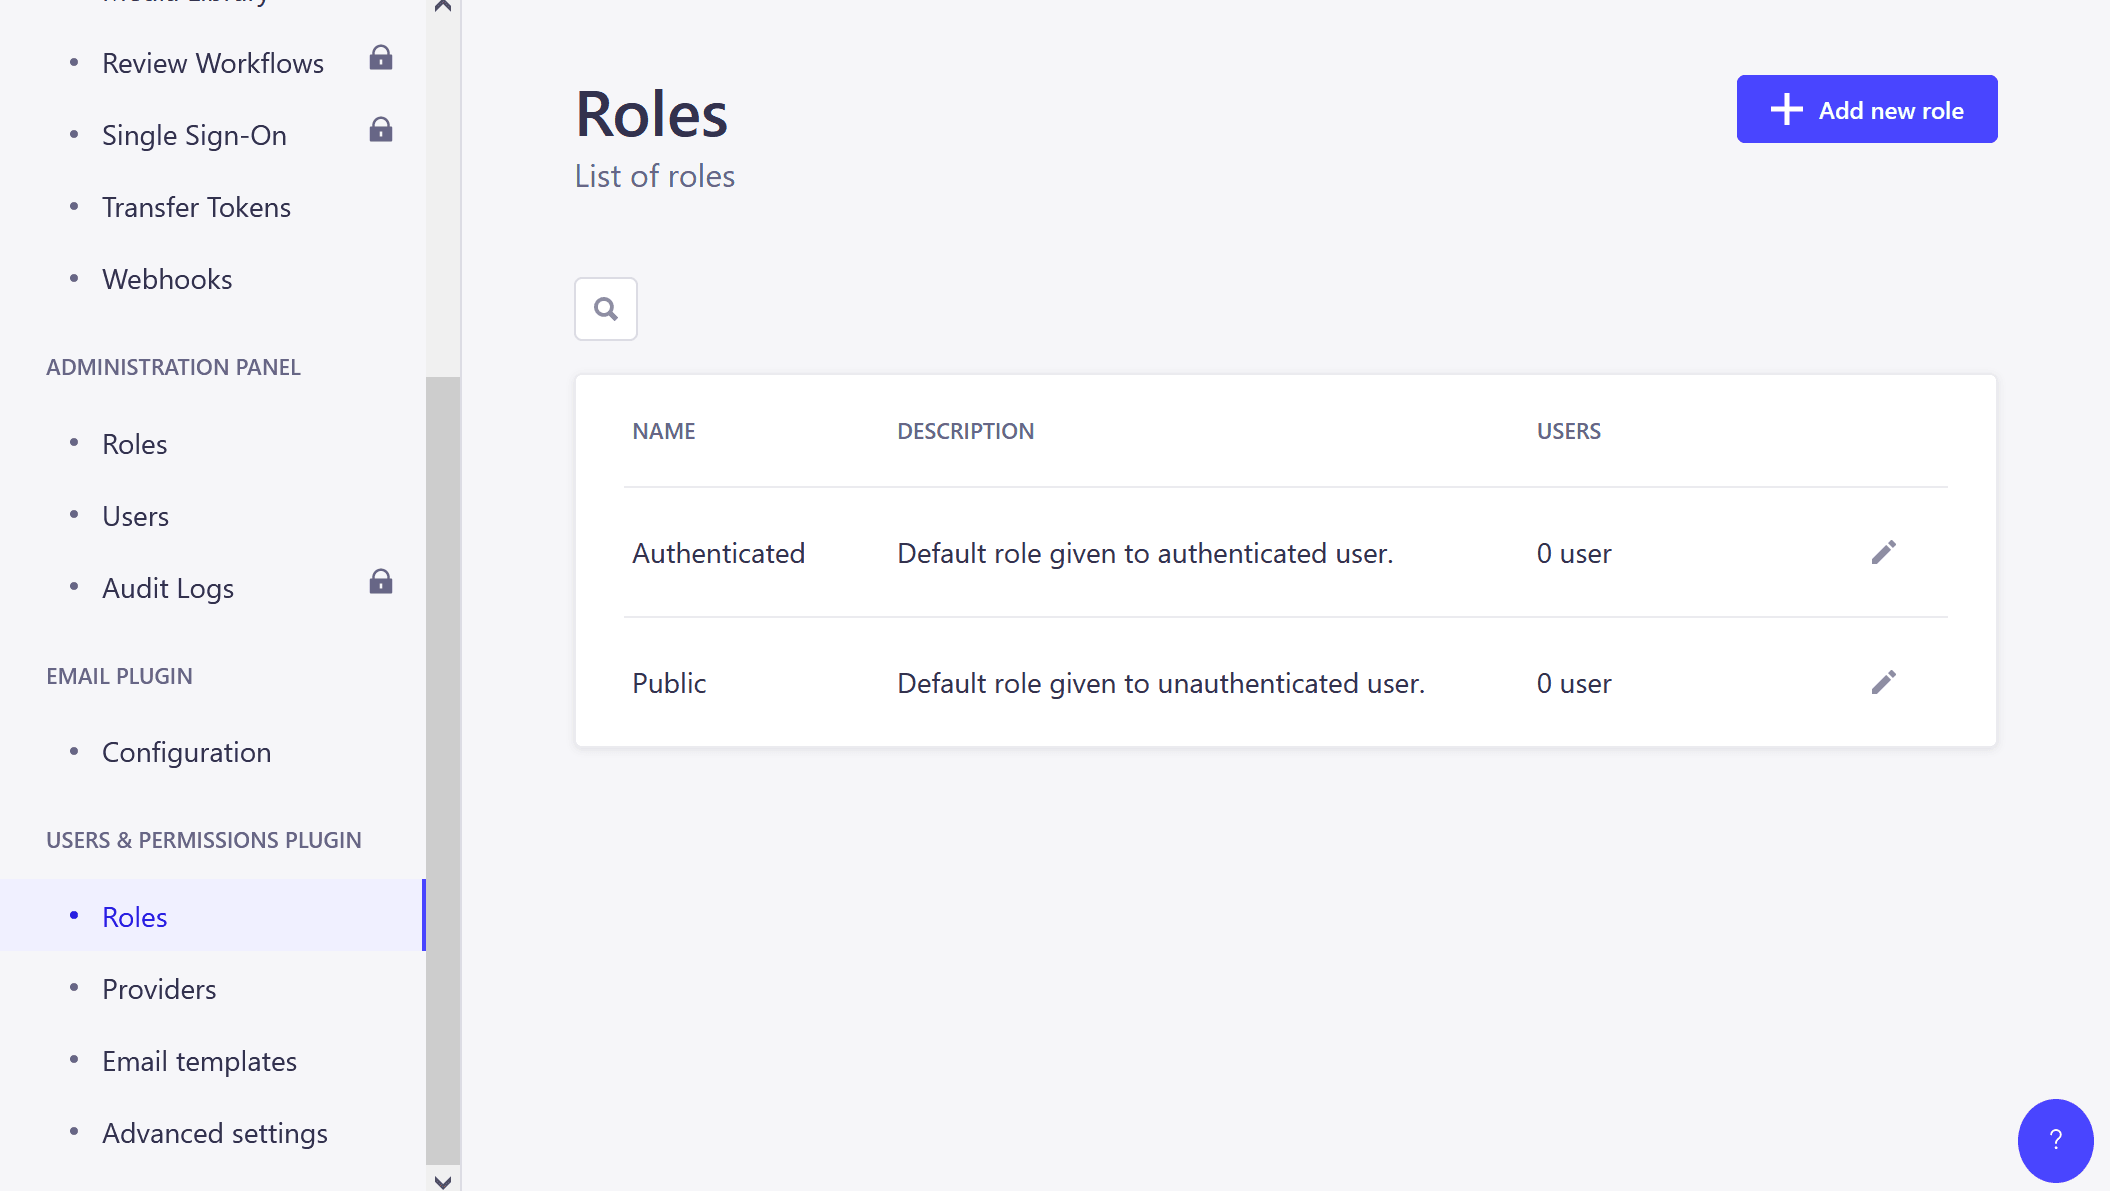
We want an authenticated user to be able to upload files, create, update and delete an estate.
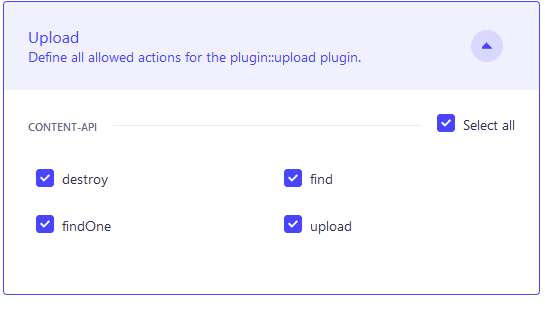
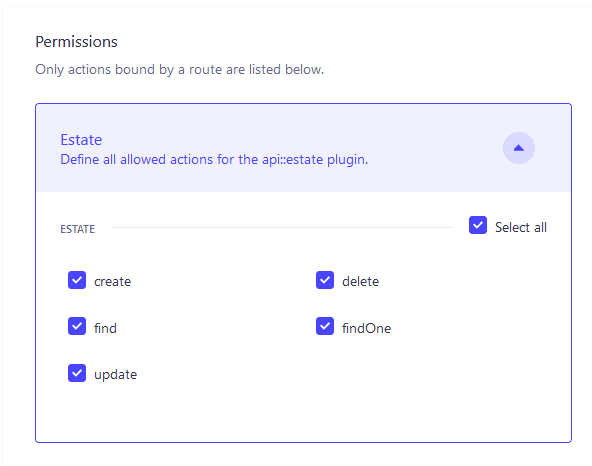
But we don’t want anyone to create an account in the application and start using it. Instead, we only want a specific group of users. So you will need to manually create a user in the Strapi panel and build a login page in the Sveltekit app for authorized users to log in, create, update or delete a property.
Note: Strapi allows you to configure third-party providers like Google, LinkedIn, Instagram, Facebook and more but in this tutorial we will stick with the email/password method.
In the Strapi admin navigate to the Content Manager → Content Types → Users → Create New Entry to add a new user
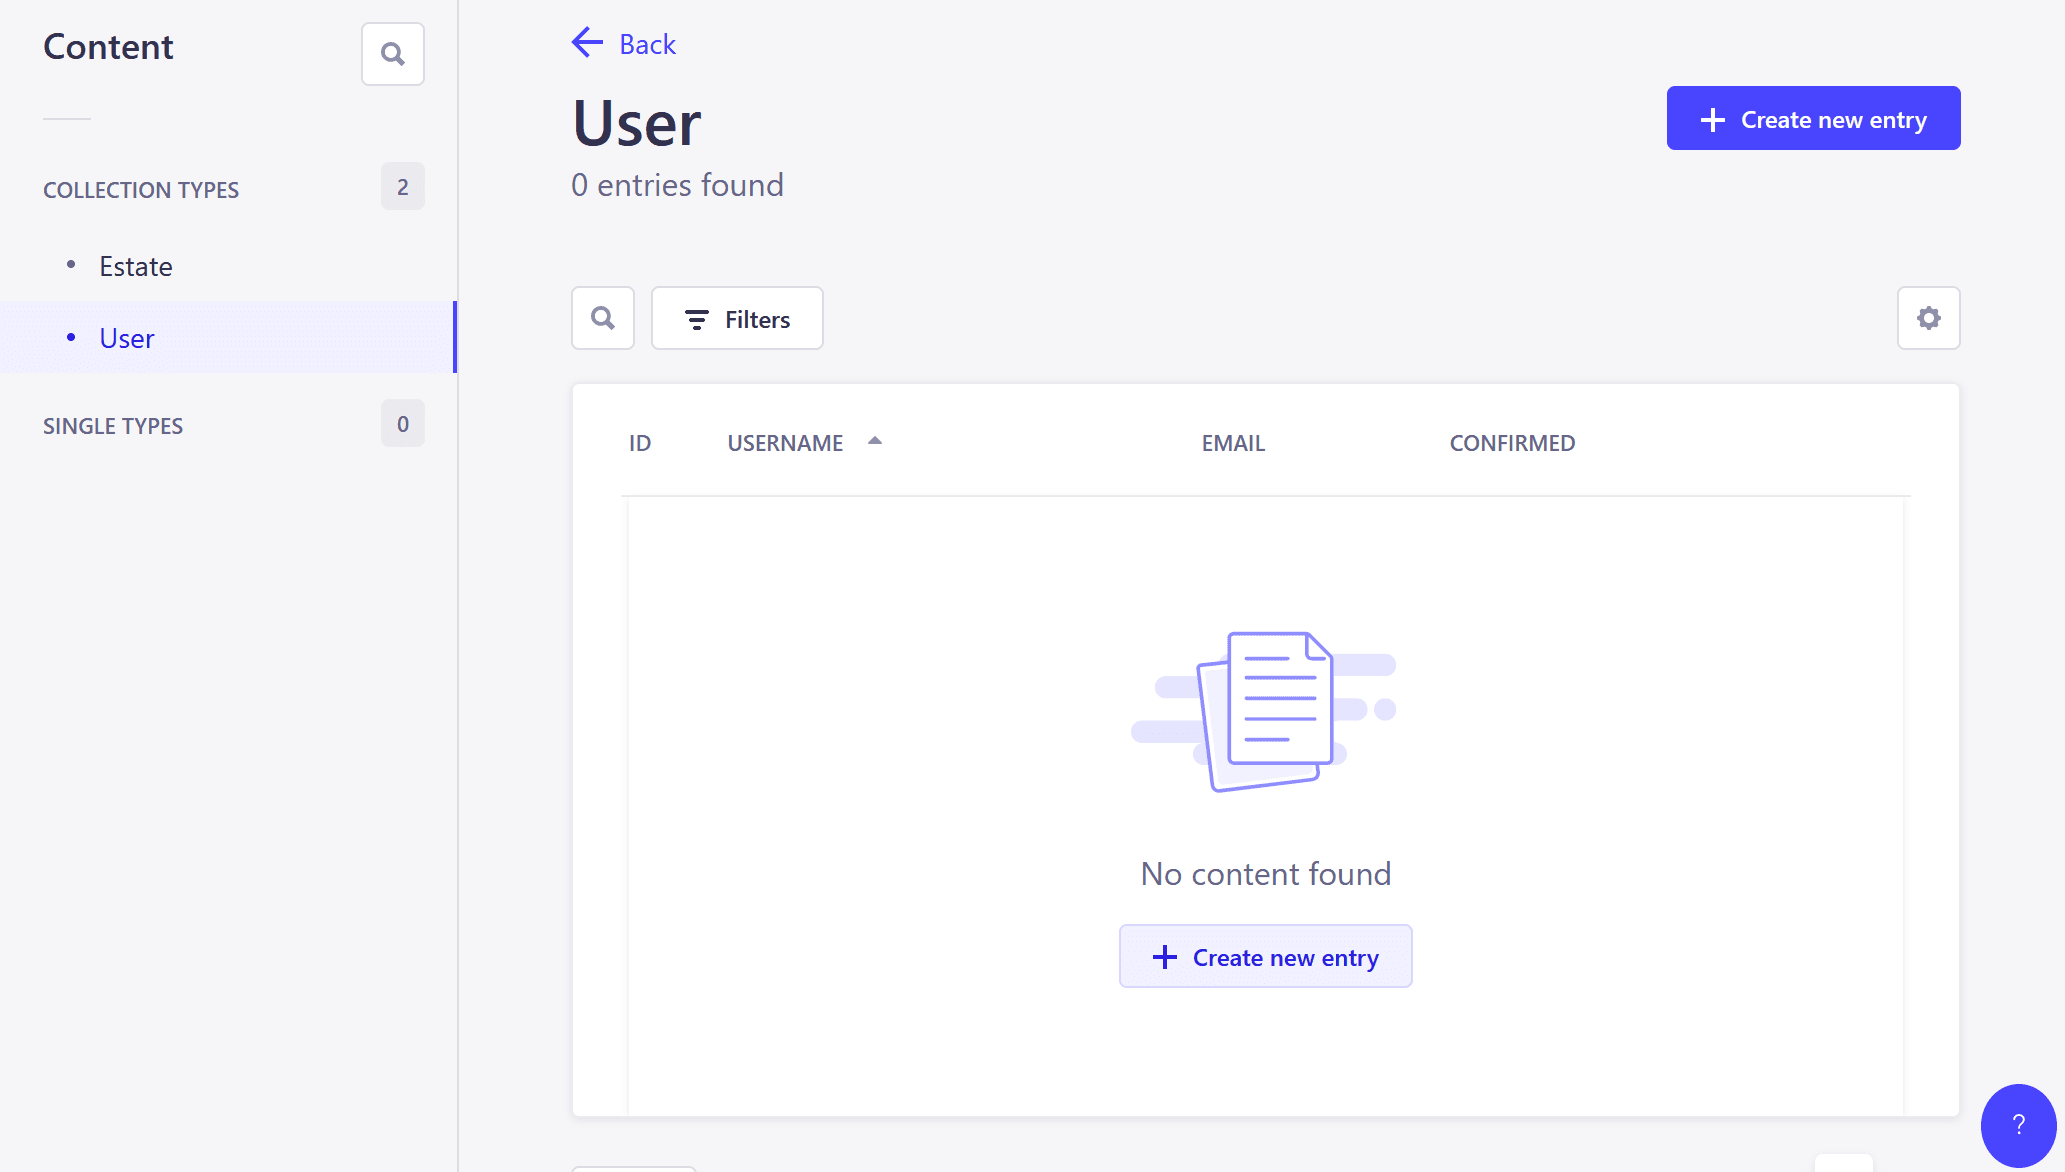
Provide the name, email and password of the user and set his role to authenticate.
Once everything is setup you can start creating the login page. But before that, you should create a store that will help to persist user data to local storage and sync changes across browser tabs.
Create authStore.ts file in the lib directory and add the code below:
import {persisted} from "svelte-persisted-store";
import type {Writable} from "svelte/store";
interface AuthStoreData {
  isAuthenticated: boolean;
  user: {
    id: number;
    username: string;
    email: string;
  } | null;
  token: string | null;
}

// manage auth state
export const authStorePersist: Writable<AuthStoreData> = persisted("strapi", {
  isAuthenticated: false,
  user: null,
  token: null,
});

// update an authentication store with new user data
export function setAuth(data: {user: AuthStoreData["user"]; jwt: string}) {
  authStorePersist.set({
    isAuthenticated: true,
    user: data.user,
    token: data.jwt,
  });
}
// mark user as not authenticated and clear the user details and token
export function clearAuth() {
  authStorePersist.set({
    isAuthenticated: false,
    user: null,
    token: null,
  });
}
In the code snippet above, we defined the structure of the authentication store data and created a writable Svelte store named authStorePersist using the persisted function from the svelte-persisted-store package which holds the authentication state data and persists it to local storage with the key strapi
The setAuth function updates the authentication store with new user data and a JWT token, then sets isAuthenticated to true, assigns the user and token properties with the provided data, and updates the store using authStorePersist.set().
The clearAuth function marks the user as unauthenticated and clears the user's token then updates the store again using authStorePersist.set().
In the api.ts file, add the code below:
import {authStorePersist, clearAuth, setAuth} from "./authStore";
import {get} from "svelte/store";

...

//send and set user credentials
export async function login(email: string, password: string) {
  try {
    const response = await api.post("/auth/local", {
      identifier: email,
      password,
    });
    setAuth(response.data);
    return response.data;
  } catch (error: any) {
    console.error("Login error:", error.response);
    throw error;
  }
}

// Clear authentication state
export async function logout() {
  clearAuth();
}

api.interceptors.request.use((config) => {
  const store = get(authStorePersist);
  if (store.isAuthenticated) {
    config.headers.Authorization = `Bearer ${store.token}`;
  }
  return config;
});- The
loginfunction sends a request to the/auth/localendpoint and if the response is positive, it sets the user's authentication state using the setAuth function from the store and returns the response data or returns an error. - The
logoutfunction calls theclearAuthfunction while the API Interceptor intercepts all outgoing requests made using the Axios API instance.
Before sending a request, it retrieves the authentication state from the store and checks if the user is authenticated. If it’s the case, it adds an Authorization header with a Bearer token derived from the stored token. This ensures that authenticated users can access protected API endpoints.
Create Login Page
Now create a login page where the user will enters his crendentials and be able to perform CRUD operations. Create the login/+page.svelte folder and insert this code:
<script lang="ts">
  import {goto} from "$app/navigation";
  import {login} from "$lib/api";
  let email = "";
  let password = "";
  let errorMessage = "";

  async function handleLogin() {
    try {
      await login(email, password);

      goto("/");
    } catch (error: any) {
      errorMessage = error.message;
    }
  }
</script>

<div class="w-full max-w-xs mx-auto mt-20">
  <form
    on:submit|preventDefault={handleLogin}
    class="bg-white shadow-md rounded px-8 pt-6 pb-8 mb-4"
  >
    <div class="mb-4">
      <label class="block text-gray-700 text-sm font-bold mb-2" for="username">
        Email
      </label>
      <input
        bind:value={email}
        class="shadow appearance-none border rounded w-full py-2 px-3 text-gray-700 leading-tight focus:outline-none focus:shadow-outline"
        id="email"
        type="email"
        placeholder="Email"
      />
    </div>
    <div class="mb-6">
      <label class="block text-gray-700 text-sm font-bold mb-2" for="password">
        Password
      </label>
      <input
        bind:value={password}
        class="shadow appearance-none border rounded w-full py-2 px-3 text-gray-700 mb-3 leading-tight focus:outline-none focus:shadow-outline"
        id="password"
        type="password"
        placeholder="******************"
      />
    </div>
    <div class="text-center">
      <button
        class="bg-blue-500 w-full hover:bg-blue-700 text-white font-bold py-2 px-4 rounded focus:outline-none focus:shadow-outline"
        type="submit"
      >
        Sign In
      </button>
      {#if errorMessage}
        <p style="color: red;">{errorMessage}</p>
      {/if}
    </div>
  </form>
</div>
Everything is now setup but there is one more last checkup to make to complete the application and prevent unauthorized users from accessing certain resources.
On the home page, we only want authenticated users to create, update and delete a property. So adjust your src/routes/+page.svelte with the code below:
import { authStorePersist } from "$lib/authStore";

...

import {authStorePersist} from "$lib/authStore";

  // initialize with the current value
  let storeValue: any;

  // subscribe to changes in the store
  authStorePersist.subscribe((value) => {
    // update the local variable with the new value
    storeValue = value;
  });

  ...

  <div class="my-4 flex justify-between items-center">
  <nav class="flex items-center">

    ...

  </nav>

  {#if storeValue.isAuthenticated}
    <a
      href="/create"
      class="bg-blue-500 rounded px-5 py-2 hover:bg-blue-700 text-white font-bold"
      >Add Properties</a
    >
  {/if}
</div>

...

{#if storeValue.isAuthenticated}
  <div class="grid grid-cols-2 mt-2 text-center gap-2">
    <a
      href={`/update/${estate.id}`}
      on:click={() => editProperty(estate.id)}
      class="bg-blue-500 rounded px-5 py-2 hover:bg-blue-700 text-white font-bold"
    >Update</a>
    <a
      href=""
      on:click|preventDefault={() => handleDelete(estate.id)}
      class="bg-red-500 rounded px-5 py-2 hover:bg-red-700 text-white font-bold"
    >Delete</a>
  </div>
{/if}

...
Only authenticated users can view the create property form. src/routes/create/+page.svelte:
  import {authStorePersist} from "$lib/authStore";
  // initialize with the current value
  let storeValue: any;

  // subscribe to changes in the store
  authStorePersist.subscribe((value) => {
    // update the local variable with the new value
    storeValue = value;
  });

  ...

{#if storeValue.isAuthenticated}
    <div class="w-full mx-auto mt-5">
     ...
    </div>
{:else}
    <div class="text-center mt-20">
        <p class="mb-5">
          You are not Currently logged, To create a property please log in
        </p>
        <a href="/login"
           class="bg-blue-500 rounded mt-3 px-5 py-2 hover:bg-blue-700 text-white font-bold"
      >Login</a>
     </div>
{/if}
Only authenticated users can update a property. src/routes/update/[id]/+page.svelte
...
import {authStorePersist} from "$lib/authStore";
import {get} from "svelte/store";

let storeValue;

// initialize with the current value
$: storeValue = get(authStorePersist);

...

{#if storeValue.isAuthenticated}
  <div class="w-full mx-auto mt-5">
    <div class="mb-5 text-center">
      <h1 class="text-center">
        Welcome <span class="text-blue-500 capitalize"
          >{storeValue.user?.username}</span
        >
      </h1>
      <p>Use the form below to edit {estate.property_name}</p>
    </div>

    <form
      on:submit|preventDefault={handleSubmit}
      class="bg-white shadow-md rounded px-8 pt-6 pb-8 mb-4"
    >
      ...

    </form>
  </div>
{/if}
In the Header, remove this part in the nav:
<li aria-current={$page.url.pathname.startsWith('/sverdle') ? 'page' : undefined}>
    <a href="/sverdle">Sverdle</a>
</li>
If a user is authenticated, display the "Log Out" button, else display the "Login" button:
<script lang="ts">
    ...
    import {onMount} from "svelte";
    import {logout} from "$lib/api";
    import {authStorePersist} from "$lib/authStore";

    onMount(async () => {});

      const handleLogout = () => {
        logout();
      };

      let storeValue: any; // initialize with the current value

      // subscribe to changes in the store
      authStorePersist.subscribe((value) => {
        // update the local variable with the new value
        storeValue = value;
    });
</script>

<header>

  <nav>

   ...

  </nav>
  <div class="corner">
    {#if storeValue.isAuthenticated}
      <button
        type="submit"
        on:click={handleLogout}
        class="text-blue-500 rounded focus:outline-none focus:shadow-outline"
      >
        Logout
      </button>
    {:else}
      <a
        href="/login"
        class="text-blue-500 px-6 rounded focus:outline-none focus:shadow-outline"
      >
        Login
      </a>
    {/if}
  </div>
</header>
Run and Test App
Finally, test your application by running the backend:
cd real-estate-back
npm run developer
and running the frontend:
cd real-estate=front
npm run dev
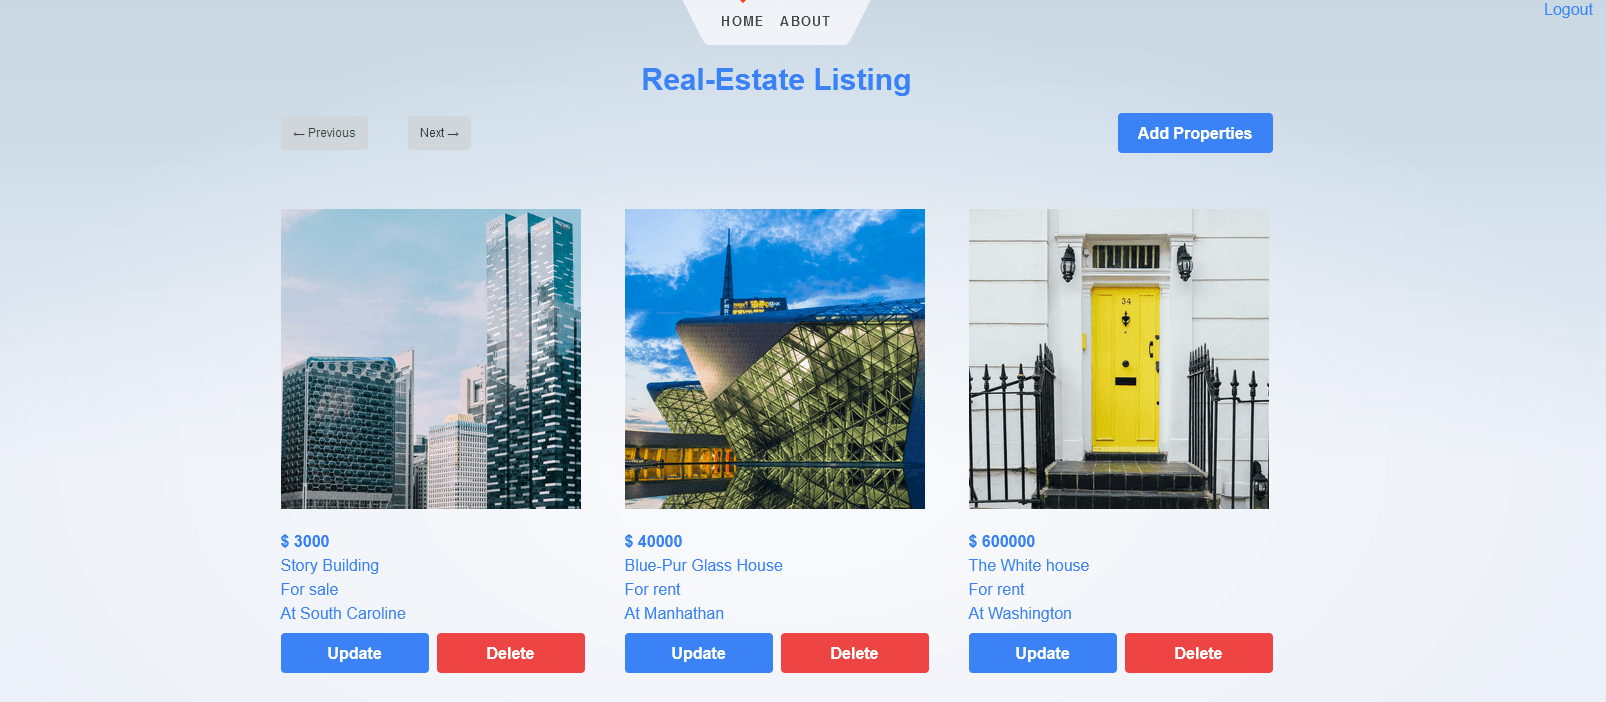
Athenticated user preview:
Demo
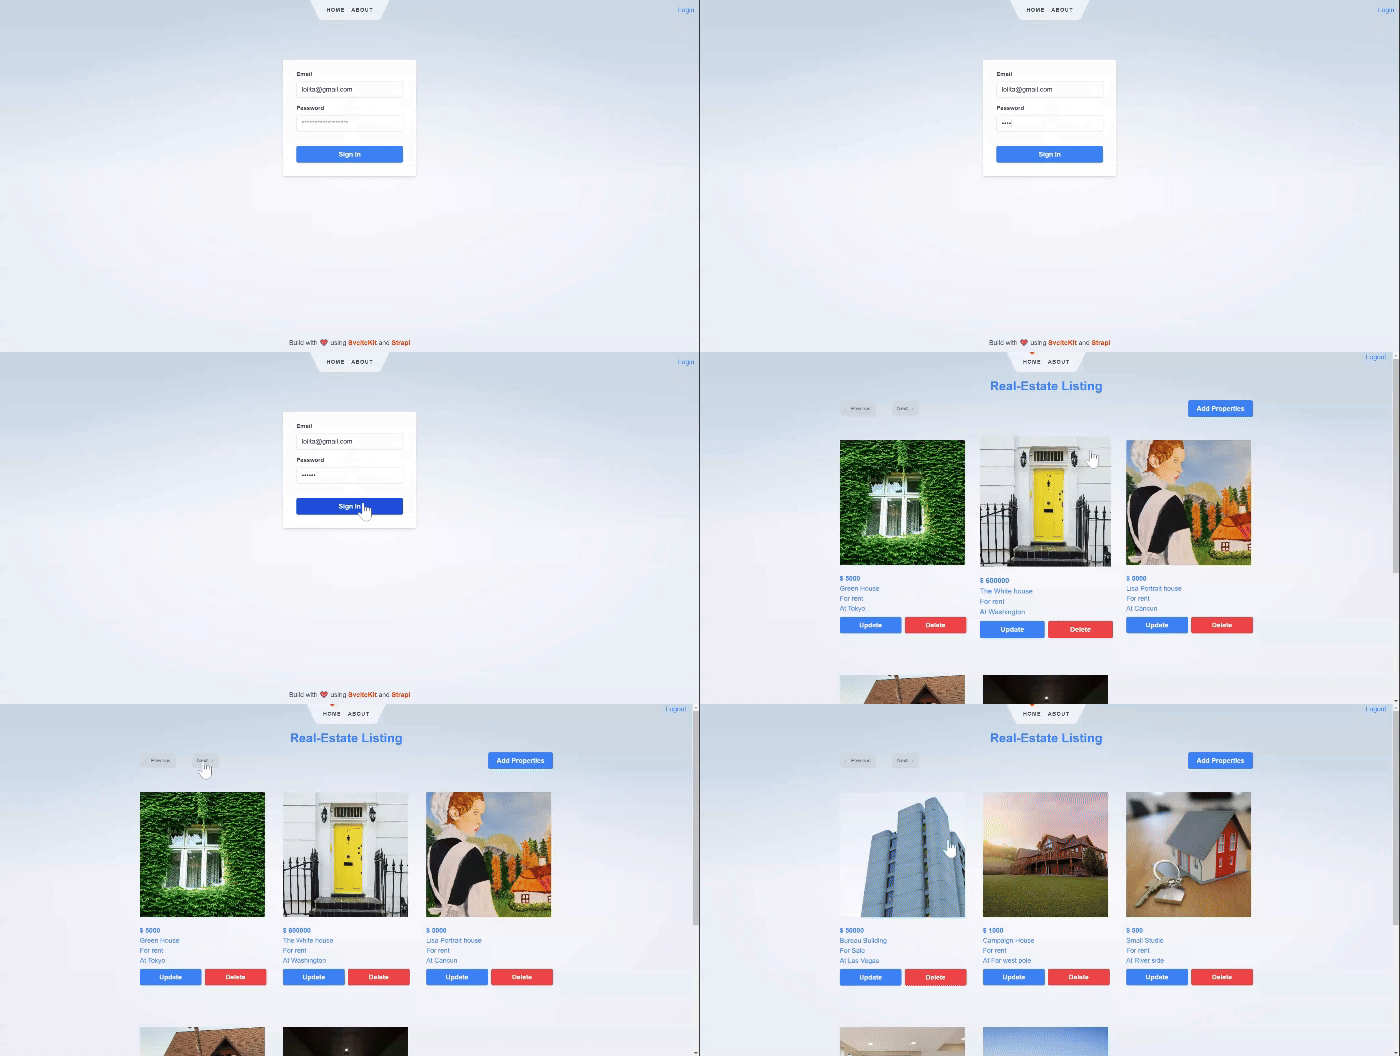
We have also prepared a demo so that you can actually visualize what you are about to create.
Conclusion
In this Strapi SvelteKit tutorial, you looked at how to build a real estate listing application with SvelteKit alongside Strapi CMS as the backend. You set up Strapi for new users, then proceeded to make the front using SvelteKit and integrated functions like user authentication, property listing, creation, edition, and deletion.
You can elevate this application to the next level by incorporating other features, such as search and filters, animation, and loading states.