Introduction
Keeping track of inventory can be a challenge, even for small businesses, but with the right tools, it doesn’t have to be. Instead of having to deal with spreadsheets for your inventories, why not build a flexible inventory management system that fits your needs?
In this guide, we’ll walk through the process of building an Inventory Management System using Strapi as the backend and React with TanStack for the frontend.
Features of the inventory system
- Store and manage inventory records.
- List inventory items.
- Add inventory items with form validation and and delete inventory items.
- View detailed information for each inventory item.
By the end, you’ll have a fully functional inventory system that’s easy to use, scalable, and customizable.
Let’s get started.
Overview of Tech Stack
Backend
We will use Strapi 5 to manage inventory data, categories, and user roles.
Frontend
- React: Frontend framework for UI development.
- TanStack Table: Displays inventory in a sortable, paginated table.
- TanStack Form: Manages inventory registration and updates.
- TanStack Router: Manages routing between main page, inventory list and any other pages we have.
Setting Up Strapi as Backend for the Inventory Management
Install Strapi 5
First, we'll create a project directory for our app:
mkdir inventory-sys
cd inventory-sys
Then, we'll install Strapi globally and create a new project using one of the following commands:
npx create-strapi@latest backend --quickstart
OR
yarn create strapi-app@latest backend --quickstart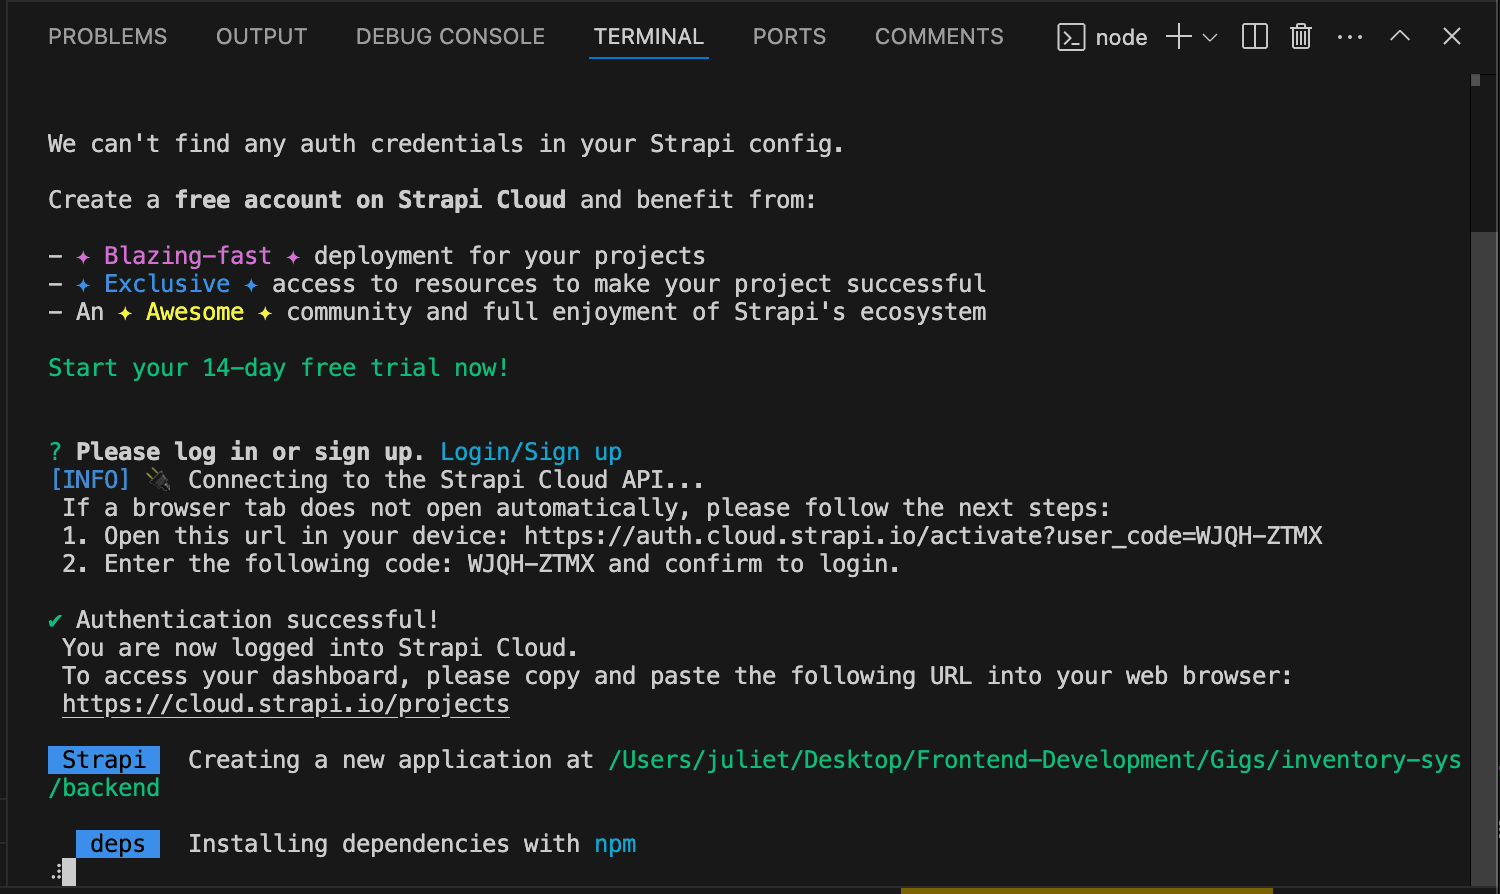
We'll proceed with the installation and login to our Strapi account when prompted (you'll have to signup instead if this is your first time using Strapi).
This process will create a new Strapi 5 project in the inventory-sys folder.
After that, navigate to the project folder using cd backend.
If you're not automatically directed to the Strapi panel on your browser, use this command to start up the Strapi server:
npm run develop
OR
yarn develop
We'll input our details, including name, email, and password to assess your admin panel when prompted to login.
The Strapi admin dashboard of our newly created project will open up at the url provided in the terminal: http://localhost:1337/admin.
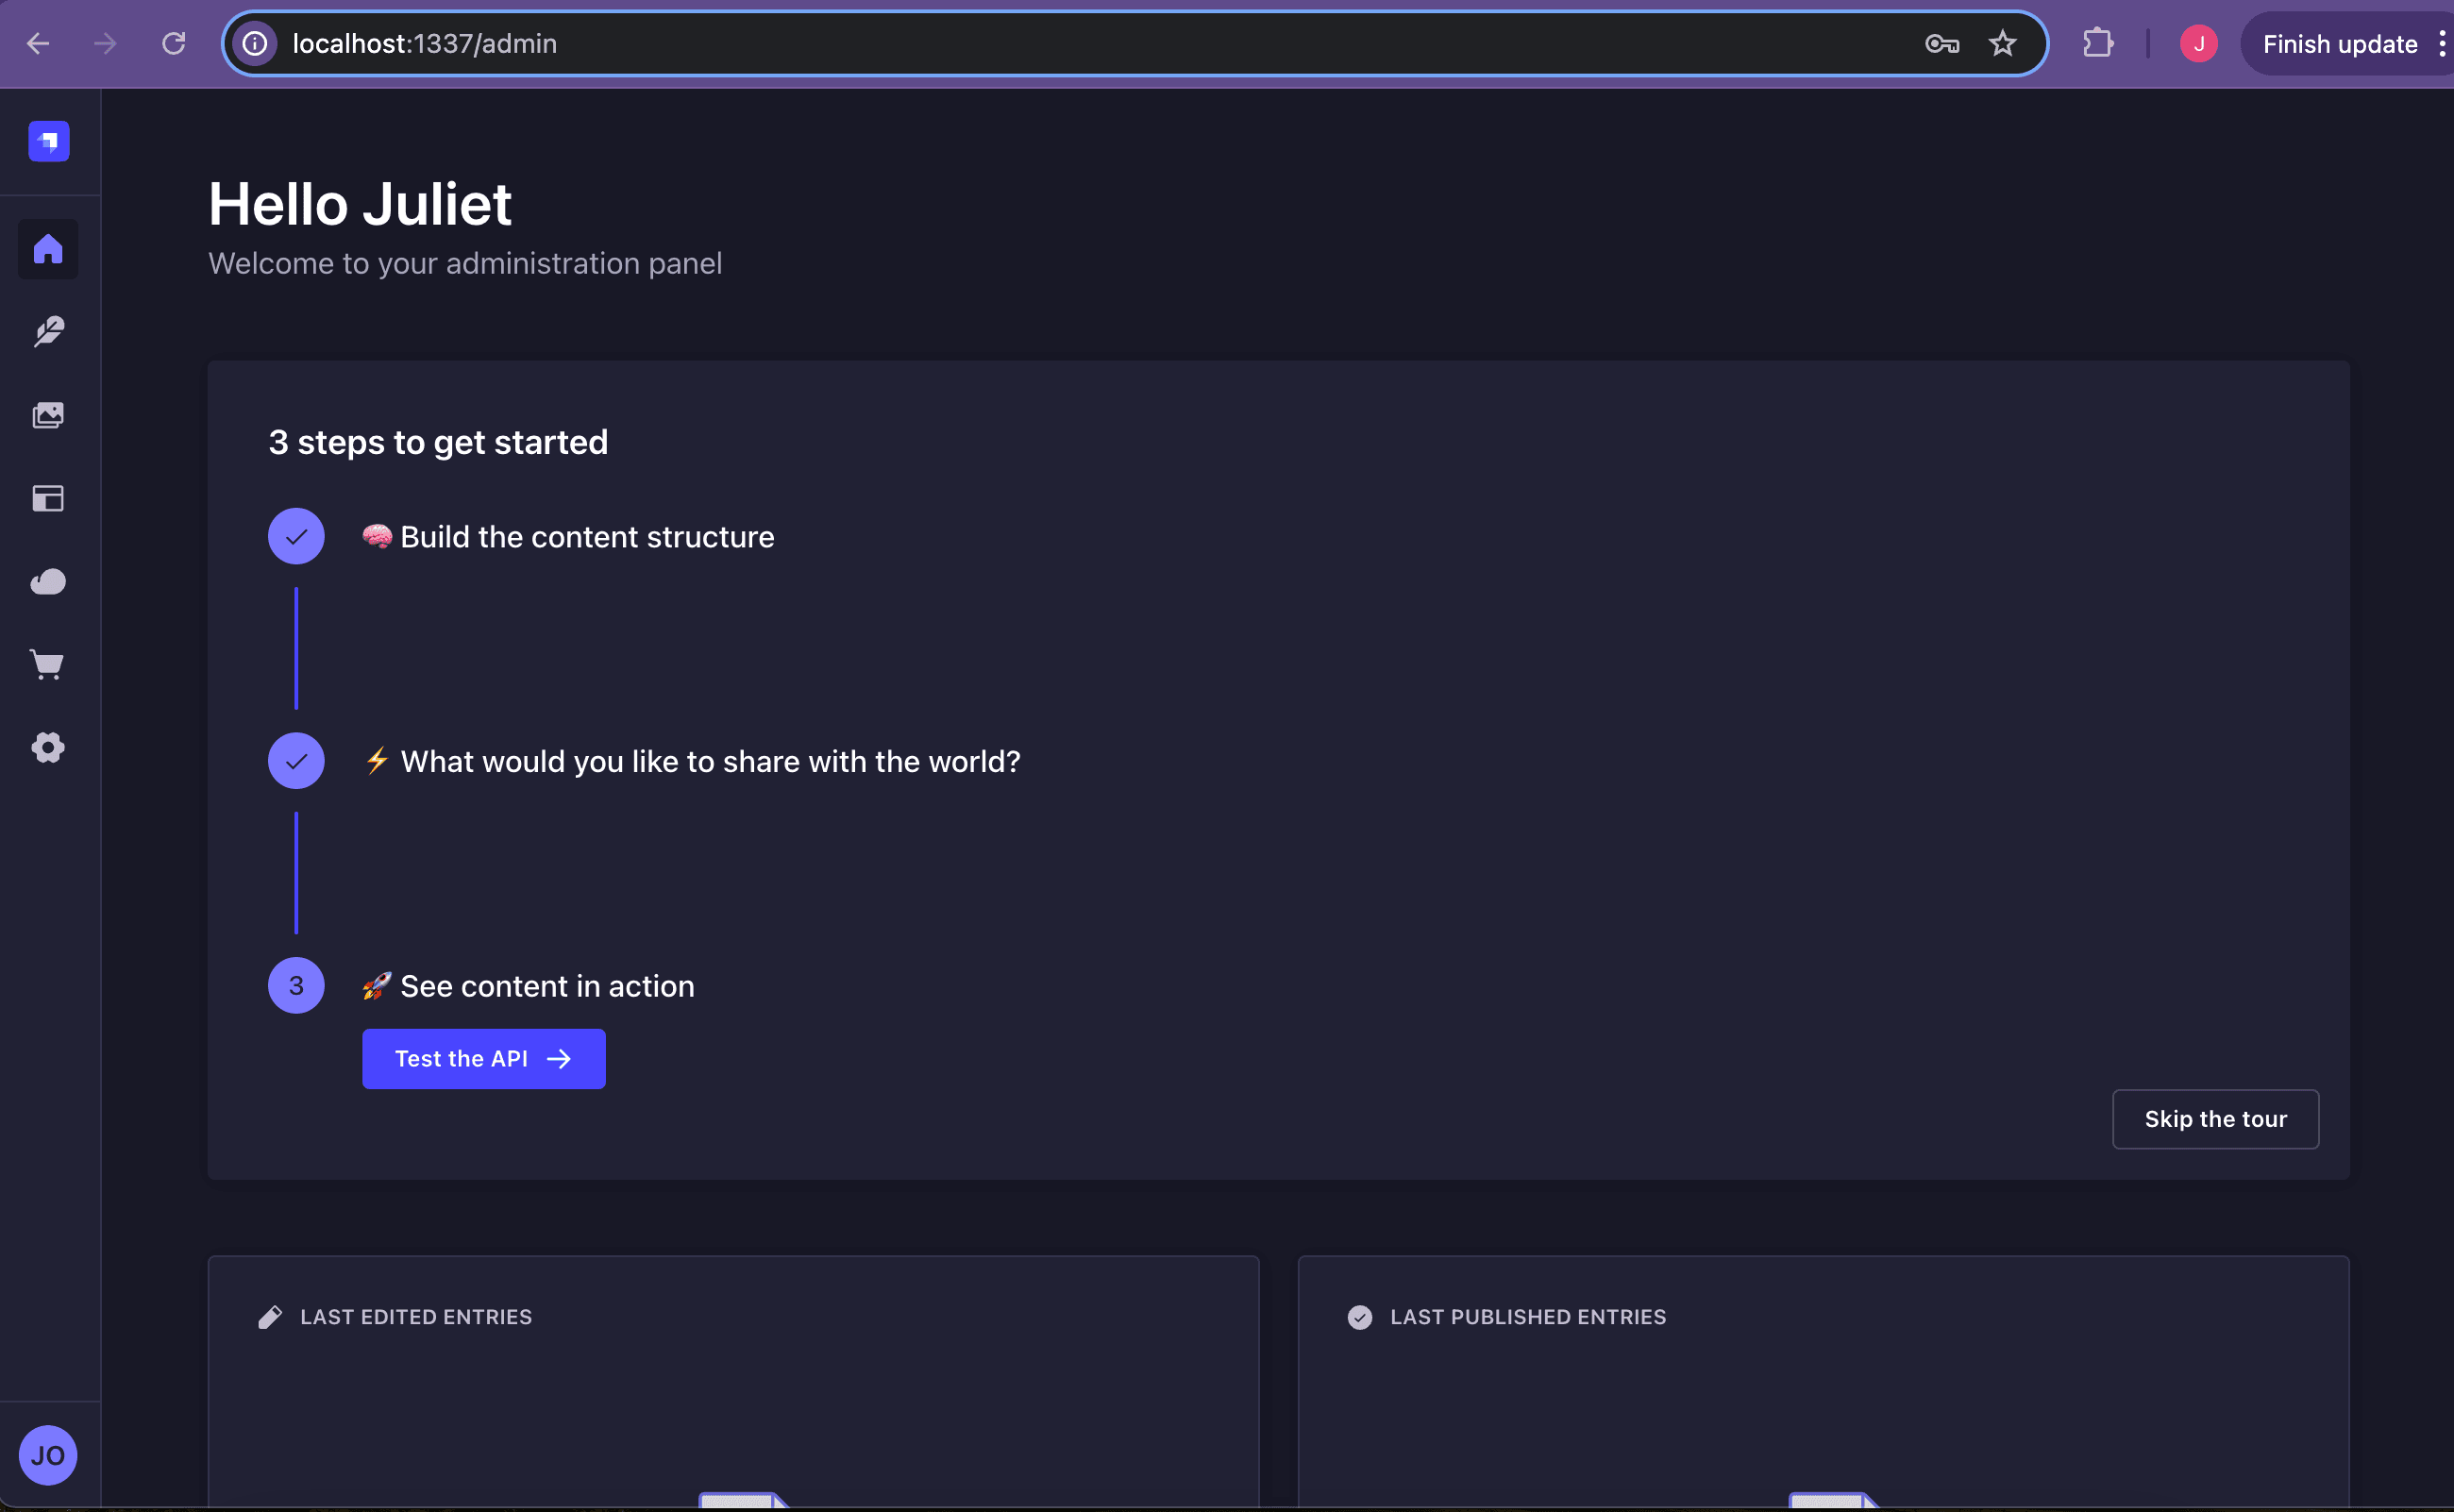
Now we're ready to perform other actions such as creating collection types, managing collection, and configuring settings for roles and permissions.
Create the Inventory Collection Type
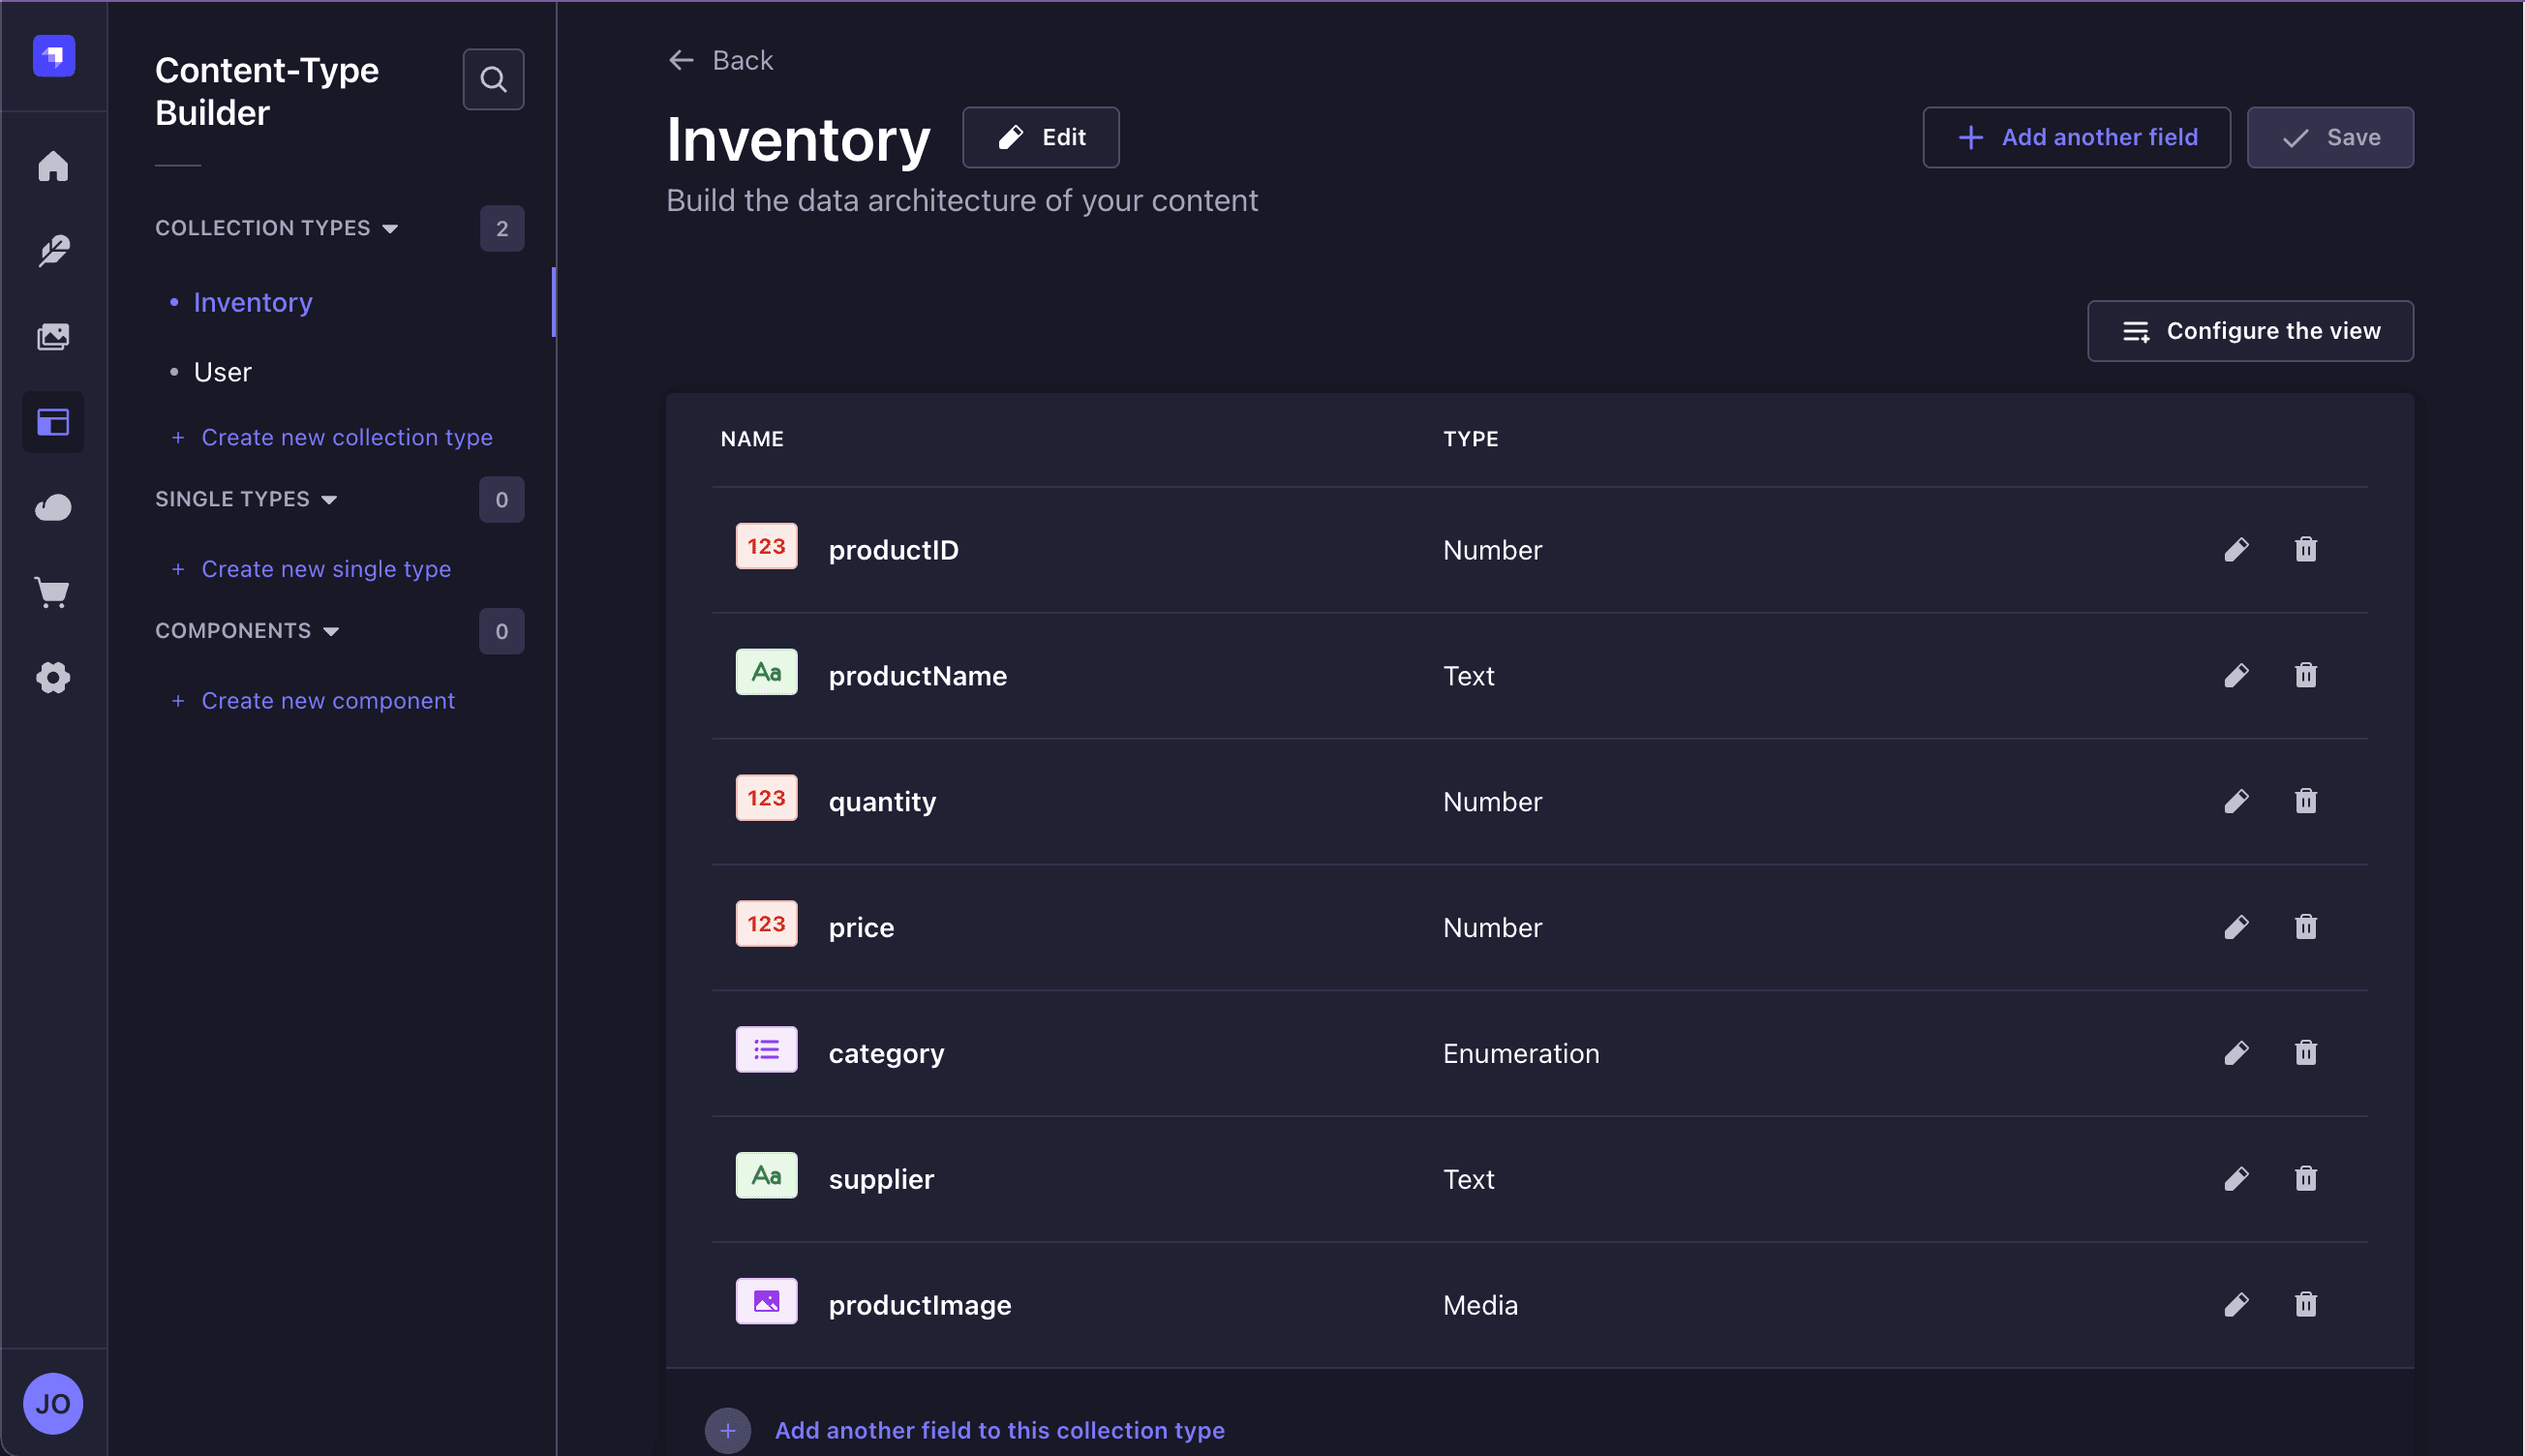
In the Strapi admin panel, create a collection type named Inventory by navigating to the Content-Type Builder page.
We'll click the Create new collection type and create our collection with the following fields:
| Field | Type |
|---|---|
productID | Number (big integer) |
productName | Text (short text) |
quantity | Number (integer) |
price | Number (decimal) |
category | Enumeration |
supplier | Text (short text) |
productImage | Media (single media) |
We'll then save it and wait for our changes to take effect.
We'll see the newly created collection and its fields, like this:
Create Entries for Collections
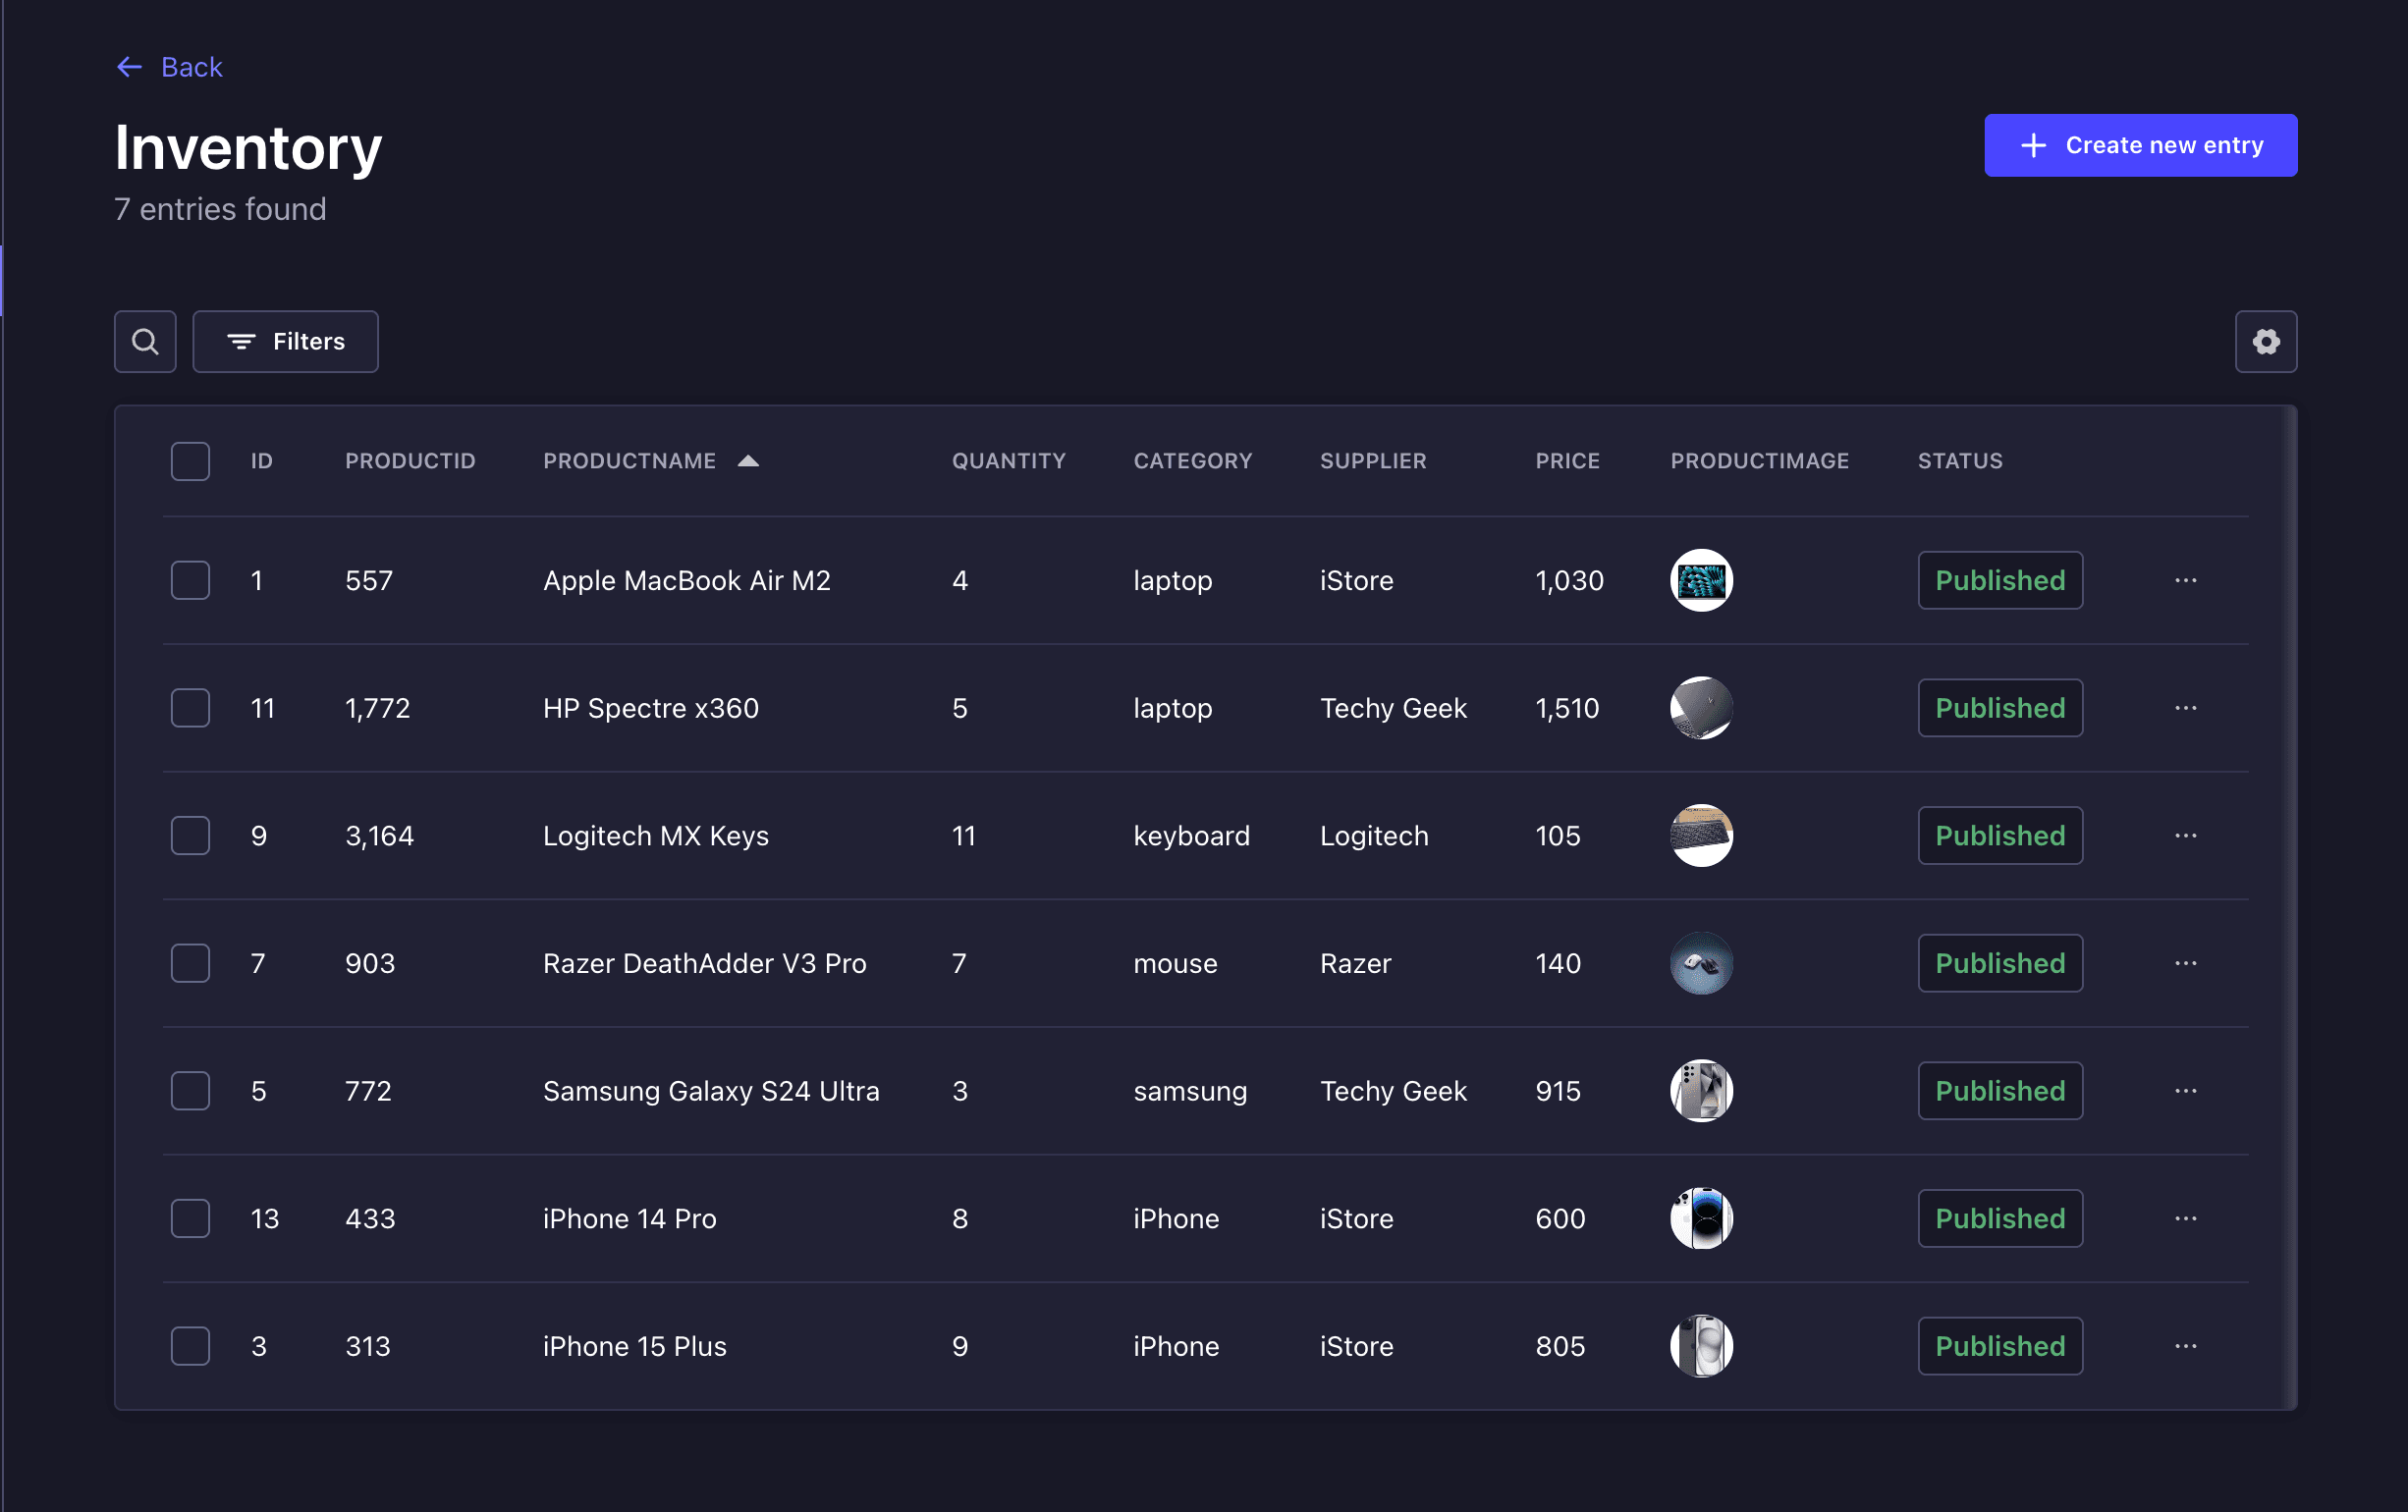
In our Inventory collection, let's create some entries in each of the fields.
We'll navigate to the "Content Manager" page and click on the Create new entry button at the top-right corner of the page.
After that, proceed to creating new Inventory entries.
Enable Strapi API Permission
Then, we'll configure API permissions to allow public access for fetching inventory data by:
- Navigating to Settings → Users & Permissions Plugin → Roles → Public.
- Click the 'edit' icon in Public.
- We'll then toggle the Inventory collection under "Permission" and tick the Select all checkbox for the collection. Save it.
Remember To add Image for API Permission
Test API
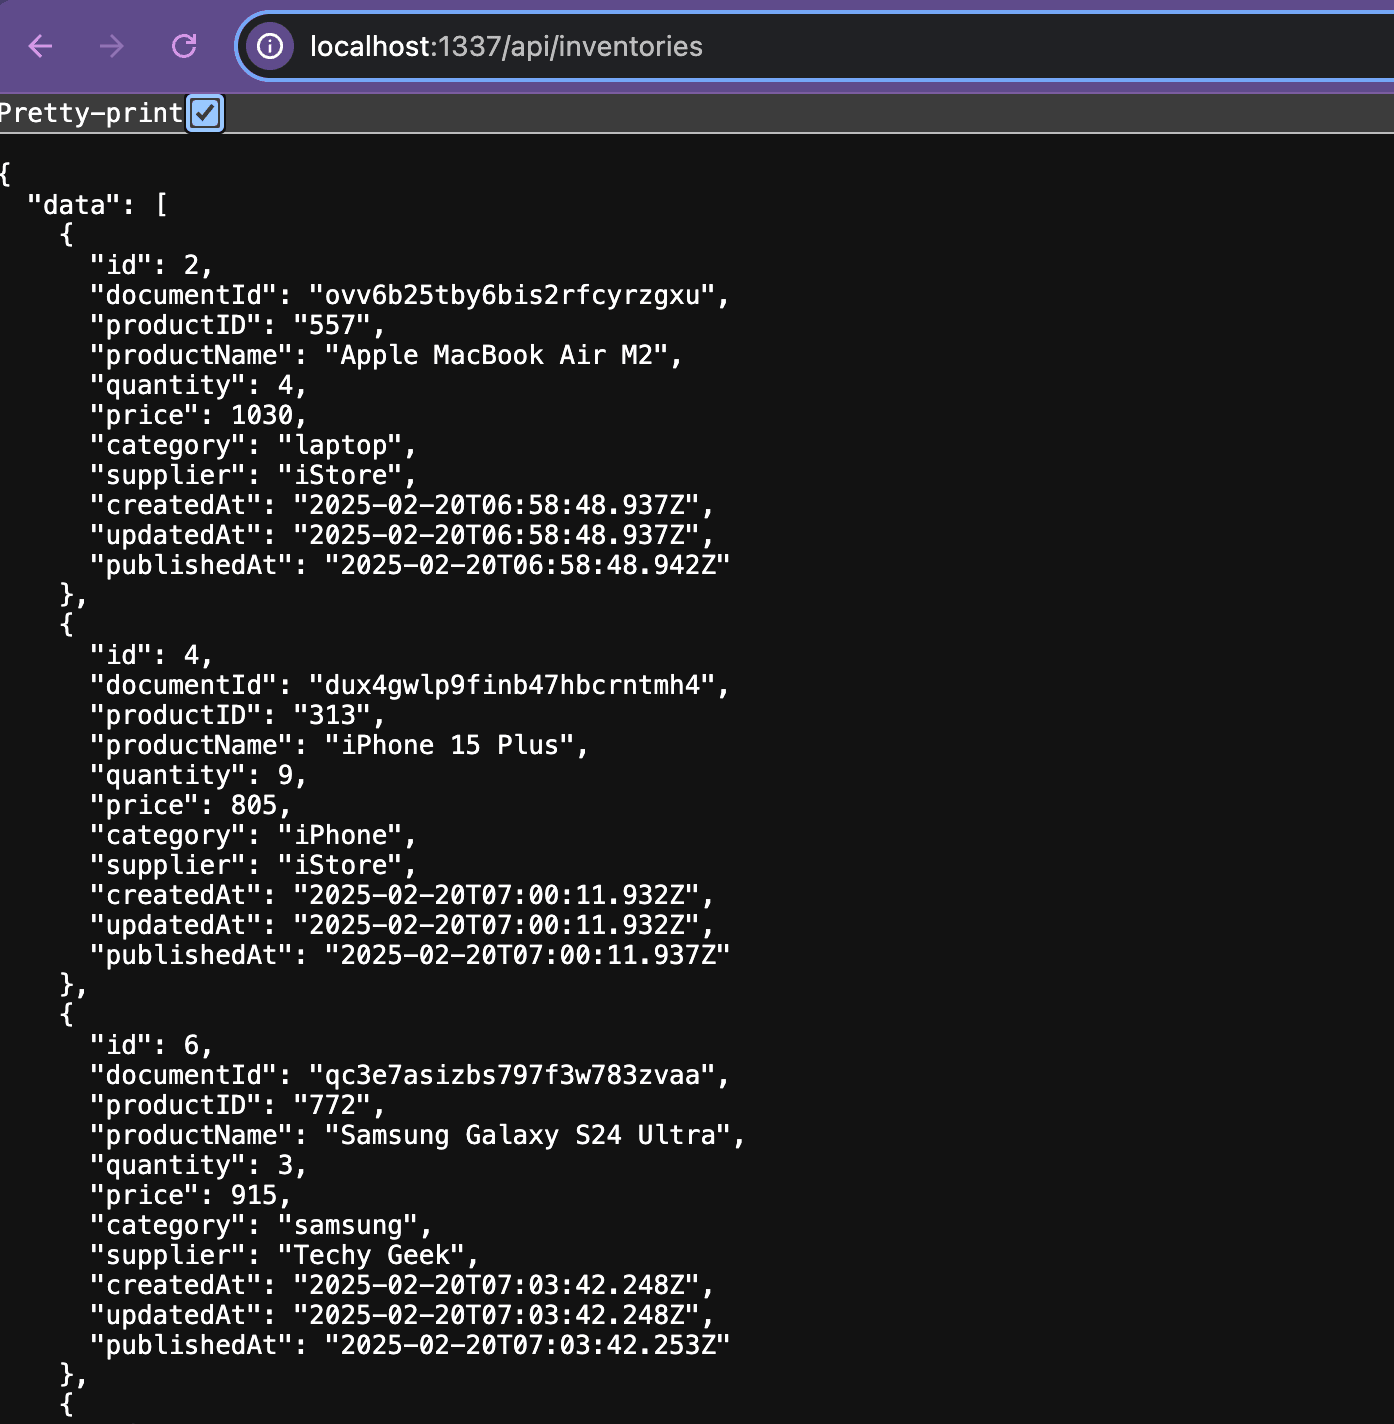
Now the http://localhost:1337/api/inventories endpoint is ready. We can now make GET requests to it.
If we visit the endpoint, we'll see that the entires are now being displayed in the JSON response.
That's all for the Strapi configuration. Let's move on to the frontend.
Setting Up the React Frontend with TanStack
It's time to build the UI of the inventory management system and we'll do this using React and TanStack.
We'll be building the project from scratch so we won't be using the TanStack quick start. Refer to the TanStack Start official documentation.
Create a New Directory and Initialize It
We'll create a new project directory for the frontend in the root directory of the main project.
Since we're already in the backend directory, we will navigate back to the root directory using the cd .. command.
After that, we'll create a new directory and initialize it using:
mkdir frontend
cd frontend
npm init -y
This will create a package.json file in our frontend folder.
Configure TypeScript
According to the documentation, it is recommended to use TypeScript with TanStack Start. So we'll create a tsconfig.json file in the root of the frontend project directory and input these lines of code:
{
  "compilerOptions": {
    "jsx": "react-jsx",
    "moduleResolution": "Bundler",
    "module": "ESNext",
    "target": "ES2022",
    "skipLibCheck": true,
    "strictNullChecks": true,
  },
}
Install Necessary Dependencies and Libraries for The Frontend
The dependencies and libraries we'll be needing include:
- Vinxi: What currently powers TanStack Start
- React
- Vite React Plugin: The default Vite plugin for React projects.
- TypeScript
- TanStack libraries (Router, Table, Form)
- qs and redaxios
- Install the first two TanStack libraries using this command in the
frontendfolder:
npm i @tanstack/react-start @tanstack/react-router vinxiThis will install the package-lock.json file and node_modules folder in our frontend folder.
2. Install React and the Vite React Plugin using:
npm i react react-dom && npm i -D @vitejs/plugin-react vite-tsconfig-paths- Next, install TypeScript and types using:
npm i -D typescript @types/react @types/react-dom- The
qslibrary will convert a JavaScript object into a query string that is sent to Strapi to enable us define complex populate and filter logic directly in JavaScript. While theredaxioslibrary is a lightweight alternative to Axios for making HTTP requests. We'll install these two libraries using this command in our terminal:
npm install qs redaxios- And finally, let's install the TanStack libraries we'll need using:
npm install @tanstack/react-table @tanstack/react-form @tanstack/react-routerNow that the libraries and dependencies have been installed, let's update the configuration files.
Update Frontend Configuration Files
The following are the configuration files we'll be updating.
- First, we'll update the
package.jsonto use Vinxi's CLI and set"type": "module", like this:
{
  // ...
  "type": "module",
  "scripts": {
    "dev": "vinxi dev",
    "build": "vinxi build",
    "start": "vinxi start"
  }
}- Now, we'll create a TanStack Start's
app.config.tsfile and configure it, like this:
// app.config.ts
import { defineConfig } from '@tanstack/start/config'
import tsConfigPaths from 'vite-tsconfig-paths'

export default defineConfig({
  vite: {
    plugins: [
      tsConfigPaths({
        projects: ['./tsconfig.json'],
      }),
    ],
  },
})
TanStack Folder Structure
From all the installations and configurations, we can see that there's currently no app or folder for the main frontend code. We'll create this manually.
In the frontend directory, we'll create a folder called app. This will be the main directory for the frontend application using TanStack Start. It will contain everything needed for routing, client-side rendering, and server-side rendering (SSR).
Now inside the app folder, create the following:
- A
routesfolder - A file inside the
routesfolder called__root.tsx - A
client.tsxfile - A
ssr.tsxfile - A
router.tsxfile - A
routeTree.gen.tsfile
This is how the folder structure of our frontend folder looks like now:
frontend/
┣ app/
┃ ┣ routes/
┃ ┃ ┗ __root.tsx
┃ ┣ client.tsx
┃ ┣ router.tsx
┃ ┣ routeTree.gen.ts
┃ ┗ ssr.tsx
┣ node_modules/
┣ app.config.ts
┣ package-lock.json
┣ package.json
┗ tsconfig.json
Now let's understand what each of these new files do.
1. routes/: This contains all the pages (routes) of our app. Each file inside will represent a different route.
2. root.tsx: The will be the root layout. It is a special route that wraps all other pages and defines the layout that wraps all routes in the app.
Paste these lines of code into this app/routes/__root.tsx file:
// app/routes/__root.tsx
import type { ReactNode } from 'react'
import {
  Outlet,
  createRootRoute,
  HeadContent,
  Scripts,
} from '@tanstack/react-router'

export const Route = createRootRoute({
  head: () => ({
    meta: [
      {
        charSet: 'utf-8',
      },
      {
        name: 'viewport',
        content: 'width=device-width, initial-scale=1',
      },
      {
        title: 'TanStack Start Starter',
      },
    ],
  }),
  component: RootComponent,
})

function RootComponent() {
  return (
    <RootDocument>
      <Outlet />
    </RootDocument>
  )
}

function RootDocument({ children }: Readonly<{ children: ReactNode }>) {
  return (
    <html>
      <head>
        <HeadContent />
      </head>
      <body>
        {children}
        <Scripts />
      </body>
    </html>
  )
}
It contains:
<Outlet />, where child routes (pages) will be rendered.<HeadContent />, which manages metadata (e.g., title, meta tags).<Scripts />, which loads necessary scripts for routing & interactivity.
3. router.tsx
This is the router configuration that configures how TanStack Router behaves.
Let's paste these lines of code into this app/routes/router.tsx file:
// app/router.tsx
import { createRouter as createTanStackRouter } from '@tanstack/react-router'
import { routeTree } from './routeTree.gen'

export function createRouter() {
  const router = createTanStackRouter({
    routeTree,
    scrollRestoration: true,
  })

  return router
}

declare module '@tanstack/react-router' {
  interface Register {
    router: ReturnType<typeof createRouter>
  }
}
It contains:
routeTree, which is a generated file that lists all routes (created automatically).scrollRestoration: true, which ensures that when users navigate, the page scrolls to the correct position.
4. ssr.tsx
This is the server entry point that handles server-side rendering (SSR) so that when a user visits the site, the server will generate the page before sending it to the browser.
Read more about SSR on TanStack.
We'll paste these lines of code into our app/ssr.tsx file:
// app/ssr.tsx
import {
    createStartHandler,
    defaultStreamHandler,
  } from '@tanstack/start/server'
  import { getRouterManifest } from '@tanstack/start/router-manifest'

  import { createRouter } from './router'

  export default createStartHandler({
    createRouter,
    getRouterManifest,
  })(defaultStreamHandler)
It containes createStartHandler() which runs on the server to process and serve routes.
5. client.tsx
This is the client entry point that will hydrate the app on the browser after SSR.
Let's go ahead and paste the following lines of code into the app/client.tsx file:
// app/client.tsx
/// <reference types="vinxi/types/client" />
import { hydrateRoot } from 'react-dom/client'
import { StartClient } from '@tanstack/start'
import { createRouter } from './router'

const router = createRouter()

hydrateRoot(document, <StartClient router={router} />)
It contains:
hydrateRoot(),which hydrates the app in the browser.<StartClient />, which initializes TanStack Router on the client.
6. routeTree.gen.ts
The content of the app/routes/routeTree.gen.ts file will be automatically generated to keep track of all routes when we run npm run dev or npm run start.
We don’t edit this manually!
Setup Main TanStack Start Route of The Frontend Application
Once we're done creating those necessary files, we can go ahead to create or define the first route (page) of our application, which will be the main page or home page.
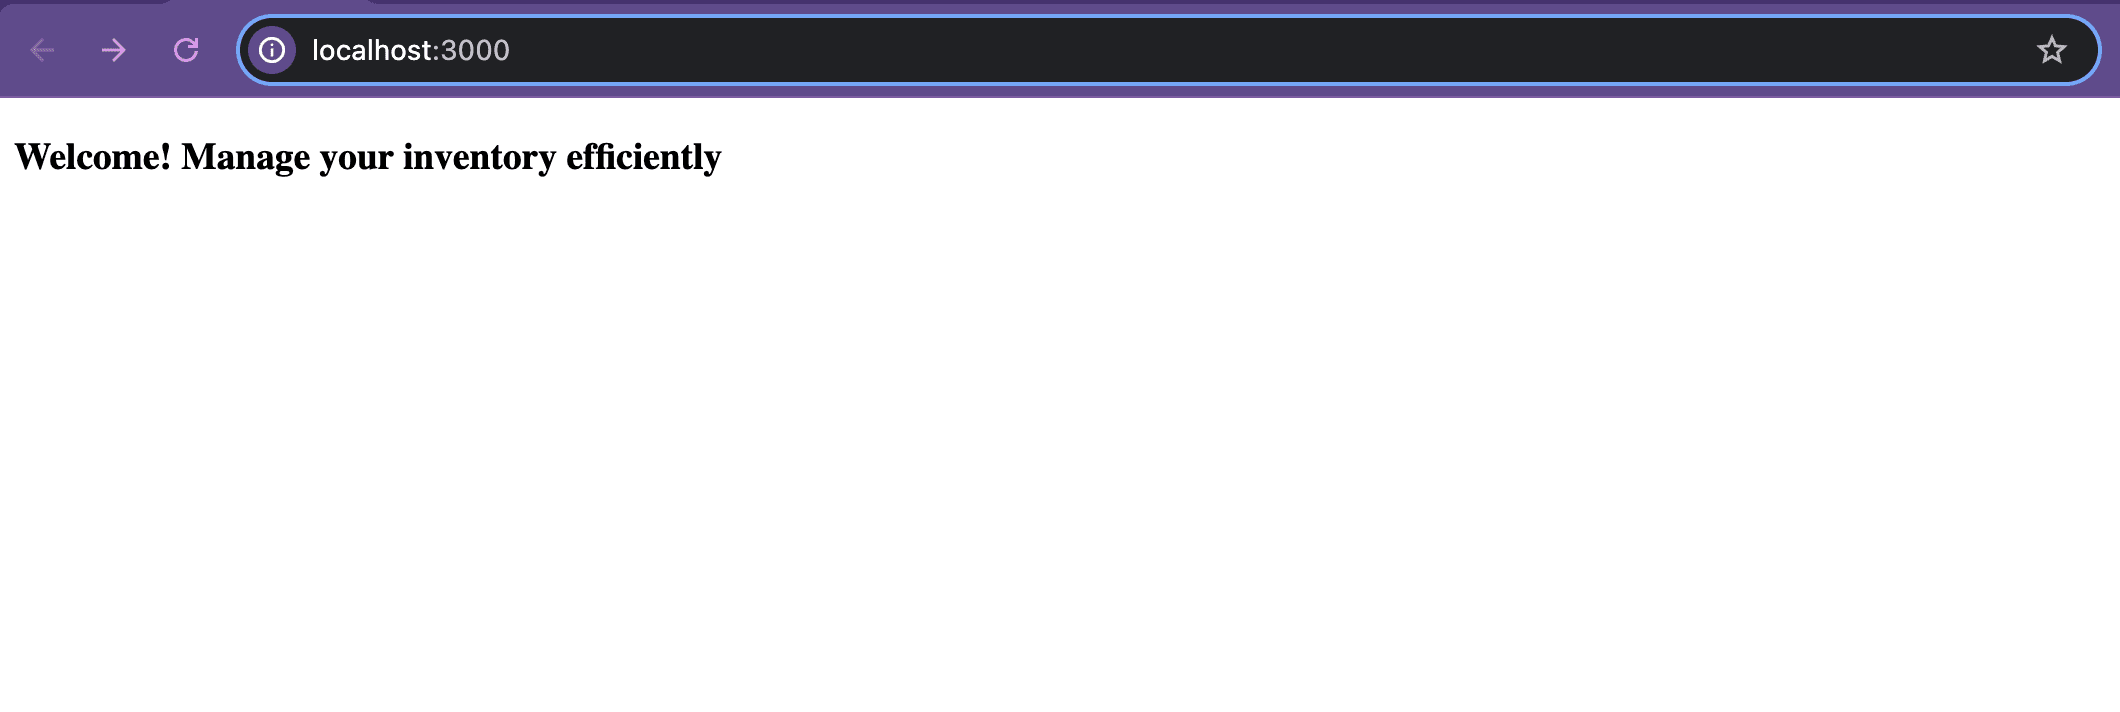
We'll start by creating a new file in app/routes directory called index.tsx and inputting these lines of code, which will return a simple welcome message.
// app/routes/index.tsx
import { createFileRoute } from '@tanstack/react-router'

export const Route = createFileRoute('/')({
  component: Home,
})

function Home() {
  return (
    <div className="p-2">
      <h3>Welcome! Manage your inventory efficiently</h3>
    </div>
  )
}
We'll then visit "http://localhost:3000/" to view our page on the browser:
Helper Functions for Interacting with Strapi
We'll create a utils/ folder that will contain helper functions for interacting with Strapi (our backend CMS). These functions will fetch data and handle our product image media URLs properly.
Inside this folder, we'll create two files: strapi.ts and inventories.tsx.
1. strapi.ts
This file will handle Strapi URLs and media files.
Let's input these lines of code into this file:
// app/utils/strapi.ts
export function getStrapiURL() {
    return import.meta.env.VITE_STRAPI_BASE_URL ?? "http://localhost:1337";
  }

  export function getStrapiMedia(url: string | null) {
    if (url == null) return null;
    if (url.startsWith("data:")) return url;
    if (url.startsWith("http") || url.startsWith("//")) return url;
    return `${getStrapiURL()}${url}`;
  }
The file contains two functions:
- The
getStrapiURL()which gets the base URL of our Strapi API from environment variables. In this case, theVITE_STRAPI_BASE_URLisn't set in.env, so it will default to http://localhost:1337 (Strapi's default local URL). - And the
getStrapiMedia(url: string | null)function which generates full URLs for images and media stored in Strapi
2. inventories.tsx
This file is responsible for fetching inventories from our Strapi's API.
First, let's paste these lines of code:
// app/utils/inventories.tsx
import { notFound } from "@tanstack/react-router";
import { createServerFn } from "@tanstack/start";
import qs from "qs";
import axios from "redaxios";

import { getStrapiURL } from "./strapi";

const BASE_API_URL = getStrapiURL();

interface StrapiArrayResponse<T> {
  data: T[];
  meta: {
    pagination: {
      page: number;
      pageSize: number;
      pageCount: number;
      total: number;
    };
  };
}

interface StrapiResponse<T> {
  data: T;
}

interface ProductImage {
  url: string;
  alternativeText: string;
}

export type InventoryType = {
  id: number;
  productID: string;
  productName: string;
  quantity: number;
  price: number;
  category: string;
  supplier: string;
  productImage: ProductImage;
};

// Fetch a single inventory item by ID
export const fetchInventoryItem = createServerFn({ method: "GET" })
  .validator((id: string) => id)
  .handler(async ({ data }) => {
    console.info(`Fetching inventory item with id ${data}...`);

    const path = "/api/inventories/" + data;
    const url = new URL(path, BASE_API_URL);

    url.search = qs.stringify({
      populate: {
        productImage: {
          fields: ["url", "alternativeText"],
        },
      },
    });

    const inventoryItem = await axios
      .get<StrapiResponse<InventoryType>>(url.href)
      .then((r) => r.data.data)
      .catch((err) => {
        console.error(err);
        if (err.status === 404) {
          throw notFound();
        }
        throw err;
      });

    return inventoryItem;
  });

// Fetch all inventory items
export const fetchInventories = createServerFn({ method: "GET" }).handler(
  async () => {
    console.info("Fetching inventory items...");

    const path = "/api/inventories";
    const url = new URL(path, BASE_API_URL);

    url.search = qs.stringify({
      populate: {
        productImage: {
          fields: ["url", "alternativeText"],
        },
      },
    });

    return axios.get<StrapiArrayResponse<InventoryType>>(url.href).then((r) => {
      console.dir(r.data, { depth: null });
      return r.data.data;
    });
  }
);
This inventories.tsx file is responsible for fetching inventory data from Strapi’s REST API. It provides two main functions:
fetchInventoryItem(id: string)to fetch a single inventory item by ID.fetchInventories()to fetch all inventory items.
At the top, we imported qs and redaxios.
The inventories.tsx file ensures that data is retrieved with necessary relationships (like images) and handles errors properly.
Adding Routes to Other Pages in TanStack Start
Now in order to enable users route from one page to another, we'll do this in the app/routes/__root.tsx file.
- First, let's change the title of our app from the "TanStack Start Starter" to "Inventory Management System" in the meta of the file, like this:
//app/routes/__root.tsx
export const Route = createRootRoute({
  head: () => ({
    meta: [
      ...
      {
        title: 'Inventory Management App',
      },
    ],
  }),
  component: RootComponent,
}) - Import
Linkto the file by updating the TanStack react-router import at the top of this file to this:
import {Outlet, Link, createRootRoute, HeadContent, Scripts,} from "@tanstack/react-router"; - Now we'll update the
<body>of theRootDocumentfunction to this to include the inventories page:
<body>
  <div>
    <Link
      to="/"
     activeProps={{
      }}
      activeOptions={{ exact: true }}
    >
      Home
    </Link>{" "}
    <Link
      to="/inventories"
      activeProps={{
      }}
    >
      Inventories
    </Link>{" "}
  </div>
  {children}
  <Scripts />
</body>
And that's all we need to do to include navigation links across the pages in our app.
Fetching Inventory
Our app will contain two pages: the main page and the inventory list page.
We've created the main page as our home page. Now let's improve it by styling and adding navigation link to the inventory list page.
1. Home Page
Let's create a basic landing page for our inventory management application by updating the index.tsx file in our app/routes folder.
//app/routes/index.tsx
import { createFileRoute } from "@tanstack/react-router";
import { Link } from "@tanstack/react-router";

export const Route = createFileRoute("/")({
  component: Home,
});

function Home() {
  return (
    <section>
      <div>
        <h2>Why Businesses Trust Our Inventory Management</h2>
        <p>
          Our inventory management system ensures real-time tracking, reduces
          waste, and optimizes stock levels. Businesses rely on us for accuracy,
          efficiency, and seamless integration with their operations.
        </p>
      </div>
      <div>
        <div>
          <ul>
            <li>
              <span>✔</span>
              <p>
                <strong>Real-time Stock Updates</strong>
                <br />
                Always know your inventory levels to prevent shortages and
                overstocking.
              </p>
            </li>
            <li>
              <span>✔</span>
              <p>
                <strong>Automated Restocking</strong>
                <br />
                Set up automatic reorders to ensure stock never runs out.
              </p>
            </li>
            <li>
              <span>✔</span>
              <p>
                <strong>Seamless Integrations</strong>
                <br />
                Connect with your POS, e-commerce, and accounting systems
                effortlessly.
              </p>
            </li>
            <li>
              <span>✔</span>
              <p>
                <strong>Comprehensive Reports</strong>
                <br />
                Gain insights into trends, stock movements, and business
                performance.
              </p>
            </li>
          </ul>
        </div>
      </div>
      <Link
        to="/inventories"
        activeProps={{
          className: "font-bold",
        }}
      >
        <button>Get Started</button>
      </Link>{" "}
    </section>
  );
}
This is just a simple home page. Feel free to refine it and customize to add more details about your inventory app.
2. The Inventory List Page
This is the page where all our inventories will be listed out in tabular format to display the info about the inventory.
First, let's display the inventory in a list.
We'll create an inventories.tsx file in our app/routes directory and paste these lines of code into it:
//app/routes/inventories.tsx
import { Link, Outlet, createFileRoute } from '@tanstack/react-router';
import { fetchInventories } from '../utils/inventories';

export const Route = createFileRoute('/inventories')({
  loader: async () => fetchInventories(),
  component: InventoriesComponent,
});

function InventoriesComponent() {
  const inventories = Route.useLoaderData();

  return (
    <div>
      <div>
        <h2>Inventories</h2>
        <ul>
          {inventories.map((inventory) => {
            return (
              <li key={inventory.id}>
                  <div>{inventory.productName.substring(0, 20)}</div>
              </li>
            );
          })}
        </ul>
      </div>
      <div>
        <Outlet />
      </div>
    </div>
  );
}
Breakdown of the code
- We imported the
createFileRouteandOutletfrom @tanstack/react-router` to define a route for our inventory page. - Then we imported the
fetchInventoriesfrom theinventoriesfile in the utils folder which will help us fetch the inventory data from our Strapi server. - Next, we define a route (/inventories) in the application. The loader function (
fetchInventories()) fetches inventory data when the page loads. While theInventoriesComponentis the component that renders the inventory list from the inventory component function we created underneath it. - Then the
Route.useLoaderData()retrieves the inventory data from the route loader. - Finally, we rendered the inventory in a list.
The <Outlet /> allows nested routes to be rendered inside this component.
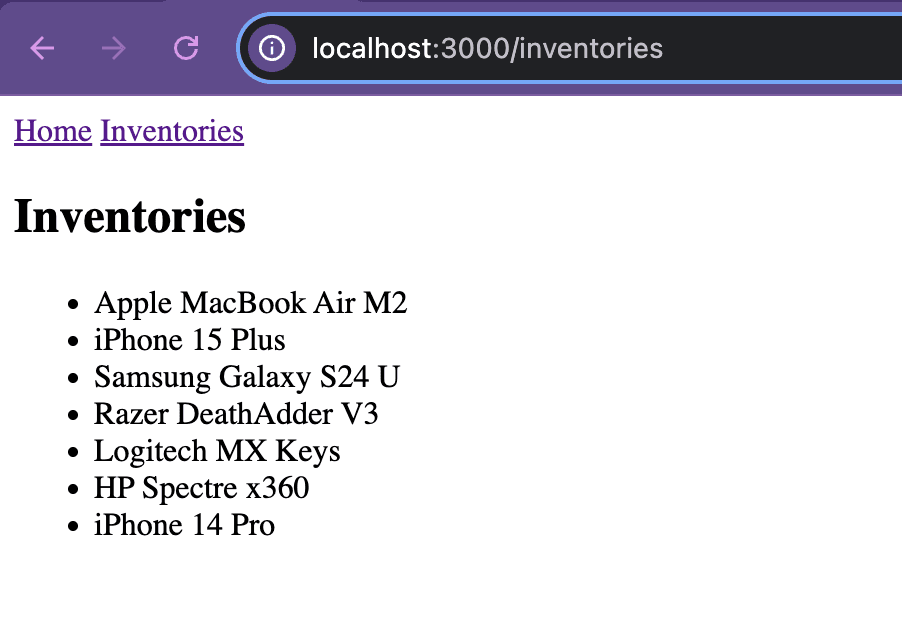
We'll now go to the browser and navigate to the inventory page by adding /inventories to the http://localhost:3000, so it'll be this: http://localhost:3000/inventories.
We can now see our inventories displayed in a list with only the product names being shown as we want it for now:
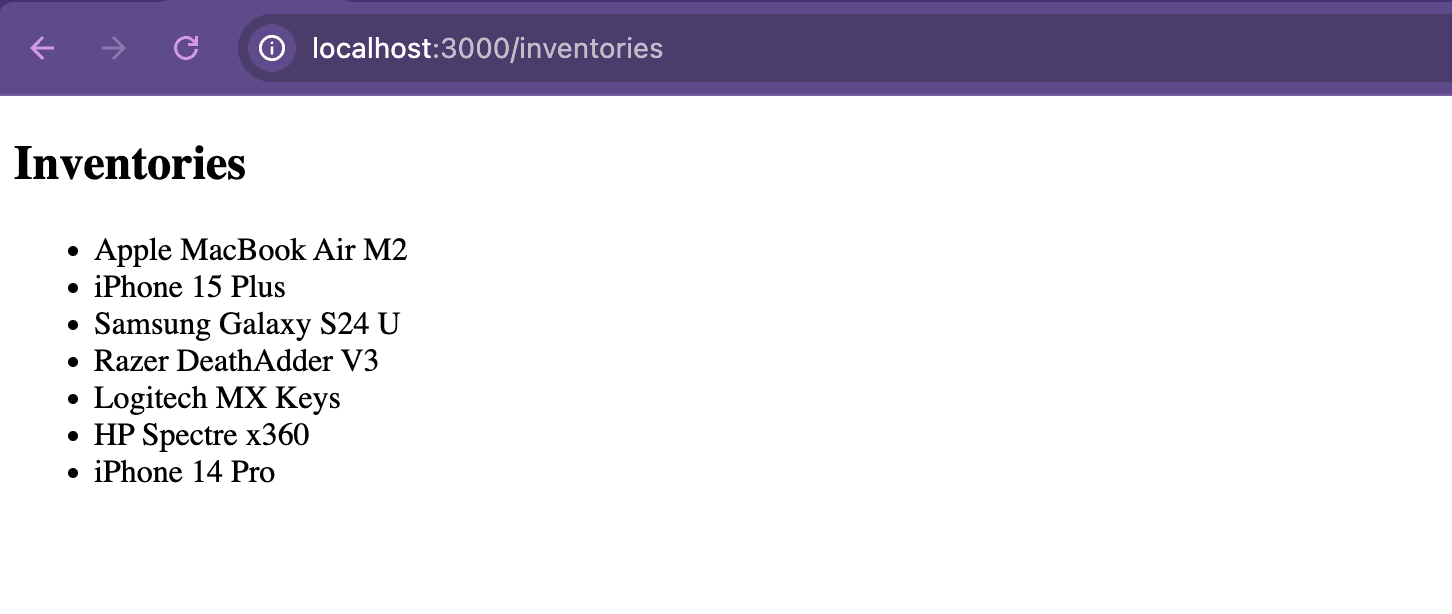
But this isn't how we want our inventories to be displayed, so let's fix the display format with TanStack Table and add a few functionalities for searching and filtering.
Creating a TanStack Table with Search and Filtering
Update the inventories.tsx file located in the app/routes folder with the following lines of code:
//app/routes/inventories.tsx
import { Link, Outlet, createFileRoute } from "@tanstack/react-router";
import { fetchInventories } from "../utils/inventories";
import {
  ColumnDef,
  flexRender,
  getCoreRowModel,
  getFilteredRowModel,
  useReactTable,
} from "@tanstack/react-table";
import { useState } from "react";
import { getStrapiURL } from "../utils/strapi";
import SearchInput from "../components/SearchInput";

export const Route = createFileRoute("/inventories")({
  loader: async () => fetchInventories(),
  component: InventoriesComponent,
});

export type Inventory = {
  id: number;
  productID: string;
  productName: string;
  quantity: number;
  price: number;
  category: string;
  supplier: string;
  productImage: { url: string; alternativeText: string };
};

function InventoriesComponent() {
  const inventories = Route.useLoaderData();

  // State for global filter
  const [globalFilter, setGlobalFilter] = useState("");

  // Define table columns
  const columns: ColumnDef<Inventory>[] = [
    {
      accessorKey: "productID",
      header: "Product ID",
      sortingFn: "alphanumeric",
    },
    {
      accessorKey: "productName",
      header: "Product Name",
      sortingFn: "alphanumeric",
    },
    { accessorKey: "category", header: "Category" },
    { accessorKey: "supplier", header: "Supplier" },
    { accessorKey: "quantity", header: "Quantity", sortingFn: "basic" },
    { accessorKey: "price", header: "Unit Price ($)", sortingFn: "basic" },
    {
      accessorKey: "productImage",
      header: "Image",
      cell: ({ row }) => (
        <img
          src={`http://localhost:1337${row.original.productImage?.url}`}
          alt={
            row.original.productImage?.alternativeText ||
            row.original.productName
          }
          className="inventory-image"
        />
      ),
    },
  ];

  // Create Table Instance
  const table = useReactTable({
    data: inventories,
    columns,
    state: {
      globalFilter,
    },
    getCoreRowModel: getCoreRowModel(),
    getFilteredRowModel: getFilteredRowModel(),
  });

  // State for filter values
  const [categoryFilter, setCategoryFilter] = useState("");
  const [supplierFilter, setSupplierFilter] = useState("");

  // Extract unique categories and suppliers for dropdowns
  const uniqueCategories = [
    ...new Set(inventories.map((item) => item.category)),
  ];
  const uniqueSuppliers = [
    ...new Set(inventories.map((item) => item.supplier)),
  ];

  // Filter data based on category and supplier
  const filteredData = inventories.filter((item) => {
    return (
      (categoryFilter ? item.category === categoryFilter : true) &&
      (supplierFilter ? item.supplier === supplierFilter : true)
    );
  });

  return (
    <div>
      <h2>Inventory</h2>

      {/* Global Search Filter Input */}
      <div>
        <div>
          <SearchInput
            value={globalFilter ?? ""}
            onChange={(value) => setGlobalFilter(String(value))}
            placeholder="Search all columns..."
          />
        </div>

        {/* Clear Filters Button */}
        <button
          onClick={() => {
            setCategoryFilter("");
            setSupplierFilter("");
          }}
        >
          Clear Filters
        </button>

      {/* Table Container */}
      <div>
        <table>
          <thead>
            {table.getHeaderGroups().map((headerGroup) => (
              <tr key={headerGroup.id}>
                {headerGroup.headers.map((header) => (
                  <th key={header.id}>
                    {flexRender(
                      header.column.columnDef.header,
                      header.getContext()
                    )}
                    {/* Category filter beside Category header */}
                    {header.column.id === "category" && (
                      <select
                        value={categoryFilter}
                        onChange={(e) => setCategoryFilter(e.target.value)}>
                        <option value="">All</option>
                        {uniqueCategories.map((cat) => (
                          <option key={cat} value={cat}>
                            {cat}
                          </option>
                        ))}
                      </select>
                    )}

                    {/* Supplier filter beside Supplier header */}
                    {header.column.id === "supplier" && (
                      <select
                        value={supplierFilter}
                        onChange={(e) => setSupplierFilter(e.target.value)}>
                        <option value="">All</option>
                        {uniqueSuppliers.map((sup) => (
                          <option key={sup} value={sup}>
                            {sup}
                          </option>
                        ))}
                      </select>
                    )}
                  </th>
                ))}
              </tr>
            ))}
          </thead>

          <tbody>
            {filteredData.length > 0 ? (
              filteredData.map((newItem) => (
                <tr key={newItem.id} className="border-b">
                  {table
                    .getRowModel()
                    .rows.find((row) => row.original.id === newItem.id)
                    ?.getVisibleCells()
                    .map((cell) => (
                      <td key={cell.id} className="p-3">
                        {flexRender(
                          cell.column.columnDef.cell,
                          cell.getContext()
                        )}
                      </td>
                    ))}
                </tr>
              ))
            ) : (
              <tr>
                <td
                  colSpan={columns.length}>
                  Oops! No item matching your search was found.
                </td>
              </tr>
            )}
          </tbody>
        </table>
      </div>

      <Outlet />
    </div>
  );
}

export default InventoriesComponent;
Breakdown of the code
- First, we imported the necessary hooks and utilities (
ColumnDef,flexRender,getFilteredRowModel,getCoreRowModel,useReactTable, ) used to create and manage tables in React from the TanStack Table. - We also imported the
useStatehook for managing component state, thegetStrapiURLfunction to get the Strapi API URL for fetching media assets, and aSearchInputfile for a search input component. - The route was already set up in our inventories file as we did when we displayed our items in a list.
- The
export type Inventorydefines a TypeScript type Inventory to represent each inventory item. - Inside the
InventoriesComponentfucntion, we first retrieved the inventory data loaded by the route and then set a state for global search filtering. - Next up, we defined an array of table columns for displaying inventory data. The
productIDandproductNamecolumns are sortable alphanumerically. Our image column will display a thumbnail of the product image. - We then initialized TanStack Table with the following:
datafor the inventory list,columnsfor the defined columns,globalFilterstate for global filtering,getCoreRowModel()which returns a basic row model that maps the original data passed to the table, andgetFilteredRowModel()to enable filtering. - The next thing we did was to set states for
categoryandsupplierfilters. We then extracted unique categories and suppliers for filter dropdowns. This then filters inventory data based on selected category and supplier. - We rendered the search input for the global search input and added a button to clear the filtered rows.
- Finally, we render the table using:
- The Header (
thead) loops throughtable.getHeaderGroups()to create column headers. - The Body (
tbody) loops throughtable.getRowModel()to display inventory data. It then usesflexRender()to correctly render the cell content.
- The Header (
TanStack Table Search Functionality for the Inventory List
You'll notice that in the above code, we imported a file called SearchInput. That's where the functionality for the search input is located, so we'll go ahead and create one.
We'll create a components folder and a file inside it called SearchInput.tsx. Now let's paste these lines of code inside it:
//app/components/SearchInput.tsx
import { useEffect, useState } from "react";

const Input = ({
  value: initValue,
  onChange,
  debounce = 500,
  ...props
}) => {
  const [value, setValue] = useState(initValue);
  useEffect(() => {
    setValue(initValue);
  }, [initValue]);

  // *  0.5s after set value in state
  useEffect(() => {
    const timeout = setTimeout(() => {
      onChange(value);
    }, debounce);
    return () => clearTimeout(timeout);
  }, [value]);

  return (
    <input
      {...props}
      value={value}
      onChange={(e) => setValue(e.target.value)}
    />
  );
};

export default Input;
Breakdown of the code:
-
First, we imported the
useStatehook to manage the state of the input value and theuseEffecthook to handle side effects, such as syncing values and implementing the debounce functionality. -
The
const Input = ({...})is designed as a controlled component that accepts the following props:value: initValue: This is the initial value passed to the component.
onChange: A function to handle changes when the input updates.
debounce = 500: Has a default debounce time of 500ms (0.5s) before invoking the onChange function.
...props: Allows passing additional props to the element.
- Next, we created a state variable value and initialized it with
initValue. WheneverinitValuechanges (e.g., when the parent component updates it), this effect will ensure that the internal state (value) is also updated. - The
useEffectis used when value changes to start a timer (setTimeout). After debounce milliseconds (default: 500ms),onChange(value)is called. - If
valuechanges before the delay is over, theclearTimeout(timeout)cancels the previous timer to prevent unnecessary function calls (debouncing). This helps to avoid callingonChangeon every keystroke to improve performance. - Finally, we rendered the input field by spreading any additional props (
...props) onto the<input>element. Thevaluestate controls thevalueand theonChangeevent updates value whenever the user types.
When we go to our browser, this is how our table looks like as seen in the video below:
We are now able to search for inventory items by their product name or product id and filter the list by category or supplier.
Refer to the TanStack Table documentation to get the complete guide on every features, utilities, and APIs that can be used in the TanStack Table.
But that's not all! We want the user, in this case, an admin of the store to be able to add new inventory items to the table and to the Strapi backend admin panel.
Adding Inventory Items with TanStack Form
TanStack Form is a headless, performant, and type-safe form state management for TS/JS, React, Vue, Angular, Solid, and Lit. TanStack form will also handle the form validation.
Creating Inventory Form
To get started with the "Add" functionality, we'll first create a file inside the components folder called ItemForm.tsx and paste the following lines of code in it:
// app/components/ItemForm.tsx
import { useForm } from "@tanstack/react-form";
import * as React from "react";

function FieldInfo({ field }) {
  return (
    <>
      {field.state.meta.isTouched && field.state.meta.errors.length ? (
        <em>{field.state.meta.errors.join(", ")}</em>
      ) : null}
      {field.state.meta.isValidating ? "Validating..." : null}
    </>
  );
}

export default function ItemForm({ onClose, onItemAdded }) {
  const form = useForm({
    defaultValues: {
      productID: 1,
      productName: "",
      quantity: 1,
      price: 1,
      category: "",
      supplier: "",
      productImage: null as File | null, // Added image field
    },
    onSubmit: async ({ value }) => {
      try {
        // Step 1: Create the inventory entry
        const { productImage, ...formData } = value; // Exclude image from first request
        const payload = { data: formData };

        const entryResponse = await fetch("http://localhost:1337/api/inventories", {
          method: "POST",
          headers: { "Content-Type": "application/json" },
          body: JSON.stringify(payload),
        });

        if (!entryResponse.ok) throw new Error("Failed to create entry");

        const entryData = await entryResponse.json();
        console.log("Entry created:", entryData);
        const documentId = entryData.data.documentId;

        // Step 2: Upload the image
        const formDataImage = new FormData();
        if (productImage) {
          formDataImage.append("files", productImage); // Append selected file
        }

        const imageResponse = await fetch("http://localhost:1337/api/upload", {
          method: "POST",
          body: formDataImage,
        });

        if (!imageResponse.ok) throw new Error("Failed to upload image");

        const uploadedImage = await imageResponse.json();
        console.log("Image uploaded:", uploadedImage);
        const imageId = uploadedImage[0].id;

        // Step 3: Perform PUT request to update entry with image ID
        const updatePayload = {
          data: { productImage: imageId },
        };

        const updateResponse = await fetch(`http://localhost:1337/api/inventories/${documentId}`, {
          method: "PUT",
          headers: { "Content-Type": "application/json" },
          body: JSON.stringify(updatePayload),
        });

        if (!updateResponse.ok) throw new Error("Failed to update entry with image");
        console.log("Entry updated with image", updateResponse);

        onItemAdded(entryData.data.attributes || entryData.data);
        alert("Item added successfully with image!");
        window.location.reload(); // Reload page to show new item
      } catch (error) {
        console.error("Error during item creation:", error);
        alert("Error adding item.");
      }
    },
  });

  return (
    <div>
      <form
        onSubmit={(e) => {
          e.preventDefault();
          e.stopPropagation();
          form.handleSubmit();
        }}
      >
        {/* Product ID */}
        <form.Field
          name="productID"
          validators={{
            onChange: ({ value }) =>
              !value || value <= 0 ? "Product ID must be greater than 0" : undefined,
          }}
          children={(field) => (
            <>
              <label htmlFor={field.name}>Product ID</label>
              <input
                id={field.name}
                type="number"
                value={field.state.value}
                onChange={(e) => field.handleChange(Number(e.target.value))}
              />
              <FieldInfo field={field} />
            </>
          )}
        />

        {/* Product Name */}
        <form.Field
          name="productName"
          validators={{
            onChange: ({ value }) =>
              !value ? "Product name is required" : value.length < 3 ? "Must be at least 3 characters" : undefined,
          }}
          children={(field) => (
            <>
              <label htmlFor={field.name}>Product Name</label>
              <input id={field.name} value={field.state.value} onChange={(e) => field.handleChange(e.target.value)} />
              <FieldInfo field={field} />
            </>
          )}
        />

        {/* Quantity */}
        <form.Field
          name="quantity"
          validators={{
            onChange: ({ value }) => (value <= 0 ? "Quantity must be at least 1" : undefined),
          }}
          children={(field) => (
            <>
              <label htmlFor={field.name}>Quantity</label>
              <input
                id={field.name}
                type="number"
                value={field.state.value}
                onChange={(e) => field.handleChange(Number(e.target.value))}
              />
              <FieldInfo field={field} />
            </>
          )}
        />

        {/* Price */}
        <form.Field
          name="price"
          validators={{
            onChange: ({ value }) => (value <= 0 ? "Price must be greater than 0" : undefined),
          }}
          children={(field) => (
            <>
              <label htmlFor={field.name}>Price</label>
              <input
                id={field.name}
                type="number"
                value={field.state.value}
                onChange={(e) => field.handleChange(Number(e.target.value))}
              />
              <FieldInfo field={field} />
            </>
          )}
        />

        {/* Category */}
        <form.Field
          name="category"
          validators={{
            onChange: ({ value }) => (!value ? "Category is required" : undefined),
          }}
          children={(field) => (
            <>
              <label htmlFor={field.name}>Category</label>
              <input id={field.name} value={field.state.value} onChange={(e) => field.handleChange(e.target.value)} />
              <FieldInfo field={field} />
            </>
          )}
        />

        {/* Supplier */}
        <form.Field
          name="supplier"
          validators={{
            onChange: ({ value }) => (!value ? "Supplier is required" : undefined),
          }}
          children={(field) => (
            <>
              <label htmlFor={field.name}>Supplier</label>
              <input id={field.name} value={field.state.value} onChange={(e) => field.handleChange(e.target.value)} />
              <FieldInfo field={field} />
            </>
          )}
        />

        {/* Image Upload */}
        <form.Field
          name="productImage"
          validators={{
            onChange: ({ value }) => (!value ? "Image is required" : undefined),
          }}
          children={(field) => (
            <>
              <label htmlFor={field.name}>Product Image</label>
              <input
                id={field.name}
                type="file"
                accept="image/*"
                onChange={(e) => {
                  const file = e.target.files?.[0] || null;
                  field.handleChange(() => file);
                }}
              />
              <FieldInfo field={field} />
            </>
          )}
        />

        {/* Buttons */}
        <form.Subscribe
          selector={(state) => [state.canSubmit, state.isSubmitting]}
          children={([canSubmit, isSubmitting]) => (
            <>
              <button type="submit" disabled={!canSubmit}>
                {isSubmitting ? "..." : "Submit"}
              </button>
              <button type="reset" onClick={() => form.reset()}>
                Reset
              </button>
              <button type="button" onClick={onClose}>
                Cancel
              </button>
            </>
          )}
        />
      </form>
    </div>
  );
}
Breakdown of the code:
- First, we import the
useFormfrom the @tanstack/react-form library to manage form state and validation. FieldInfois a helper component that displays validation errors and validation status for a form field.- The
field.state.meta.isTouchedchecks if the user has interacted with the field. field.state.meta.errors.lengthchecks if there are validation errors.field.state.meta.isValidatingshows "Validating..." when validation is in progress.- The main form component
ItemFormhandles inventory item submissions. It take two props:onClose, which closes the form andonItemAddedwhich is a callback for when an item is successfully added. - We then use the
useFormto initialize the form with default values for product fields,productImagefield set as null initially, andonSubmitto handle form submission. - We create the inventory entry buy extract
productImageseparately to exclude it from the first request and prepare a payload with other form data. - The
entryResponsecreates a new inventory entry in Strapi by sending a POST request. If the request fails, an error is thrown. We then parse the response and extract the new inventorydocumentId. - The next thing we did is to create a
FormDataobject and append the selected image. This will send the image to Strapi's/uploadendpoint. - If the upload is successful, it extracts the uploaded image ID. If not, it returns an error.
- We handled the inventory entries for the product id, name, etc differently than the product image. So we have to update the inventory entry to link the uploaded image by performing a
PUTrequest to update entry with image ID. - If the update is successful, it logs the response. It calls
onItemAdded, alerts success, and reloads the page to show the newly added item. And of course, any error is caught and logged. - Moving on to the form UI, the form prevents default form submission and calls
form.handleSubmit()to process the form. name="productID"links the field to the form state.validatorsensures the field value is greater than 0.childrenrenders a<label>, an<input>field bound to the form state, and theFieldInfoto show errors.- Other fields (productName, quantity, price, category, supplier) follow a similar structure.
- The
productImagefield uses the<input type="file">to select an image and callsfield.handleChange()to update the form state. - The
form.Subscribecontains buttons for submitting the form, reseting form values, and cancelling submission.
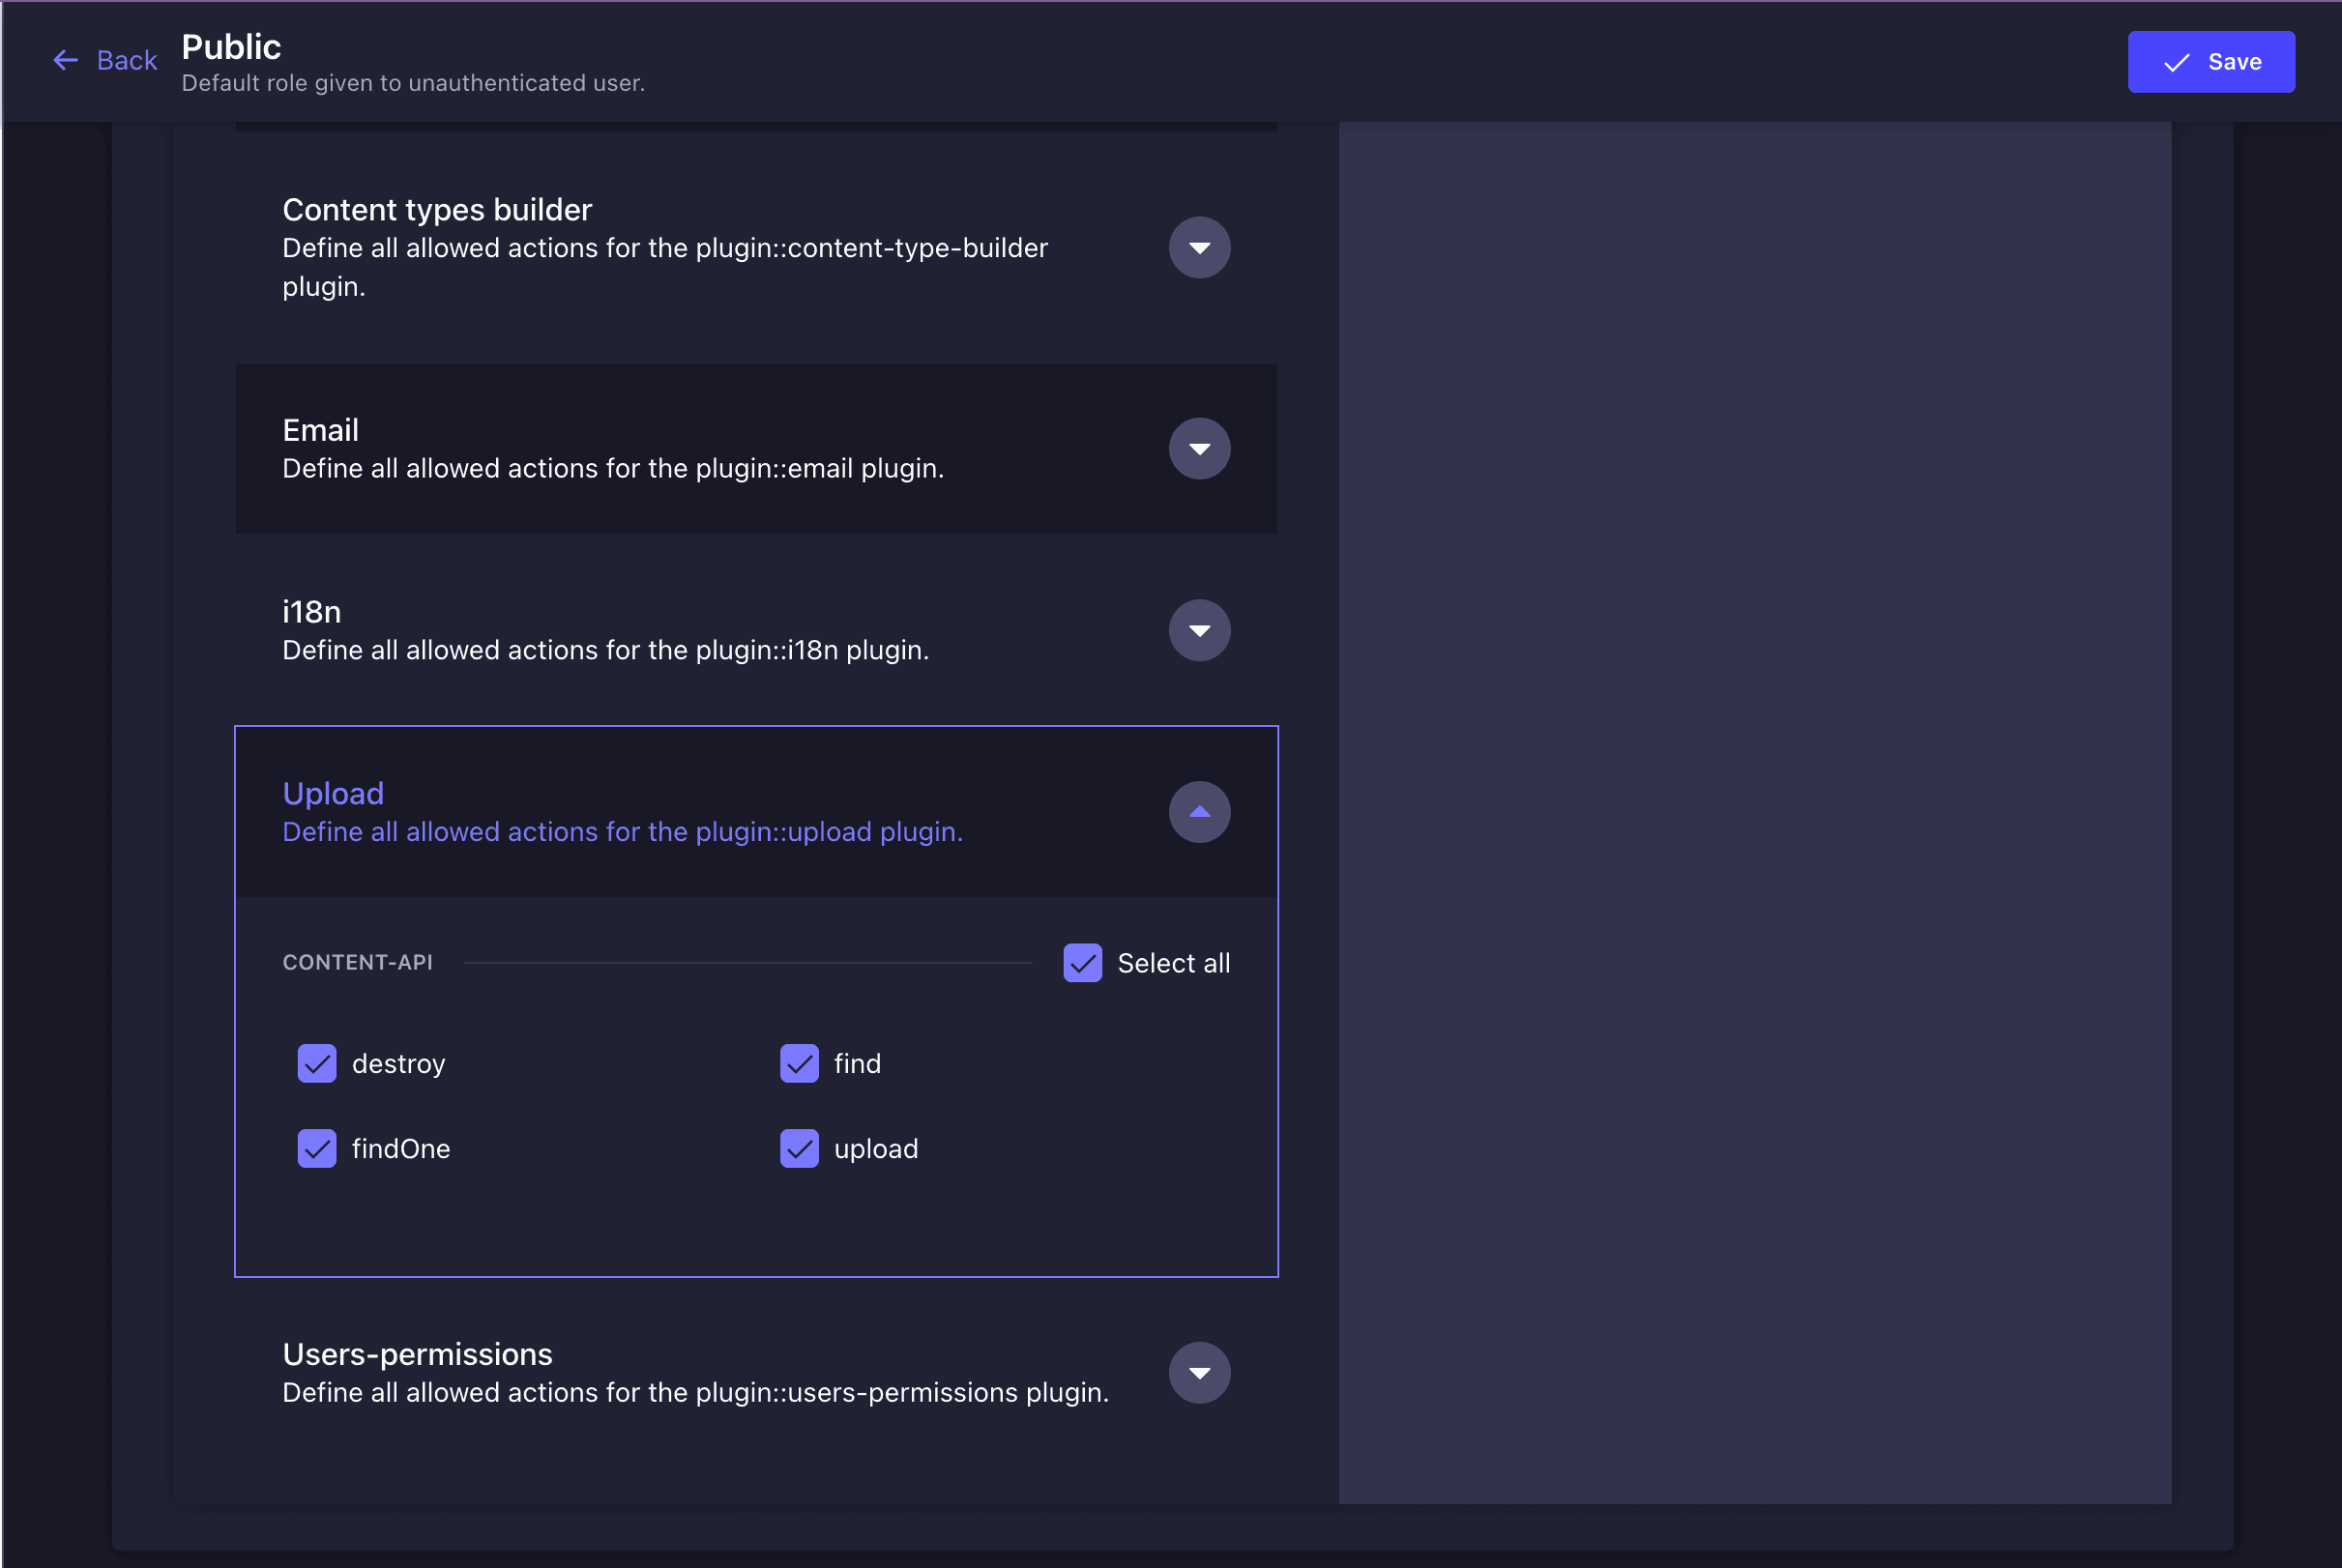
Grant Access Permission for Strapi Images
NB: We are sending the image to Strapi's
/uploadendpoint and to make sure this works, we have to configure API permissions to allow public access for uploading images in our Strapi admin panel, just like we did at the beginning for the Inventory.
Navigate to Settings → Users & Permissions Plugin → Roles → Public. Click the 'edit' icon in Public.
We'll then toggle the Upload option under "Permission" and tick the Select all checkbox for the collection and then click the "Save" button to save the settings.
Update Inventory Page
The last thing we have to do is update the inventory page to include the add item functionality.
In the inventories.tsx file, we'll do the following:
- First, we'll import the
ItemForm.tsxfile from thecomponentsfolder - We'll then create a state to hold the list of inventory items and update dynamically when a new item is added.
- Next, we'll create a
handleItemAddedfunction to update theinventoryListby adding the newly created item. The spread operator (...prev) will keep existing inventory items intact. We'll also include a defaultproductDetailsproperty. - Now, we set another state to control whether the item form is visible or hidden and add a button which when clicked, will set
showFormto true, making the form appear. - To render the form when needed, we'll:
-
Make the
ItemFormcomponent appear only whenshowFormis true. -
Set
onCloseprop to allow closing the form. -
Include the
onItemAddedprop to passhandleItemAddedtoItemForm, enabling it to update the inventory list when a new item is successfully added.
-
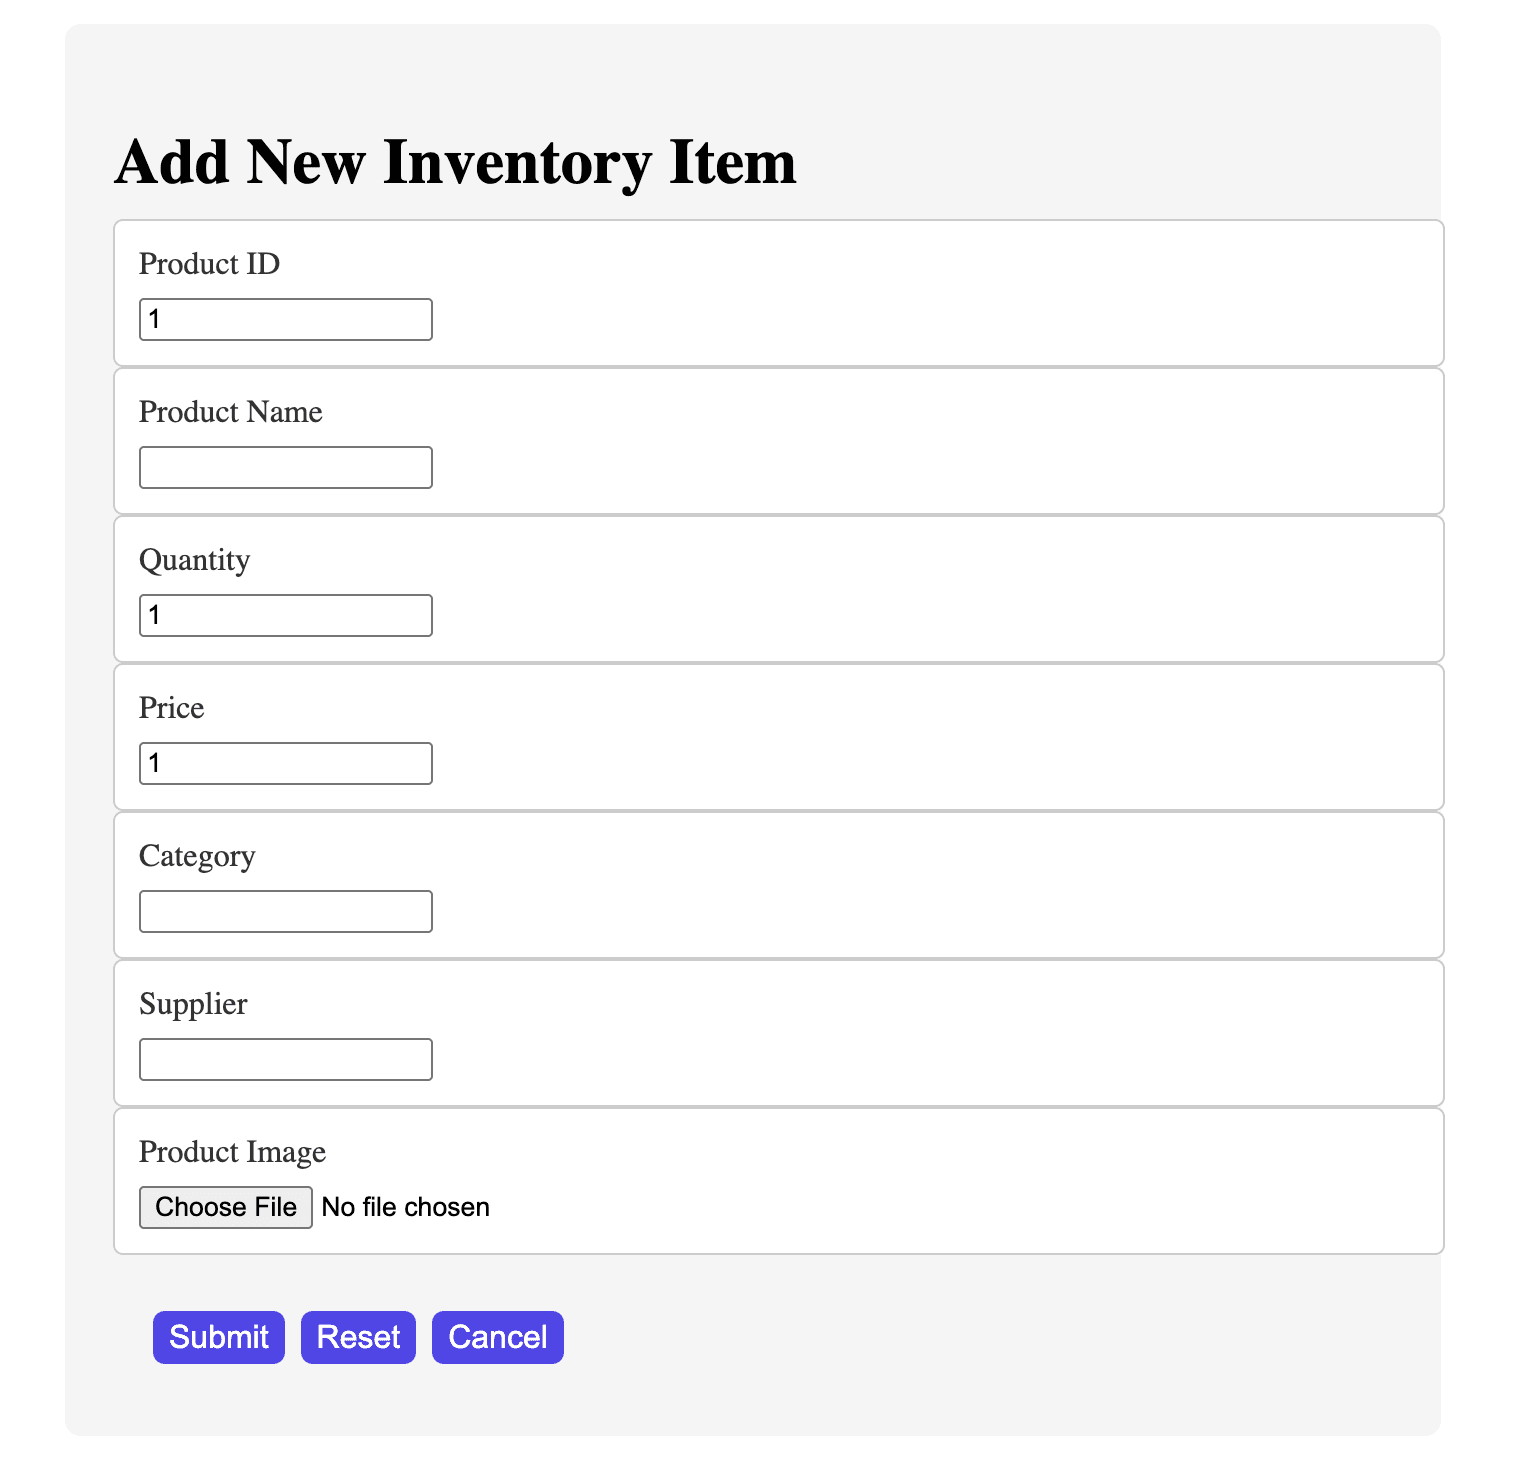
What our form looks like after styling:
Deleting Inventory Item
As an admin of this inventory system, you'd want to be able to delete an inventory item directly on the app instead of doing it from the Strapi admin panel. Here's how we can achieve that:
- First, we'll add a
documentId?to theexport type Inventoryto act as the unique identifier for the inventory item to be deleted. Set the value to string, like this:
documentId?: string; - We'll then create a
handleDeletefunction in theroutes/inventories.tsxfile
// app/routes/inventories.tsx
const handleDelete = async (documentId: string) => {
    try {
      const response = await fetch(`http://localhost:1337/api/inventories/${documentId}`, {
        method: "DELETE",
        headers: { "Content-Type": "application/json" },
      });

      if (response.ok) {
        setInventoryList((prev) => prev.filter((item) => item.documentId !== documentId));
        alert("Item deleted successfully!");
        console.log("Item deleted successfully!");
      } else {
        throw new Error("Failed to delete item");
      }
    } catch (error) {
      console.error(error);
      alert("Error deleting item");
    }
}; - This function takes
documentIdas a parameter, which is the unique identifier for the inventory item to be deleted. - The
const = response...makes aDELETErequest to http://localhost:1337/api/inventories/{documentId} to remove the specific inventory item from the Strapi backend. - If the request is successful
(response.ok), the function updates the UI. - The state
inventoryListis updated by filtering out the deleted item to ensure the UI reflects the deletion without needing a page refresh. A success message is displayed and logged to the console. - If the response is not ok, an error is thrown. If the request fails (e.g., network issues or server errors), an error message is logged, and an alert notifies the user.
- Finally, we add a delete button in the body of the table to appear in every row of inventory item, like this:
<button
  onClick={() => handleDelete(newItem?.documentId)}
  className="delete-btn"
>
  🗑️
</button> - When this button is clicked, it triggers
handleDelete(documentId), which then deletes the corresponding item.
Refer to the Inventory page code in the GitHub to see the full code that handles these functionalities.
Don't forget to style your pages. Refer to the stylesheet in the GitHub repo to get the exact styling used in this app.
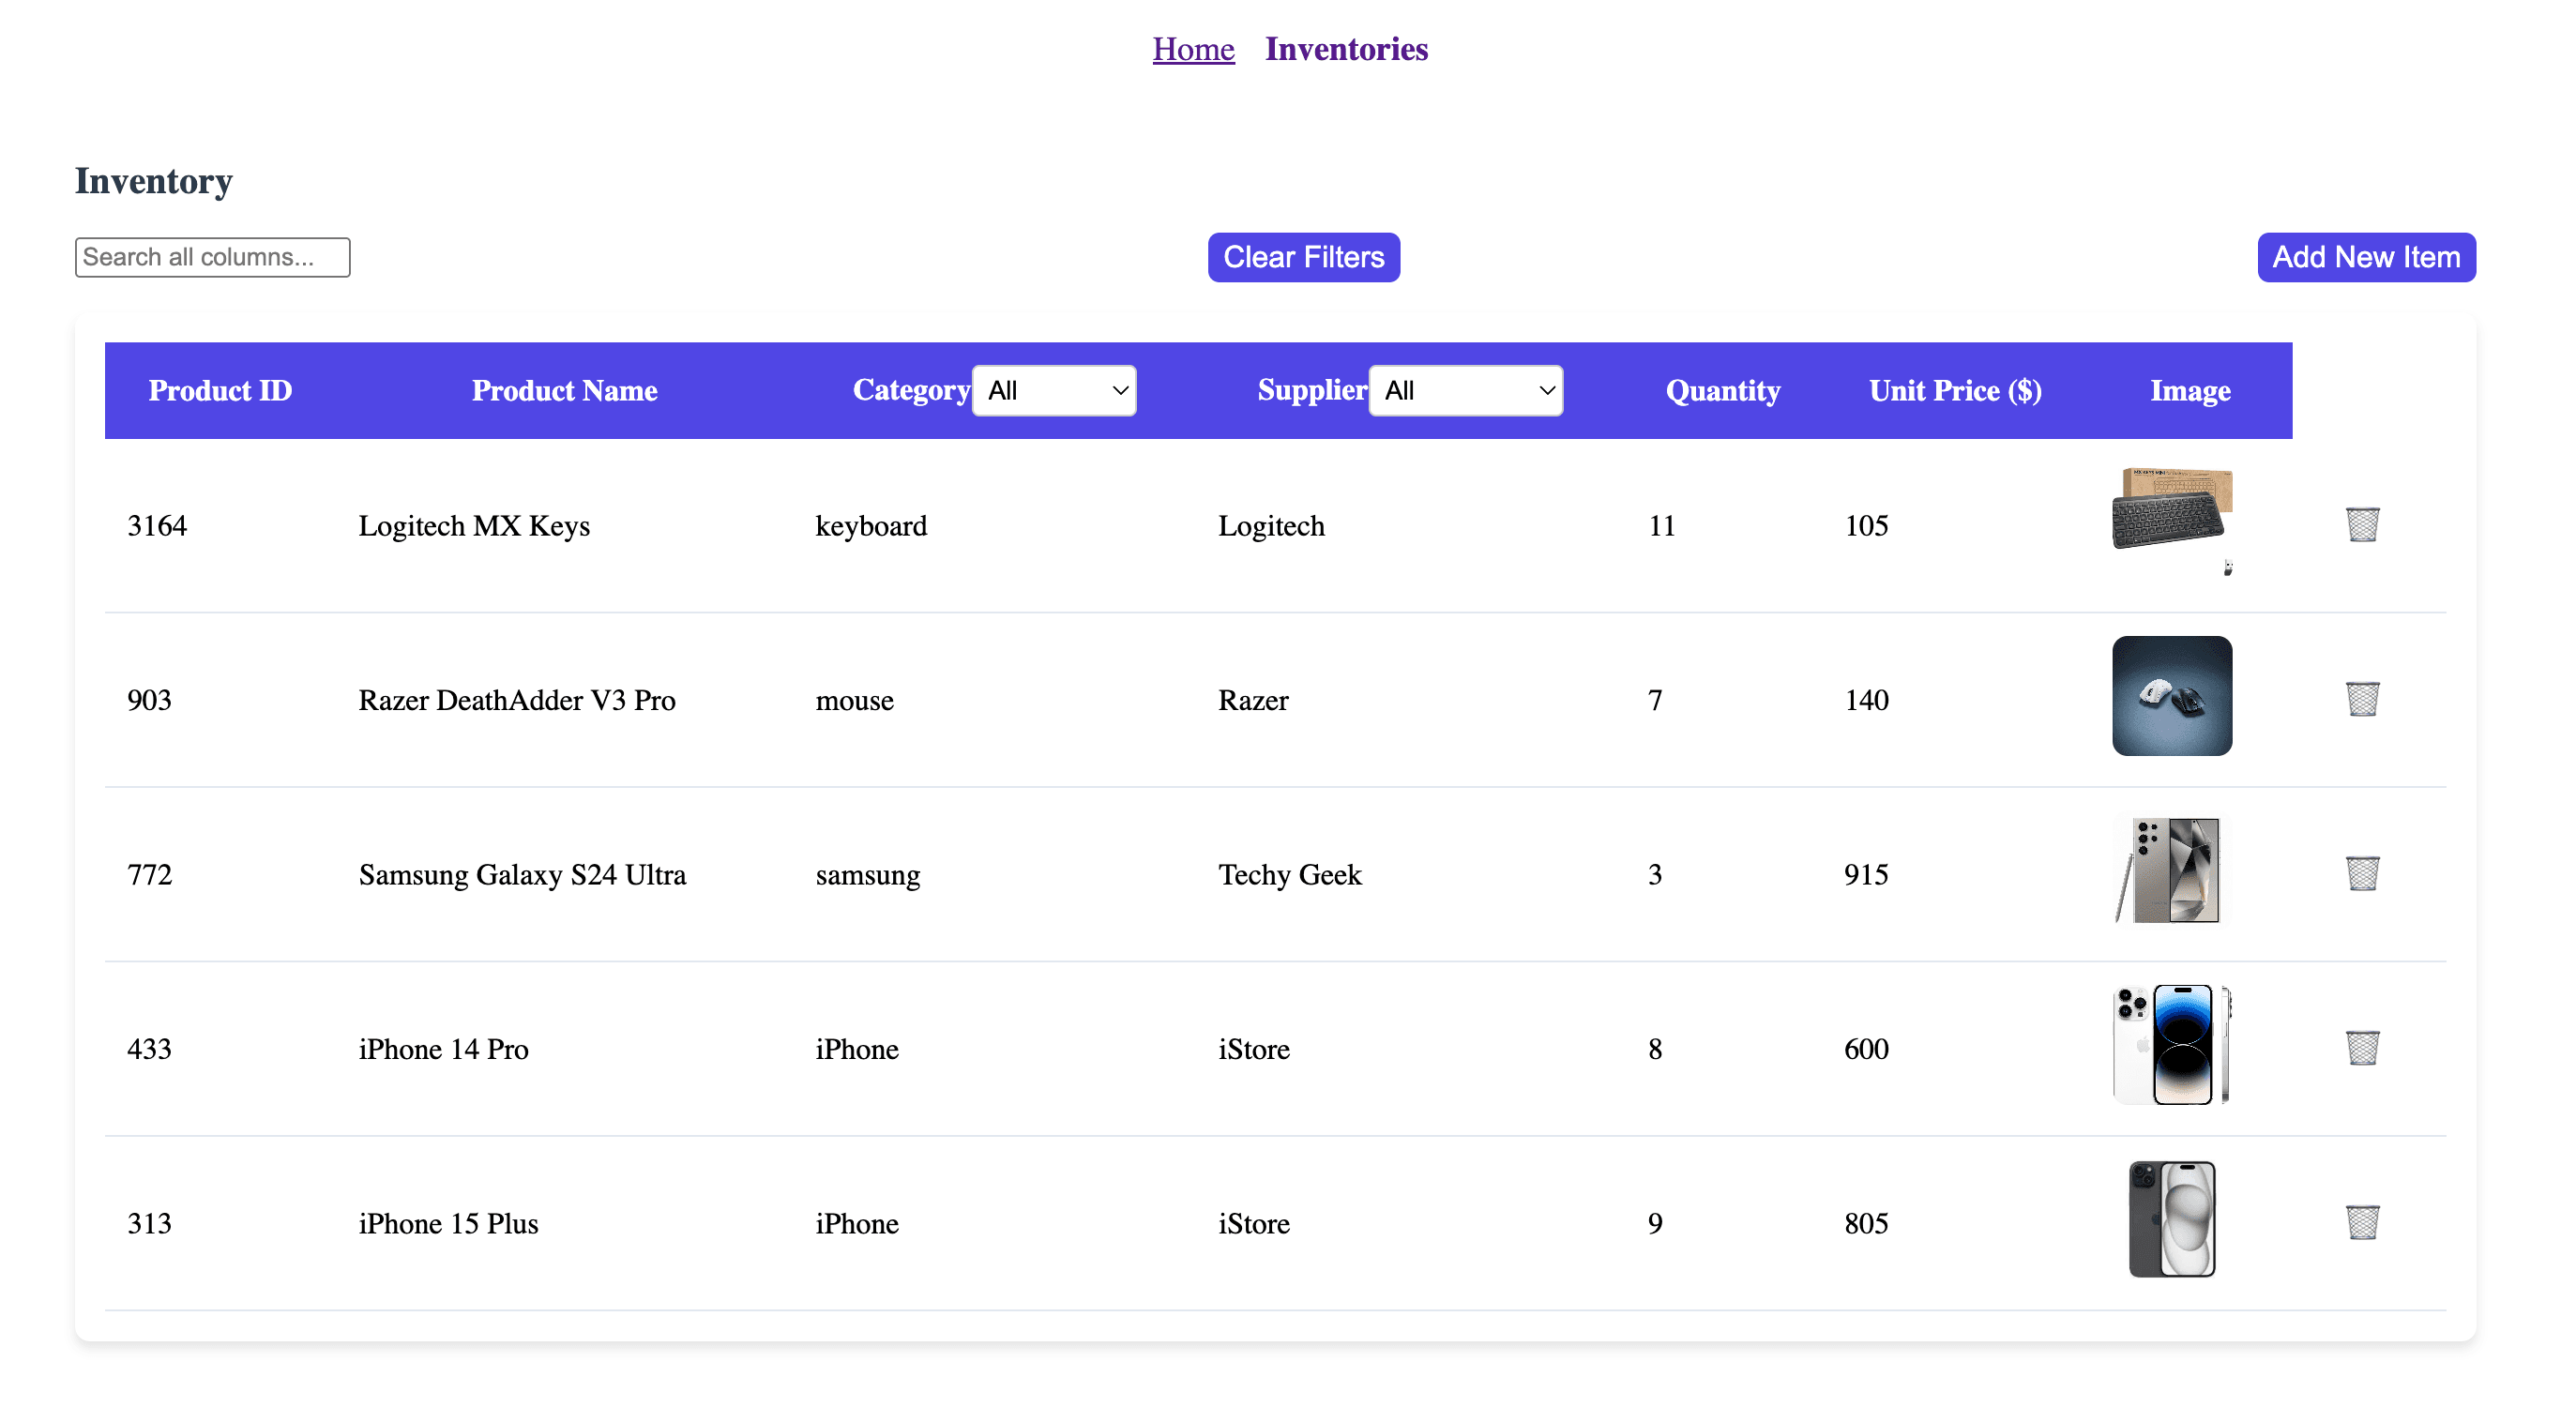
And that's it!
We've succesfully built an inventory management system using Strapi for the backend inventory management and TanStack and its libraries for the frontend.
App Demo
Let's test out our app.
Go to your localhost on your web browser. You may need to refresh the page to ensure it has been updated.
Now, add an inventory item and watch as it's added to the inventory list.
Go to your Strapi admin panel to see it has also been added as an entry in the content manager. Also try deleting an inventory item to see the changes reflected.
GitHub Repo
Want to explore the full code? Check out the full project here in this GitHub Repo.
Conclusion
Building an inventory management app with TanStack makes things a whole lot easier. From handling forms with TanStack Form, managing dynamic tables with TanStack Table, to easy navigation using TanStack Router, everything works well together.
If you made it this far, thanks for following along. Hopefully, this guide gave you a clearer picture of how to use TanStack’s powerful tools together with Strapi to build a functional inventory management system. You can always upgrade this system to include more functionalties.